kombucha- and how to make it

kombucha- how to brew it and how to look after your scoby || cityhippyfarmgirl

I hadn’t heard of kombucha before I started blogging. Then I started, and voila, really it was a whole new fermentation food world opening up before me.

I started making sourdough, and the steady supply of all things fermented slowly trickled their way in. There were experiments of pickles, mead and kefir. Whole hearted love for sauerkraut, ginger beer and sourdough, and sometimes there was just talk. Kombucha was one of those talks.

I talked and I talked, until I really had to walk my talk. Kombucha was one of my last men standing so to speak, because in my head I had made it far more daunting than all the others for some reason. I kept putting it in the all too hard to think about basket.

Then something flicked, the idea had fermented enough *ahem*. Water kefir and I had done our dash, ginger beer was already established and I really was ready to move on to another drink. Ready for a new fermentation project to get to know and bring into our family’s life.

Kombucha, lets do this.
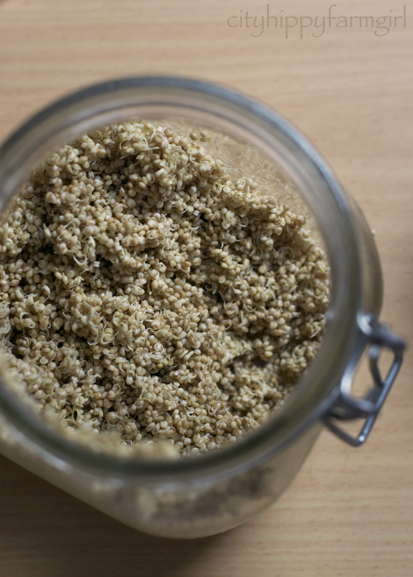
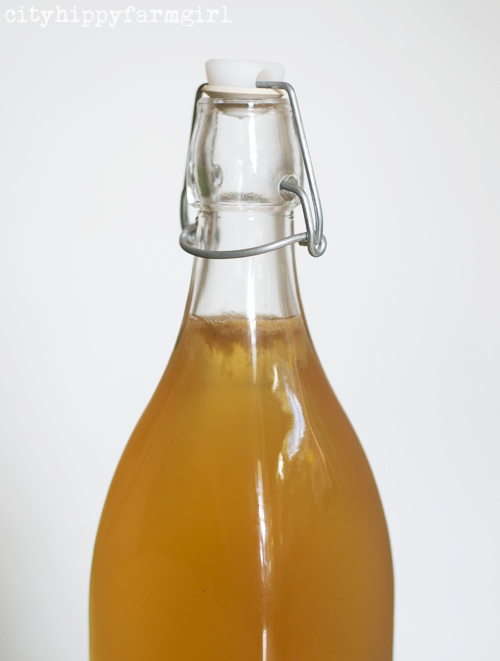
scoby forming

scoby forming

I had two false starts initially. One with a cranky scoby, (I say cranky, because the person who gave it to me was a little distempered and it seemed the scoby had a similar temprament. The scoby didn’t do anything and seemed long past it’s useful date. The second attempt was no scoby and instead, growing it from scratch. This method could have worked, maybe even should have worked but it didn’t and it was time for me to move on.

Then stepped in the lovely Sarah from Remedy Kombucha. Listening to my tales of kombucha woe on instagram, she offered to send me a scoby, would I like one? Well yes, yes indeed I would!

I’d had some of their kombucha at a Sandor Katz talk earlier on in the year. I knew it was good. I knew they knew their kombucha and I also knew if I couldn’t get this funny sounding little fermented drink happening with their help?…well, I may well have to hang up my fermenters flag for a bit.

First up a little info…

What is it?

It’s a fermented tea drink.

Why would I want to make it?

Because it’s good for you, full of probiotics, and who doesn’t like a little science experiment on their bench top now and then.

What is that thing on top? That’s a scoby, and a rather amazing little gelatinous thing that keeps growing more and more layers as time goes on. You can pass them on to other fermenting enthusiasts as a starter, (go on they’ll love you for it.)

kombucha scoby || cityhippyfarmgirl

So did I get it work? Yes, yes I did, and have been happily fermenting and drinking batch after batch of kombucha ever since. Thank you to Sarah for being so generous, helpful and best of all sharing tips on kombucha brewing.

I think I’m rather hooked on this stuff!

REMEDY KOMBUCHA’S EXTRA HELPFUL TIPS

* 175g raw organic sugar

* 35g organic tea

* 3.85L glass jar

* Muslin cloth (and rubber band)

* MOTHER (i.e. Symbiotic Community of Bacteria & Yeasts) & feeder (500ml)

Directions (makes 3.5L of Kombucha)

  • Boil 1L of filtered water (let cool until water temp approximately 90 °C)
  • Add tea (steep for between 5 and 6 minutes)
  • Strain Tea
  • Add sugar and stir until dissolved
  • Fill glass jar with 2L of filtered water (room temp) *It’s important to use filtered water (including the water you boil)
  • Add tea / sugar concentrate (i.e. 1 L) to glass jar
  • Test temperature of full jar (body temp is perfect)
  • Add feeder & MOTHER culture (0.5L)
  • Cover with muslin cloth
  • Place jar in a well-ventilated and warm area (24°C is the perfect temp), out of direct sunlight (but not in a cupboard).
  • At around the 3 to 4 day mark a slight film (MOTHER) will have developed on the top of the Kombucha.
  • Leave for 4 to 5 days before taste testing (it’s important not to stir or mess with your MOTHER during these early stages!). An easy way to taste test is to use a straw (i.e. push the straw down the side of the jar past the MOTHER).
  • After approx 7 days the brew will be slightly sour but still fairly sweet (it will be perfect for drinking at this stage).
  • The longer the brew is left the stronger (more sour) it will get. It’s personal preference how long you leave it at this stage – please be aware that if left for a long period the brew will eventually become Kombucha vinegar (and not really suitable for drinking – but great as a vinegar!).

MOTHER ongoing: for the first couple of brews, transfer the entire MOTHER from the previous brew. After your 3rd or 4th brews (once the MOTHER looks healthy and approx. 2cm thick) you can peal the new MOTHER (BABY) that grows on the top of the older MOTHER and use this in your new brew. Alternatively you can just rip the MOTHER in half and add this to the brew (and donate the other half – or make a 2nd brew!).

 If you don’t have a scoby you can still grow your own-

To grow your own kombucha mother (scoby), pour a couple of bottles of Remedy Original (or another unflavoured brew) into a wide mouth bowl, cover lightly and leave on counter for a week or so. You will start to notice a thin film growing across the top of the liquid…that’s your new kombucha mother! You can then use this mother and the kombucha liquid to start another kombucha brew.

* I’m using organic green tea at the moment which seems to be working well. 

kombucha ready to go || cityhippyfarmgirl

Remedy Kombucha is on Instagram, Facebook and Twitter if you would like to know more about kombucha.

The book The Art of Fermentation is excellent if you want to really delve into the world of fermentation. It’s one of those forever books that I will always keep going back to.

***********

Do you brew kombucha? Would you like to give it a crack if you don’t already? 

How to make fancy pants Flower Bread

how to make fancy flower bread || cityhippyfarmgirl

Bread is one of those things that at times look far more fancy than what it really is. Well, it can do anyway. This Flower Bread is one of them. An easy one to do if you want to team it up with a simple soup or alternatively, tear chunks off and slap some butter on those sides.

First up flatten your dough, this is done at the stage when you would normally shape your bread. (For a basic bread dough recipe see here for a regular yeasted one, or here for a simple sourdough.) Any old shape, as long as it’s the same thickness generally all around. Next you need to divide it into equal portions. I would normally do this as I go along. Again any shape is fine, and a rough triangle is excellent for the next step.

Next you are creating little balls. If you pull those corners into the middle (as if you were making a dumpling) it traps air in and creates a smooth outer surface. Pinch the ends together to seal it. Lightly plop it into some flour (this stops it from sticking to the board or bench top) and leave to the side. Carry on with the rest.

Once you have all your balls. Get two small bowls, one filled with water and the other with poppy seeds (or any other seeds, you might like to use.) Holding your ball of dough at the top where you sealed it, gently dip about a quarter of the dough into the water and then the seed bowl.

Next place them, seed side up into a lined cake tin. Depending on how big you did them, you should fit about seven. Six on the outer and one in the middle. Cover, and let them prove. Then bake at 230C with steam for about 25-ish minutes.

And there you have it… easy fancy pants Flower Bread!

how to make fancy flower bread || cityhippyfarmgirlhow to make fancy flower bread || cityhippyfarmgirl

how to make sauerkraut

sauerkrautcityhippyfarmgirl

I felt pretty satisfied looking down at my kitchen bench. Sure it looked ridiculously crowded, and if someone had asked for a sandwich at that particular moment, I would have had to point them in the opposite direction…but. There was still that sense of satisfaction.

Satisfaction in the form of my bench tops being full of bacteria, and lots of it. There was the ever-present sourdough starter bulking up and bubbling away, there was the slowly sprouting buckwheat, gaining little green tails. There were kefir grains in the wings waiting, and the new guy who only speaks a little English… Herr Sauerkraut.

I’d finally taken the plunge, and had jumped in. I had been put off by pictures, wafty smells and stories of mouldy cabbages. Also the length of time to do it and having no bench space or proper pot to make it in. Saskia and I had talked of it awhile ago and then there it sat. A suggestion, a hint, sauerkraut were you going to happen?

sauerkraut

first day

I looked up lots of recipes and decided that a quick and easy version using sugar, and vinegar seemed like a good option. Twenty minutes cooking no problem!

But I held back. I make sourdough, I make yogurt, I sprout things, I wanted to try kefir, was I really going to be content with a twenty minute version or should I try and do it properly?

Well, put it like that and there sat my answer…get going girl.

Half a cabbage cut as finely as possible. In a bowl with two teaspoons of salt and crunch it all up in your hands. Breaking it down, releasing the juices. (Unless you have arms of steel, I crunched it a bit and then left it, going back and forth over the next half an hour or so.) Then in a clean glass jar, squash it all in with the juices sitting at the top, (it breaks down a lot.) My half cabbage was quickly nothing in size and I wished I had more to put in there. Lesson learnt for next time. I’d kept one outer leaf to put over the top of the cabbage mixture and then some muslin and a rubber band over top.

cityhippyfarmgirl

a few days in, and the colour has changed

Now the waiting. One week to 6 months is how long you can leave it. Due to teeny tiny kitchen bench spaces, I was not going to be waiting 6 months. Projects were lining up on the bench tops and a week was all I was giving it.

Taking the muslin off, the outer cabbage leaf out and sticking my nose in, what do we have? Bless my birkinstocks if we don’t have sauerkraut.

That was ridiculously easy, and now I’ve got a lovely batch of sauerkraut sitting in my fridge ready to be teamed up with…well pretty much everything, (including the reuben sandwich.)

sauerkraut

 How about you, have you made sauerkraut? Does the fermenting world entice you or scare the pants off you?

simple, everyday sourdough

 cityhippyfarmgirl

cityhippyfarmgirl cityhippyfarmgirl

I’m often asked for a basic sourdough recipe and for some reason I have never done a post that is just simply that. A simple, every day sourdough bread recipe.

Bit of an over sight really as so much of this blog is designated to bread. After three years, I still find making sourdough an incredibly enjoyable experience.

I like to make it, I like to eat it and I like seeing other people start on their own sourdough journey. The contagious excitement of when a first bubble appears of a newly made starter. The shared joy of an exceptionally tasty freshly baked loaf. The jump up and down happy feeling of a new mixer arriving. The relief and happiness of hearing that one of your recipes have been used and loved and now in turn as been passed on to someone else.

I tell you, it’s true bread nerd stuff, but I love it, I really do.

For anyone that has vaguely considered making their own bread and they would like to give sourdough a crack, this recipe might be helpful to start off with.

cityhippyfarmgirl

If you don’t have a starter here is post on how to make one.

Or if sourdough seems far too daunting at the moment and you would really just rather try making some regular bread, this post here.

Basic Sourdough Bread

400g starter (100% hydration, refreshed and bubbling)

750g flour

500mls water (approx- depends on your starter and flour)

2 tsp salt (or to taste)

Mix your starter, flour and water together either in a mixer or in a bowl with a spoon. Mixing for about 6 minutes. The dough will be kind of rough and shaggy.

Now leave it. Go find something else to do for about 40 minutes. (Bread magic is beginning…or autolysing but bread magic sounds better. You are developing the gluten here.)

Add your salt and mix again for about another 6 minutes or if by hand until you get a smooth dough.

Put it back in the bowl and leave it for about an hour.

cityhippyfarmgirl

Now you need to do a three way fold. It will take about twenty seconds, (and you are not kneading.) Dough out on to the bench. Flatten a little with your finger tips and fold a third into the middle, then the other third. Swing it round 90 degrees and three way fold the other way.

Back in the bowl for another hour or so, another three way fold, and then back into the bowl again for another hour or so.

cityhippyfarmgirl

Divide your dough up and shape it. Laying it on lined trays, banetton baskets or tins, cover it with a plastic bag and into the fridge for an over night nap (around 12 hours.) Bring it back to room temperature. (Depends on the household temperature 1-4 hours generally.)

Bake at 230C with steam, (I use a cheap spray bottle of water inserted in to a crack of the oven door when first putting the loaves in.)

Bread is baked when tapped and sounds hollow. Allow to cool on a wire rack.

cityhippyfarmgirl

Now there 100 types of different ways to make sourdough and each baker will always have there own little tricks and ways to do things. Sourdough is an amazingly versatile beast, that can work in far more ways than regular commercial yeast made bread. There is never a right way or wrong way in my mind. If the end result is an edible loaf of bread that people are enjoying eating, well your way works. Taste buds and preferences can always be catered for as it’s your bread and you can do what you want. As long as you start off with three keys things- flour, water and salt- combine that with time, a little love and you’re in business…the sourdough world awaits.

Happy baking.

lunch time dutch crunch

dutchcrunch2

dutchcrunch

Tuna, asparagus, tomato and cheese toasted sandwich. That was my favourite sandwich of choice when I lived on a tropical island covered in goannas, snakes and partying backpackers. Perhaps an odd choice for that point in my life, but it worked and I was hooked on them for quite a while. I had timed the toasting to just the right crunch, to get the cheese just so, and the taste just right. With a light tropical sweat on my brow, and evening party plans being made, that was my tropical island lunch.

Day old slightly stale cheap bakery bread topped with peanut butter. That was my lunch of choice when I first moved to Sydney. With barely any furniture in my newly leased flat, my fluffy white cat pushing against my feet for attention, my lunch time choice was the cheapest of the cheap. Certainly no crunch in this lunch. I was lucky to get the sandwich actually swallowed without at least two glasses of water.

These days, my lunch of choice is usually an open sandwich on something dark and grainy. Not for the rest of my family though. I made these dutch crunch rolls recently and they were declared a new lunch time favourite.

You can easily make them with any basic bread recipe, (commercial yeast or sourdough) and all you need to do is add a thick paste to the top before baking. Giving your lunch a little extra crunch.

dutchcrunch1

Dutch Crunch or Tiger Bread

Sourdough Bread

400g starter

750g flour (5 cups)

750mls water

2 tsp salt

Commercial Yeast Bread

see this post if you have never made bread before and think you might like to give it a crack. 

600g strong bakers flour

2 tsp dried yeast

400mls tepid water

 3 tbls olive oil

2 tsp salt

The Crunchy Paste

1/2 cup water
1 tablespoons sugar
1 teaspoon sesame seed oil
1/4 tsp salt
3/4 cup rice flour

Mix together to form a thick paste and add to half way though the last prove of your dough.  Bake as you normally do, (I do 230C with steam.)

This post submitted to the inspiring yeastspotting

Jammin’ with Mariana

I love making jams and marmalades. For me it’s the perfect way to preserve the season. Vanilla Plum Jam- a gentle reminder of hot summer days in a jar, when eaten in the cool of winter. Tarty Citrus Marmalade- Autumn love and enjoyed every week of the year on my sourdough toast.

I started making jam and marmalades back when I was a teenager. I’d watched my mum do it countless times and just learnt by watching. A couple of decades on and I still happily make my preserves although I’m not particularly good at why I do certain things, I just do.

For this reason I thought I would do a Q and A on jam making, with the ever knowledgable Mariana from Thru My Kitchen Window. Mariana’s pantry is the kind of pantry I would quite happily raid any night of the week. Those darkened shelves, I know would be lined full of beautifully made preserves. Made with a basket full of love and knowledge, (which is a pretty awesome combination when it comes to cooking.)

how to make jam-cityhippyfarmgirl

Jammin’ with Mariana @ Thru My Kitchen Window

Q: What is the best kind of fruit to jam and do I use over ripe, or under ripe fruit?

A: Fruits that grow successfully or are native to the area where you live.  Apples would be an exception; for example I live in SE Qld and I source my apples at the local farmers market. The apple growers are from Stanthorpe (over two hundred kms away) and I know the apples were picked up to three days before market. Under ripe or close to just being ripe are the best fruit to use in jamming.

mulberries

Q: What is pectin, why do I need it and which fruit has the most? Can I use that packet stuff that says Jam Setter?

A: Pectin can be a hard thing to understand until you’ve worked with quite a number of fruits; at least it was for me. I would describe pectin as a ‘gummy-like substance’ that oozes from the fruit while it’s simmering. Adding lemon juice to simmering fruit helps to further release the pectin. Pectin levels are different in every fruit, eg; apples are high; strawberries are low.  Preserve books generally contain information about the pectin levels in most fruits; consult them or the net and use as a guide to help you achieve the best setting. It’s worth noting that once you add the sugar to the fruit you are no longer enabling the pectin to release; so do not add sugar until you’re happy with the softness or firmness of the fruit. You may think the rind in your marmalade is very soft, but once the sugar is added it actually assists in toughening the skin, so don’t be afraid to cook down fruit with rind, unless of course you like a firm rind.  The sugar will cook with the available pectin to form a gel or set; you may need to persist a few times till you get the setting right. Don’t give up, it’s all learning.

I’ve made and used my own liquid pectin stock. It’s very good; but some of the gels have been too firm so in future I’d only use it with poorer pectin fruits if at all.

I don’t use packet jam setter so I can’t comment on that one.  I’ve heard that these setting agents can reduce the intensity of the flavour in the fruit. However if you’re new to jam-making then anything that will help to boost your confidence in setting the jam can’t be such a bad thing.

how to make jam- cityhippyfarmgirl

Q. How long do I cook it for? Is timing the same for every fruit or does it vary?

A. Cooking times for jams all vary, for example strawberry jam could take 5mins to simmer and another 5 or 10mins for setting, whilst for strawberry and apple jam, simmering could take 20mins till the apples are soft and up to another 20mins till it jells. It’s all approximate unfortunately as so many factors depend on the condition of the fruit. For instance if you use overripe strawberries you’ll most likely end up with a strawberry sauce with very little chance of setting. Unblemished, just-ripe strawberries will in the same cooking time will give you a much better jam result.

jam

Q.What’s the saucer test, and how do I know when it’s ready? Also, I’ve heard about jam getting wrinkly, what does that mean?

A. I used to do the saucer test. Basically it’s to test how well the jam is jelling. Place a teaspoon of the jam onto a chilled saucer that’s been in the fridge.  Allow a couple of minutes to cool. Then with your finger gently push the jam from one side to see if it ‘wrinkles’. If it does then your jam has reached setting point; cease any further cooking. If it doesn’t wrinkle then presumably it needs more cooking.

These days I use my wooden spoon to determine the setting of my jam, jelly or marmalade.  Dip the spoon into the centre of the saucepan and slowly lift the spoon well above the pot. Tilt and watch how the liquid drips back into the mixture. If it runs off quickly, then keep cooking.  When a setting point is reached, the jam should fall off the spoon in small clumpy teardrops . I much prefer using this method than the saucer test but it does take practise to recognise the signs.

blueberries

Q.Skimming scum off the top doesn’t sound very pleasant, do I need to do that?

A. Yes. It’s unavoidable that some impurities will rise to the top as it should. This is a good thing.  Take a metal spoon and skim away from the sides. Don’t attempt to skim from the centre of the pot; you’ll scald yourself.  With some fruits there’ll be lots of scum while hardly any with others. Generally cooking the whole fruit albeit chopped, will produce greater scum. This is usually the case for jelly-making, and even more important to remove because jellies can be quite transparent and therefore the clarity depends on how well you skim the scum away during cooking.

Q. How to sterilise your jars and do I really need to? There seem to be so many different methods to do this?

A. Consult ‘canning books’ or simply ‘google’ to see recommendations on how best to sterilize. I always wash the jars and lids together in hot soapy water; rinse in boiling water, sit on a rack that’s also been placed in hot water.  Arrange the jars on a baking tray bottom side down and place into a preheated conventional oven at about 80degrees; leave while the jam is cooking. Don’t put the lids in the oven till five minutes before the jam is ready. Your jars and lids should be quite ‘hottish’ just before filling. Once you’ve filled your jars, seal immediately. Place the jars side by side in a high sided tin or tray.  Cover with a tea towel to help cool down slowly.  I’ve yet to encounter a problem doing it this way. I read that filled jars should be reboiled for ten minutes, but I find it all so tedious and an extra step in what can already be quite an arduous task.

jamjars

Q. How long does the jam keep for?

A.The greater the sugar content the longer the keeping time. If you use one cup sugar to one cup of fruit then easily a year and even up to two years. You may get some discolouration of the jam as it tends to darken a little the older it is. These days I prefer to use a ratio of between sixty or seventy five percent sugar to the fruit. In this case it’s best to use the jam between six months and up to a year. At least that’s my experience.

citrus

Q. If I have never made jam before, what might be an easy fruit to start with?

A.Choose a fruit that’s in season, one with reasonable pectin levels.  Add some Granny Smith Apples – this will improve your chances for a really good set – and help your confidence for the next jam-making session.  If you want to be really adventurous, go for making marmalade. You’ll have extra work with finely shredding rind, but your chances for a good setting will be excellent as citrus have high levels of pectin.

Q. And lastly, what’s your favourite jam?

A. I love a really good orange marmalade; it’s hard to beat.  However; dabbling in lilly pillies and jaboticaba fruit the last couple of years has been thrilling and has produced some wonderful discoveries.  And the mulberry season this year was one of the best ever. The mulberry and lime jelly I made was so intense in flavour it was unbelievable. My gifts to people turned into a nightmare! They were begging me to buy more of the stuff, so I’ll have to say mulberry jelly is my favourite. One thing it did confirm, there’s nothing quite like the taste of a home-made preserve.

************

A huge thank you to the lovely Mariana for taking the time to do this and if anyone has any other questions that haven’t been covered here, please do ask in the comments. Hopefully I, Mariana, or someone else can jump in and answer. Jam making isn’t scary or complicated, it’s following some general rules and then you are away, ready to preserve the season. 

sprouted quinoa sourdough

crumb

sprouting

The beauty of sourdough is it really is incredibly forgiving. There is no set way that you have to do things. It’s this part that appeals to me, as me and a regular routine don’t usually skip hand in hand.

Fasten it up, slow it down, make it with more water, make it with less water, cook it in a super hot oven, cook it in a slow oven. Leave it for 24 hours in the fridge? Yep, still good to go. Sure with all those changes, it might not have the same delectable taste of the the local sourdough bakery down the road, but your working conditions probably aren’t the same either. Phones get rung, children need feeding, appointments need to be kept and sometimes well, to be blunt you just couldn’t be arsed.

For these many reasons, this is why I love sourdough. It’s adaptable. Pretty much what ever I throw at it, it comes back with a tasty totally exceptable loaf of bread. It might not be winning awards, but it feeds hungry bellies, and it is good and true in a wholesome kind of way.

Putting sprouted quinoa in my sourdough sounded ridiculously wholesome. Thanks to my little friend Instagram, I have a steady supply of inspiring bakers around the world giving me advice, encouragement and all round inspiration that is pretty hard to top at the moment.

Sprouting had been at the back of my mind since I had had some delicious sprouted granola in Byron Bay, and with a steady supply of encouraging pictures via Instagram it was time to jump on board.

I tried sprouted organic brown rice first, delicious. Next up, quinoa it was. Dead easy in our summer, and whoosh… before I knew it they had little tails. Into the bread they went, which  resulted in a lovely moist, chewy crumb.

With a sprouted quinoa sourdough under my belt, now I just have to decide what to sprout next?

sproutedquinoa

Sprouted Quinoa Sourdough

400g starter

750g flour (5 cups)

500mls water

(5 minutes in the mixer)

(30 minutes snooze)

200g sprouted quinoa

2 tsp salt

(5 minutes in the mixer)

(60 minute snooze)

three way fold

60 minute snooze

three way fold and shape

overnight nap of 12 hours in the fridge

bring it back to room temperature

slash

230C preheated oven with steam.

 sprouted

this post submitted to the bready inspiration yeast spotting

a hot King’s crown

felt crown- cityhippyfarmgirl

felt crown- cityhippyfarmgirl

felt crown- cityhippyfarmgirl

It’s been hot here lately, really hot.

Tuesday got up to 43C, (that’s around 110 farenheit I think). Tuesday night 9.45pm, I was bringing the washing in and it was still 36C. With a not so lovely straight from an oven hot dry wind to add to it. During the day, with the blinds drawn, the kids playing in a cool water bath, my head turns to thoughts of- why oh why does this country not build better insulated houses? Insulation, double glazing… that’s what I was thinking about sitting on the floor of my bathroom. A country filled with well insulated houses and not an air conditioner to be seen…imagine that.

On hot days like this, going outside wasn’t particularly appealing so I needed an indoor activity that would keep The Monkeys interested. Monkey Boy had been asking me all about Kings and Queens that morning so a crown seemed like a good project.

Will you make me one Mama?

Your Majesty…it would be an honour.

Scrap felt and buttons from my stash, made two crowns. One for The King and the other for his brother the young Prince.

felt crown- cityhippyfarmgirl

capsicum sweet chilli sauce

I wanted to make this chilli sauce, but then realised I didn’t have enough vinegar, and also wanted to use up the eight long capsicums I had, (bull horn’s.) So I fiddled a bit, a little tweak, a whispered please let it work and hey presto… capsicum chilli sauce. I think I actually like this one even more than the other as it’s a little less sweet, leaves the taste of the capsicums and still gives a dish the kick I want it to.

Capsicum Chilli Sauce

8 long thin capsicums

100g small hot chillis

2 cups sugar

1 1/2 cups white vinegar

5 cloves garlic

2 tsp salt

black pepper

2 good slurps of balsamic vinegar

In a food processor, blitz the capsicum, chilli, garlic and ginger. In a pot add add the remaining ingredients, add chilli combination and bring to a rolling boil. Keep at the same temperature, stirring until sauce thickens. Poor in to sterilised glass jars/ bottles or in to a clean jar and store in the fridge.

sweet white squares of deliciousness

The recipe calls these sweet white squares of deliciousness Australian White Christmas. I can’t bring myself to call it that. White Christmas in my head is a horrible taste memory that sits with childhood cake stalls, laced with copha, bulked up with a cheap rice bubble crunch and far too much icing sugar. Copha in my books is up there with finding slugs in your spinach moments before you eat it. The Monkeys (if I can help it) will never have to endure copha.

So why would I make something that is titled ‘Australian White Christmas’ given my taste bud association with the name?

Well one, because it’s in the SBS Feast magazine (surely THEY wouldn’t use copha) and two, because all the ingredients look like they would blend quite nicely- with a few minor change ups on my part.

Let’s give it a crack.

Oh! It’s good.

Really good. The good quality white chocolate I think makes a huge difference. Don’t bother buying ‘white chocolate’ if it doesn’t have cocoa butter in it. It’s just a concoction of sugar and some sort of vegetable/animal oil something or other. Go for the good stuff, (I use Whittakers.)

The macadamias give it some texture, and the odd cherry here and there, some colour. This one is super easy to make and cut up for a gift…

Or for a little after dinner nibble with an espresso or two and some lively dining table conversation.

Sweet White Squares of Deliciousness

adapted from SBS Feast Magazine- December issue

500g good quality white chocolate

395g can of condensed milk

100g macadamia nuts

100g glace cherries

50g desiccated coconut

1 tsp vanilla

In a pot over low heat melt the chocolate combined with the condensed milk, turn off the heat and add the rest of the ingredients. Spread mixture out into a greased and lined pan. Sprinkle with a little extra coconut and pop in the fridge for a couple of hours until firm. Cut into squares or logs for gifts.

Jammin’… Peach Punch and Nectarine

“We’re jammin, jammin’

I hope you like jammin’ too…”

Bob Marley

It’s that season again. Dripping ice creams, long hot nights, sneaky midday siestas, mangoes and jammin’.

Yes, it’s summer…although summer got confused this week and has brought out scarves, and minestrone. I don’t mind though, I can roll with the punches, especially if the punches involve a little Peach Punch Jam. Summer might be confused in Sydney, but elsewhere it’s still producing delicious stone fruit and this time of year it’s all about the stone fruit.

What better way to hold onto those summer tastes than to pop them in a jar and eat them through out the rest of the year. Clearly Bob Marley was a keen preserver of the seasons going by the lyrics of his song.

These make a really easy gift for someone, for Christmas time, birthday time… any old time. It’s seasonal, you can use locally grown fruit, recycle some glass jars, and it’s an inexpensive gift to give that tastes a bucket load better than any supermarket stuff.

Peach Punch Jam

2 kg peaches

1 litre water

2 kg sugar

juice of 2 lemons

approximately 80mls dark rum
I roughly skin and chop the fruit. Weigh it, generally fruit equals sugar amount. Then cooking the fruit up with the water, and gently with a hand held mixer blitz any big lumps. If you don’t have one of these, simply cut the fruit a little finer, (or enjoy your lumps.) Slowly add sugar and lemon juice.Cooking at a rolling boil, until cold saucer test stage. Add the rum once the jam has started to gel. In to sterilised jars and store.
*******

Nectarine Jam

2 kg nectarines

1 litre of water

2 kg sugar

juice of 3 lemons

Same method as above, without the rum.

Limoncello

With my recent run of lemons, Limoncello was in the air.

Limoncello is a lovely Italian lemon liqueur, that is best drunk icy cold. Store the bottle in the fridge and pop your glasses in the freezer just before drinking. Before making it, I did a bit of reading through the internet. Trying to find a recipe that sounded authentic, and not too much of a pain to make. I couldn’t decide on one particular one, so I thought I would combine them all together and go with what suited my time frame.

So was it easy and did it work?

Easy yes. Did it work, I really don’t know. I’m not drinking any alcohol at the moment so my usual taste test was passed over to Mr Chocolate. He keeps asking for a glass full at night time, so I think it got the seal of approval. It certainly smells like the real deal, and I have a sneaking suspicion I’ll be making more sooner rather than later.

Pop them into some smaller glass bottles and they will make a lovely homemade Christmas gift.

day four- vodka and lemon rind

Limoncello

8 medium sized organic lemons

750mls vodka

400g sugar

250mls water

100mls strained lemon juice

Soak organic lemons in hot water for about half an hour, clean them thoroughly. Leave to dry and then with a vegetable peeler take all the skins off and pop into a large glass bottle or jar. Don’t use any of the pith as it will become bitter. Once peeled, lemon juice can be used for lemon cordial or curd. Alternatively store the lemons in the fridge for later use. Add the bottle of vodka and secure the top. Store bottle in a dark spot and daily give it a bit of a shake, making sure all the peel is moved around.

I did this for nine days and then added the lemon sugar syrup.

In a pot boil the sugar and water together until it thickens a little. Keep stirring, the whole time, as it can bubble over, or become too thick quickly. Once mixture has thickened, turn off the heat and add the lemon juice.

Cool completely (you don’t want any of the alcohol to evaporate) and then add to the vodka mixture. Top on tightly again, and back in a cool dark place. Once a day, give it a swirl and mix it up a little.

Day sixteen, I strained the mixture of all peel, using a muslin lined colander. Handed some to Mr Chocolate to do a little taste test. He thought it was more lemon cordial to try, and drank it quickly. Really quickly… that was funny.

Limoncello is best drunk ice cold. Keep the bottle in the fridge and chill the glasses before hand.