a boy and some biscuits

cityhippyfarmgirl cityhippyfarmgirl cityhippyfarmgirlcityhippyfarmgirl

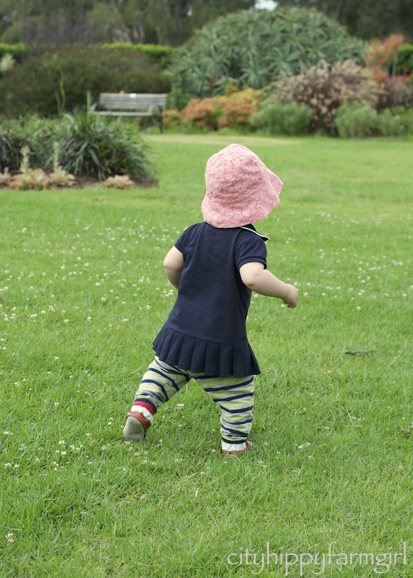
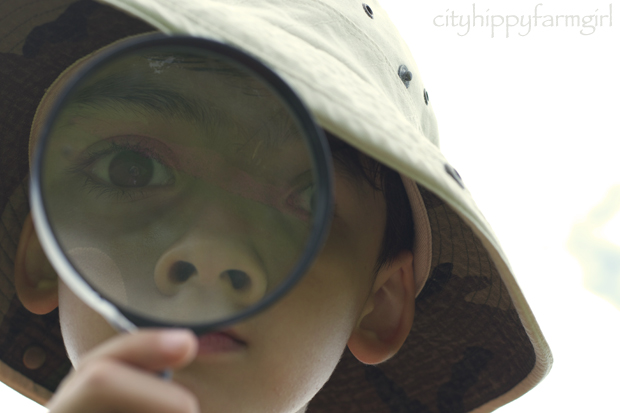
Mostly the small boy doesn’t like a camera pointed at him.

Mostly he runs in the opposite direction to the apparatus that is making him stay still for a full 30 seconds. He might miss out on something. Something important.

Mostly.

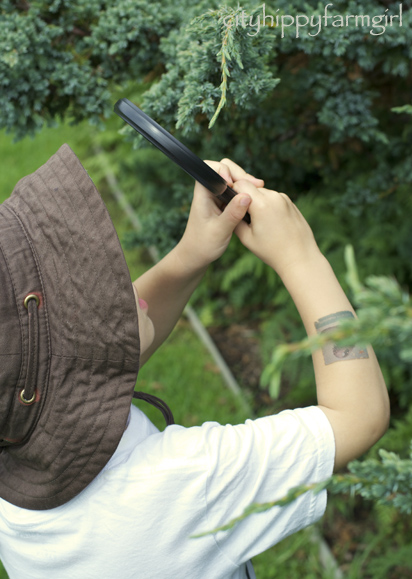
Then some days he just pops up. Just like that. A wriggle under the table and tahdahhh! 

What are you doing mama?…and what’s THIS?

 Oh, and I want to be in your picture.

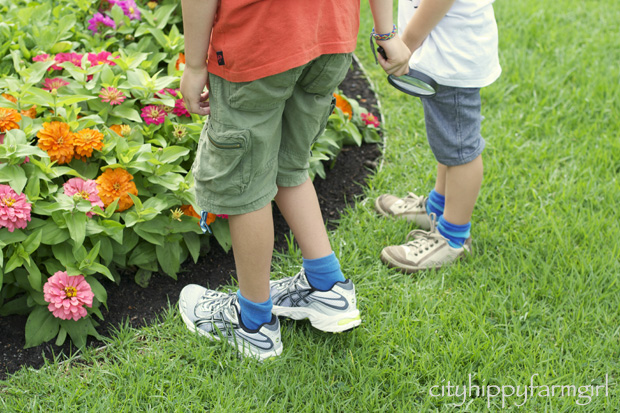
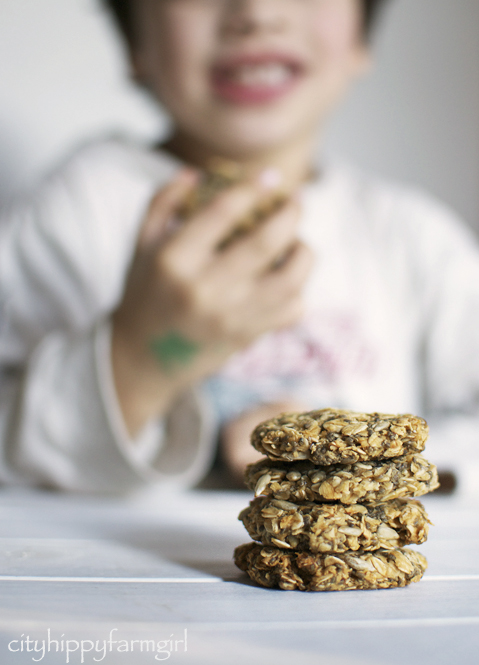
The longing. The hunger. The puppy dog eyes.

Disappearing only once a biscuit was firmly in hand.

Back to what ever mischief was interrupted before.

****************

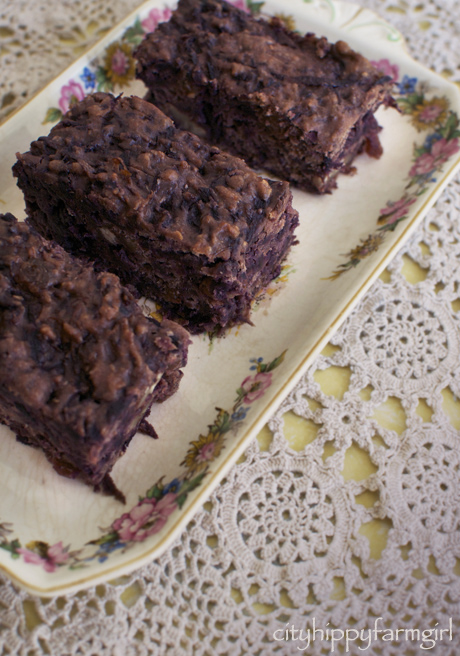
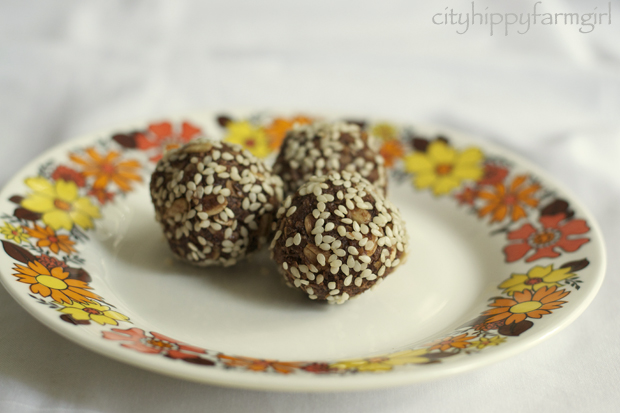
These truly were just slapped together, but as four out of five of our family members really enjoyed them I thought I would put them up. As they are super healthy and easy.

No butter, no eggs, no processed sugar, no nuts.
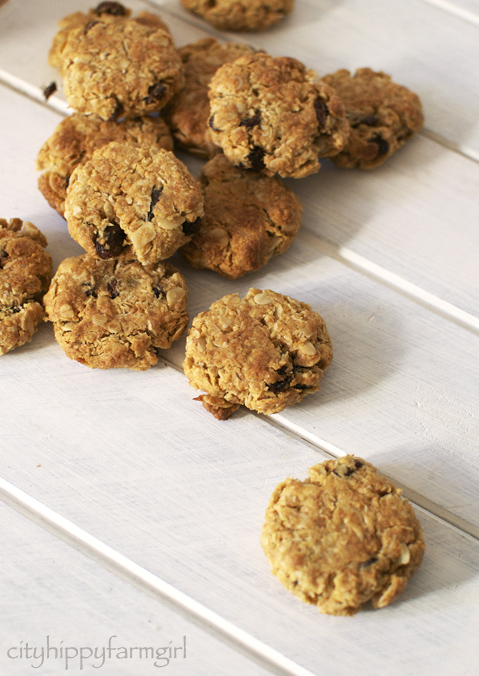
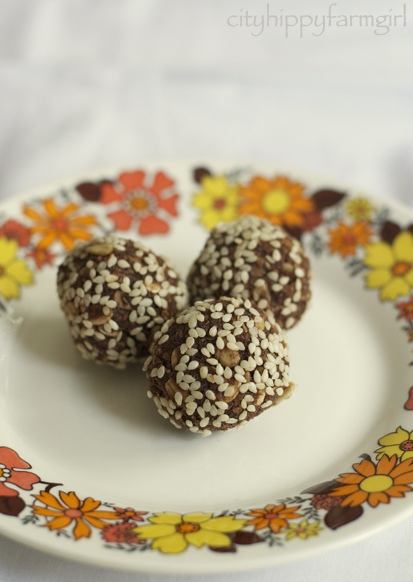
Honey Chia Biscuits

2 cups of whole rolled oats

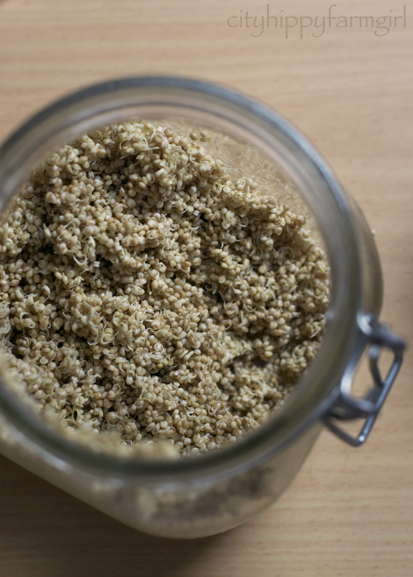
4 tablespoons of chia

4 tablespoons of sunflower seeds

4 tablespoons of water

5 dessert spoons of honey*

Add water and chia together, (a gel type mass should appear pretty quickly- this helps it bind it together.) Add the rest of the ingredients with an extra 2 or so tablespoons of water and mix well. Put aside for ten or so minutes, letting the water soak in. Squish them into balls and squash them done flat on to a tray.

180C for about 20 minutes and then I turned the oven off, leaving them in.

Eat with enthusiasm and regularity.

*(swap to maple syrup if you want to vegan it up.)

Little Nut Bars and a keep it simple reminder

cityhippyfarmgirl

Last Saturday I baked.

I baked and I baked, and I baked. I didn’t set out with having a baking day in mind, it just sort of turned out like that. A baking day that snuck up on me. I didn’t mind, I ran with it. I had ideas in my head, and I really just wanted to try them. Thing is I tried too hard. After a whole days baking I had a table full of food to feed my family for the coming week, and a sink full of dishes, but was I happy with them?

The Date and Pecan bread, yes- but nothing really new there.

cityhippyfarmgirl

The Muesli Biscuits, yes. (Although one tray was over cooked as I got distracted trying to do too many things.)

not lasagne

The Rocky Road Brownie was a complete and utter mess, mostly due to the fact that I’d forgotten to turn the oven down after baking bread at a really hot temperature, (the marshmallows certainly didn’t appreciate this.) And yes, it does look like lasagne.

The first tray of Chocolate Honey Cardamom Buns- looked like I had been blind folded while shaping them, and the taste was just plain bland. The second tray looked better, and tasted better, but oozed it’s contents every where, and certainly didn’t have any wow factor.

What was left?

The little Nut Bars. They certainly looked ok, but would they stand up to being flicked out of the mini muffin tray? (Jeez, maybe I really should have just put it all in a lined tray like was suggested.) I didn’t want to find out.

I wanted to go for a bike ride. Leave the mountain of dishes and ride with the wind in my hair. And so I did. A quick 15km’s later and I was back in the kitchen, ready to find out if the brownies were as bad as they looked, (hell no!) hoping the dishes had miraculously disappeared, (they hadn’t) and whether those little nut bars would come out (they did.)

So what did I learn from the days baking? Simple cooking is still the best. Nothing fancy, nothing complicated, just good quality ingredients put together. I know this, I always say this. But I still seem to have days where I need to remind myself of it.

So with a days baking behind me, and some tasty little nut morsels to nibble on by my side….now I just had to work out what on earth we were having for dinner.

cityhippyfarmgirl

Little Nut Bars

(inspired by this recipe at the always delicious Green Kitchen Stories)

8 chopped medjool dates

100g whole almonds

100g crushed peanuts

100g sunflower seeds

100g sesame seeds

a pinch of Murray River Salt

2 heaped dessert spoonfuls of coconut oil

2 heaped dessert spoonfuls of local honey

In a pot gently combine the coconut oil and honey together. In a bowl pour mixture over the rest of the ingredients, and mix together. Either press down into a  lined baking tray or a non-stick mini muffin tray. Pop into the fridge until firm.

Purple Carrot Cake

purple carrot cake purple

Purple isn’t a colour that holds a strong part in my life. It seems to come up in flicks and flecks and then disappears again.

When I think of purple I think of the purple cabbage dish my mum used to make as a child…oh how I used to shudder knowing that was going on to my plate. Any offers of her to make it again as an adult have been politely refused as really…you can’t fight history.

Purple, and I think of the beautifully scented lavander that sits outside my front door. A heady large bush that seems to have a constant stream of buzzing bees dancing on it’s purple flowered heads. Brush past it with your hand just after rain shower and you are rewarded with a heady scented smell that clings to finger tips.

I once had an oversized costume jewellery ring with a purple stone centred in the middle. An old flatmate had given it to me on my birthday. It wasn’t a considered birthday present, it was more the fact that I appeared in the room at the same time as he unveiled the ring. We used to joke that he had got it off someones dying finger….given that he used to keep a large axe in his room, and periods of ridiculously erratic behaviour… probably not a joke I would find quite so funny now.

Purple was on my leg recently. A peach sized bruise that I didn’t have the foggiest idea of how it got there. For two weeks I was reminded of the fact that I didn’t remember how something so big and sore had got there in the first place. (What is it about bruises that make you prod it routinely to make sure it still hurts?)

Purple is also the colour of an old brooch that has sat in a small wooden of mine box for a very long time. I’ve never actually worn it, so it still sits in little drawer surrounded by a purple ribbon, ready and waiting for that one day.

So what does purple have to do with my carrot cake? Well clearly I’ve used purple carrots. Those carrots with the deepest darkest of colour. Carrots that stain your fingers when you peel them, and carrots that scream out to be made into a cake. Not just any cake though. I had played with my carrot cake recipe before, using the purple carrots and all I got was dark coloured flecks through out. Where was the purple? (Like in this sourdough.) I needed to somehow let the carrot cough up its colour without becoming a stodgy lump by cooking it too much. I also didn’t want to put any vegetable oil, or sugar in there. Raising your eyebrows a little? Nope, stick with me.

Local honey and sultanas for sweetness. Pecans and wholemeal spelt for flavour. Carrots for well, purple. And voila, purple carrot cakeMaybe purple is going to hold a bigger part in my life now after all.

Purple Carrot Cake

400g grated local purple carrots

100g melted butter

150g local honey

3 beaten free range eggs

1 tsp cinnamon

50g roughly chopped pesticide free pecans

50g natural sultanas

150g wholemeal spelt flour

150g s/r flour

Grate carrots and melt just the butter just a little with them either in a pot or microwave. Just enough to melt the butter- which also releases the purple colour. Mix through remainder of the ingredients, leaving the flours until last, then folding them through too.

Bake at 180C for approximately 45 minutes, in a greased and lined tin.

sprouted buckwheat…not really hippy food at all

sprouted and dehydrated buckwheat

DSC_0057 copy

Sprouted buckwheat. It’s my new best friend at the moment, and I’m having a quiet love affair with it in, well pretty much everything.

Since last December I’ve been playing with it in various incarnations and there is yet be a combination that I haven’t liked. I’ve put it in bread, alive granola, a base for tarts, raw energy ball snacks, porridge, pancakes and smoothies. Plus a few experiments with pizza bases, cakes and biscuits. Really, I think the possibilities for these little stars would be endless.

So what’s so good about it and why would you bother sprouting it?

– It’s gluten free.

– It’s super easy to sprout, (given reasonably warm conditions, it can sprout within 24 hours.)

– It’s considered a super food and has a low glycemic index.

– Sprouted it is full of live enzymes and nutrients.

– High in iron and protein, and acts like a grain but isn’t a grain.

– Great for balancing blood sugar levels and has been linked with stabilising cholesterol.

–  It’s also incredibly versatile when it comes to making and baking.

sprouted

How to sprout buckwheat

You’ll need a glass jar, some muslin and a rubber band or alternatively one of these fancy pancy sprouting jars, and raw buckwheat (not roasted).

Rinse your buckwheat.

Leave it to soak in tepid water for about 2 hours, (twice the amount of water to buckwheat.) Buckwheat will swell.

Rinse again, getting rid of any of the slimyness that might have built up (starch). Drain, turning it upside down. Keep rinsing and draining every 6 hours until little tails appear. (In warmer weather this can take as little as 24 hours.) Make sure it’s well drained as you don’t want it to go mouldy. Wait until their tails are the same length as the groat.

essene bread with avocado

And that’s it. Depending on what you are you using it for. You can halt the sprouting process by popping it in to the freezer, or dehydrating if you aren’t quite ready to use it there and then. I don’t have a dehydrater but have used the second shelf of my oven while cooking something at a slow temperature with the same effect (see top picture.)

An incredibly versatile food that is rich in nutrients and other health benefits. Easily accessible, (check in your local health food store) giving a little nutty texture to any food you decide to pop it into. So not hippy food at all, just a simple food item that really, I can’t get enough of at the moment.

Now get sprouting people.

Alive Granola

200g sprouted dehydrated buckwheat

150g dates

100g coconut

100g linseed

100g sunflower seeds

50g sesame seeds

1 tsp vanilla

1 tsp cinnamon

Pulse everything in a mixer and eat instead of a boxed cereal.

Everyone loves Parfait- Frugal Friday

mungbeanandyogurt

‘You know what ELSE everybody likes? Parfaits! Have you ever met a person, you say, “Let’s get some parfait,” they say, “Hell no, I don’t like no parfait”? Parfaits are delicious!’ {Donkey}

Donkey was right of course, parfaits really are delicious.

The Monkeys were watching Shrek one rainy weekend recently and I was in the kitchen wondering what inspiration was going to fall upon me for the container of sprouted mung beans on the bench. I kept mentally adding ingredients to my bowl but I was also furrowing my brow a little at the same time as quite frankly, sprouted mung beans, honey and yogurt… I really wasn’t sure about it.

What the hell. I started to construct, pulled out a spoon, and tentatively tasted. Yep… Yep, I think that works. Even works quite well. I made it again several days later and then again just to make sure my taste buds weren’t playing tricks on me.

Nope, still works.

Mung beans, honey and yogurt DOES work in a parfait like kind of fashion, and I would even go as far as saying… it’s delicious.

Mung Bean Parfait

organic sprouted mung beans

linseed meal

local sunflower kernels *

sultanas

home made greek style natural yogurt

local honey

* I found some locally grown sunflower kernels recently at Newcastle Farmers Markets– I can’t tell you how happy I was to find this, as up until now all I had found was imported. Very happy!

sprouted quinoa sourdough

crumb

sprouting

The beauty of sourdough is it really is incredibly forgiving. There is no set way that you have to do things. It’s this part that appeals to me, as me and a regular routine don’t usually skip hand in hand.

Fasten it up, slow it down, make it with more water, make it with less water, cook it in a super hot oven, cook it in a slow oven. Leave it for 24 hours in the fridge? Yep, still good to go. Sure with all those changes, it might not have the same delectable taste of the the local sourdough bakery down the road, but your working conditions probably aren’t the same either. Phones get rung, children need feeding, appointments need to be kept and sometimes well, to be blunt you just couldn’t be arsed.

For these many reasons, this is why I love sourdough. It’s adaptable. Pretty much what ever I throw at it, it comes back with a tasty totally exceptable loaf of bread. It might not be winning awards, but it feeds hungry bellies, and it is good and true in a wholesome kind of way.

Putting sprouted quinoa in my sourdough sounded ridiculously wholesome. Thanks to my little friend Instagram, I have a steady supply of inspiring bakers around the world giving me advice, encouragement and all round inspiration that is pretty hard to top at the moment.

Sprouting had been at the back of my mind since I had had some delicious sprouted granola in Byron Bay, and with a steady supply of encouraging pictures via Instagram it was time to jump on board.

I tried sprouted organic brown rice first, delicious. Next up, quinoa it was. Dead easy in our summer, and whoosh… before I knew it they had little tails. Into the bread they went, which  resulted in a lovely moist, chewy crumb.

With a sprouted quinoa sourdough under my belt, now I just have to decide what to sprout next?

sproutedquinoa

Sprouted Quinoa Sourdough

400g starter

750g flour (5 cups)

500mls water

(5 minutes in the mixer)

(30 minutes snooze)

200g sprouted quinoa

2 tsp salt

(5 minutes in the mixer)

(60 minute snooze)

three way fold

60 minute snooze

three way fold and shape

overnight nap of 12 hours in the fridge

bring it back to room temperature

slash

230C preheated oven with steam.

 sprouted

this post submitted to the bready inspiration yeast spotting

new discoveries


DSC_0038 copy

choc agave balls

DSC_0030 copy

DSC_0052 copy

New discoveries…

New legs to walk on, and walk she does. At ten months and four days she said, whoooshka! Lets go, lets get busy…and hasn’t looked back.

New magnifying glasses for the boys, show little critters can become big critters at the right angle. There are a lot of new little things to discover.

Holiday time and park mornings are spent exploring. It can be hard work and they need lots of healthy energy giving snacks.

I’ve posted these balls before (here) but have changed around the ingredients a little. My new discovery of the deliciousness of dark agave nectar, was a lovely surprise. I would use it sparingly due to the food miles on it, but it is a wonderful alternative to sugar or honey.

These ingredients are just a rough guide, use whatever you have on hand and like to add to the mix.

choc energy balls copy

Chocolate Agave Energy Balls

1 1/2 cups rolled oats
1/2 cup desiccated coconut
1/2 cup linseed meal
1/2 cup sunflower kernals
1/4 cup cocoa powder
1/4 cup agave syrup
1/4 cup honey (use extra agave if you want to make it completely vegan)
2 tbls of unhulled tahini
1 tsp vanilla
sesame seeds/ or extra coconut
Mix all ingredients together, add a tablespoon or two of water if needed to bind ingredients together and roll into balls. Roll again in sesame seeds or coconut.
DSC_0086 copy
This post is going to We Should Cocoa @ Chocolate Log Blog– for a sugar free chocolate combo this month.

the nordic return


It had been over a year since I had last made these. A whole year since I had gone all nordic with my reading and eating.

How had a whole year gone by and I hadn’t made them again? Having a baby might have been something to do with it. I got distracted, other things got priorities and slowly time ticked on by.

With my recent jumping in to spelt however, it was time to revisit knekkebrod.

These are ridiculously adaptable and now being made continuously again.

Knekkebrod

* I’m not sure how authentic my version is, but they work for me.

1 cup wholemeal spelt flour

1 cup whole oats

1 cup LSA/sesame seeds/pepitas

small palmful of caraway seeds

1 cup water

Mix it all together and flatten out with wet hands, on a lined baking tray. Divide it partially to the size you want them to be- easy to snap after baking then.

Baked at 160-170C until crisp.

******

I’ve also been playing with Cardamom Buns.

A lovely friend married to a Norwegian fella, gave me a recipe for them the same week that Joanna posted about them. I fiddled with the recipe to tweak it a bit to suit me. With the buns baking, I went and looked up cardamom buns in google… 385,000 possibilities! Probably should have done that before I started baking the buns of goodness, as I was a little underwhelmed with how very average mine looked compared to how they could look.

An hour before they were popped in the oven, I had looked at my proving dough all ready to divide and make pretty. I looked, got completely over whelmed with my lack of time, (laziness) and decided a divided slab would be fine. Sure it was fine, but next baking session I think I will try and make them look a little better and allow more time, (less laziness.)

I had also spotted spelt cardamom buns with marzipan thanks to my good friend google. Oh, oh my! Who knew it could be so good?! Spelt…and cardamom…AND marzipan. Clearly I need in on that action. So no recipe for these buns today, but promises of a bun return.

Or perhaps, a nordic return, (again.)

a bowl full of sushi

It’s quiet.

Not a murmur, not a word. Just the rhythmic sound of two forks being taken from bowl to mouth.

The Monkeys are eating two bowls of sushi. This is their favourite dinner at the moment. Not daintily rolled between a sushi bamboo mat, instead carefully constructed by their own little hands. I get it all out, prepare the ingredients and then they assemble what they would like to go in there.

Healthy, looks good, they get to help put it together and most of all they love to eat it.

I can’t help but feel a teeny bit pleased. Pleased and proud of my vegetable loving children. Sure they won’t touch zucchini, mushrooms, sweet potato or spinach. Eggplant also isn’t getting a look in any time soon, but what they won’t eat- they make up for. If that means a bowl full of sushi, with a selection of raw vegetables in there, I’m more than happy to give it to them.

I know kids can be picky little things, but if you plant the seeds of eating healthily from the very beginning and get them involved it sets them up for later on. Once a week, the Monkeys wrestle over who gets to bring in the vegetable box after it’s been delivered to our back door. Carefully sorting what’s in there and what exactly it all is. We don’t get to harvest a great deal from our (rather pathetic at the moment) plant pots, so this along with going to farmer’s markets is a second best. Sorting, learning, preparing and then eating it.

As a child, the idea of sitting through an eggplant or mushroom dish set me up for an hours worth of good solid gagging. These truly were horror vegetables that were put on this earth just to torture me. A few decades on and funnily enough what are two of my favourite vegetables?… Eggplant and mushrooms. The seed had been planted, the palate had already been explored, and then it was just a matter of finding out how I liked to eat those two little vegetables.

So that’s what I’m doing with The Monkeys. Expanding their palates and planting seeds. No, they don’t have to eat handfuls of mushrooms, broccoli, and zucchini. They can try a little bit each time though, just so to remember what it tastes like and then they can move on to what they really love. Vegetables like peas, capsicum (peppers), tomatoes, cucumber, corn, avocado, lettuce, pumpkin and carrot. Pop it all in a bowl of rice, with some shredded seaweed and a little line caught tuna, (Good Fish.)

There they have, a bowl full of sushi.

food foraging- mulberry breakfast trifle

The last few weeks I’ve been lucky enough to find a couple of laden mulberry trees on my daily travels. The first thing to notice is lots of dark almost blue coloured stains squishing under your shoes, then I look up and… oh hello bountiful tree with your weighty branches filled with red tinged berries. What’s that? You want me to pick me you and store you in my handy empty container I just happen to have with me? Don’t mind if I do.

Most mulberry trees around these parts are usually on some one elses property and not within arms reach. Not my arms anyway. However lately I have had easy access to a couple of trees weighted down by all their fruit. Only once I have seen someone else picking the fruit, everyone else seems to walk on by not knowing what it is, or not in the slightest bit interested.

Picking mulberries is a bit of a labour of love. The juice stains your fingers and each berry has to be picked individually. Once home, you still have to pick off the little green stems before cooking with, (and I always seem to be in a white top when ever I happen to come across them). It can take a while to get a decent amount, but it’s definitely worth it.

I’m not particularly good at identifying wild food foraging options in my local area. Mulberries are easy. Loquats quite often pop up, and the tiniest mini mandarins are also near by. (Which were the tartiest fruit I have ever tasted- very funny while watching The Monkeys taste test them… evil mama, I know.)

Apart from that, my knowledge for urban foraging could use a little upgrade. In the mean time though, at least I have breakfast sorted.

Is anyone else enjoying some local free foraged food?

Mulberry Breakfast Trifle

whole oats

apple juice

natural yogurt

whole almonds

mulberries

***

Soak whole oats in some hot apple juice.

Blitz whole almonds (skins too) until you get a consistency you like (I like it chunky) or use almond meal. Mix in with the soaked oats.

Cook up mulberries in a little apple juice, then cool.

Then alternate with the layers of oats, mulberries and yogurt.

* If you like it sweeter, you can add flavoured yogurt, or a little jam to the mulberries (or sugar). No mulberries? Use any other kind of berry.

B Bread

I have fiddled, twiddled and tweaked this recipe so many times, and I’m still unsure of what to actually call it.

Could it be wholemeal bread? Technically it’s not wholemeal as it doesn’t use the whole grain.

Bran bread doesn’t haven’t much of ring to it. Sounds like something your grandmother might be encouraging you to eat.

Keeps me regular as clock work that Bran Bread does! 

Nope. Bran Bread doesn’t work either.

How about Brown Bread? A bit dreary sounding though isn’t it?

Would you like some lunch? How about some white cheese, red tomato, on some brown bread?

Exciting no?

How about B Bread? It’s got bran, it’s brown, it’s bread, (and it’s made by Brydie.) Yep that will do.   

For such a simple loaf, I really have tweaked it a lot. Has it made a terribly big difference? Probably not.

I have played with higher hydration, (too tricky to shape) short mixes within the autolyse period, longer autolyse period, (I like leaving it about 40 minutes) using hot water mixed with the flour, long over night prove, shorter day proves, big slashes, little slashes, no slashes, (I like them) not soaking the bran (dry bits), adding the dark malt secondary, (too streaky) adding the malt with the bran and hot water, (no difference) shaping before the over night prove, shaping after the over night prove. (I’m still not sure which I prefer with this one. Depends on the time factor at this stage.)

At the end of the day though, it’s a bread that does what all good breads do. Fills your belly in a wholesome, soul uplifting kind of way.


B Bread

400g starter

700g flour (4 2/3 cups)

1 tsp dark malt flour

50g unprocessed bran (1 cup)

125mls hot water

500mls water

2 tsp salt

Add hot water and bran together, mix until all absorbed. Mix starter, flour, water and dark malt flour together for a minute or so, and then add the bran mixture (I use a sunbeam mixer with a dough hook). Rest period 40 mins. Add salt. Mix again. Prove for 1 hour or so. Quick knead on lightly floured surface. Another hour or so prove. Fridge for 12 hours. Shape. Back to room temperature and prove,(took about 3.5 hours). Slash. Baked at 240C with steam, for about 30 minutes.

This post submitted to the wonderful yeastspotting.

Bircher Muesli or freezer surprises

Apple something or other that was for sure. Puree, pectin, juice?…

I don’t know what it was, as I wasn’t clever enough to leave label on it in the freezer. All I know it was apple-y, it was sweet and it was mighty fine.

The Monkeys had me grinding spoonfuls of it off the frozen sides of the tub into their sweet insistent mouths.

“More! More!” They demanded like noisy, needy little baby magpies.

Alright, alright… It’s ok, Mama doesn’t really want any of this sweet frozen apple-y goodness that she found way back in the freezer…not much anyway.

Bircher Muesli is one of those tasty meals in a bowl that you know is good for you and you can cater to your own taste buds. There are so many ingredients that you substitute one for another  and still get a great tasty bowl full. Dry ingredients start with oats, then you can add…slivered almonds, sunflower seeds, sesame, hazelnuts etc. Adding to that your wet ingredients, a grated apple, apple juice, milk, mashed banana, whatever tantilizes your taste buds. Leave it over night and then in the morning top it off with a dollop of yogurt, and some fresh or poached fruit. Imagination is your friend here.

It’s filling, low GI, and tastes like you should get a second bowl full.

Bircher Muesli

1 1/4 cups rolled oats

1/2 cup almond meal

1/4 cup linseed meal

1/4 cup pecan pieces

1 tsp cinnamon

1 cup apple puree

Popped it all in together and then in to the fridge overnight for the dry ingredients to absorb the wet. Added a dollop of homemade yoghurt and a hand full of blueberries on top.