

I was a little nervous about using the Pashmak. I hadn’t really understood why until it came out in an email to the revered foodie Tania. I had asked her for some input on what to make with the goods and suddenly it became abundantly clear to me… I was nervous because this Persian fairy floss was dainty and delicate.
Dainty, delicate… and pink!
Not three words that I would usually string together in my cooking. Rustic yes, every day yes, basic yes…but dainty and delicate? Not really.
I’d bought it with grand visions, plans changed, ideas came and went, and so did the time. When are you going to use that stuff? said Mr Chocolate helpfully… Soon, really soon.
Cupcakes possibly… a cake could be good…or perhaps a little panna cotta?
Now panna cotta sounded like the right thing although along with never having played with pashmak before I’d never tried making panna cotta before, or used gelatine for that matter.
Well that was my answer wasn’t it. The one that I had the least amount of knowledge on, and only a fluffy idea forming, well that would be the one. Of course it would be, it’s the cityhippyfarmgirl way. Hackbaking I like to call it, (and if it all ended up in colourful sloppy mess in a bowl? I had a sneaking suspicion we’d still eat it.)
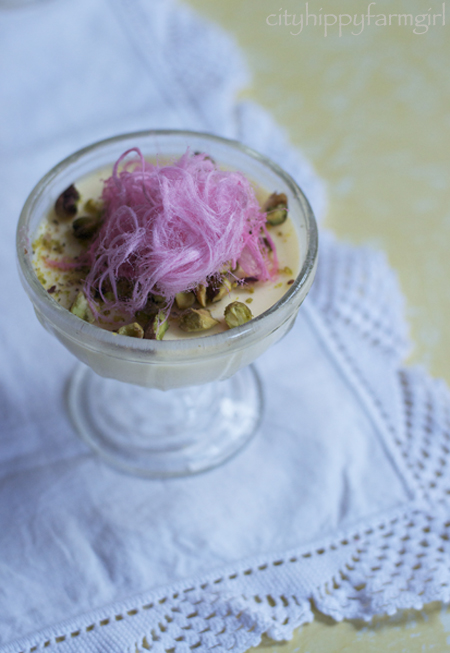
Pistachio and Vanilla Panna Cotta
300mls cream
150g natural yogurt
50mls water
75g raw sugar
1 tsp vanilla
60 mls water
2 1/2 tsp powder gelatine
Sprinkle the gelatin over the water, dissolving it. In a pot add the cream, yogurt and sugar- gently heat to dissolve the sugar. Cool a little, and add the gelatine mixture and vanilla, dissolve again. Pour into individual glasses and chill for about 3 hours.
40g lightly roasted pistachios- roughly crushed
Persian Pashmak*
*********
* Pashmak wilts in humidity…a lot!
If you like rose water, you can swap this for the vanilla.


