custard tart vs chocolate pudding

custard tart || cityhippyfarmgirl

custard tart || cityhippyfarmgirl

I recently made a chocolate self saucing pudding.

It was fairly forgettable really.

Prompted from a chat on instagram, I wanted to revisit my early teen winning staple. And I really mean staple. I made those chocolate puddings on a weekly basis at one stage. Fueled by my love of anything dessert orientated and driven by a new found kitchen freedom that one seems to acquire after a certain period of time that has passed of proving yourself. Yep, I could bake them alright, and along with it feed my hungry mouthed siblings all through the long winter months. (Which weren’t particularly long, but it does sound more dramatic.)

The question was, would I be doing the same for my own children? Would the humble self saucing chocolate pudding become a family favourite as it once was mine?

Errr, no. No it won’t be.

I made it. It was pleasant, and that was about it. It seems my chocolate pudding days go no further. After 20 plus years of not making it, it seems my palate has completely changed. No longer sated by a simple concoction of self-raising flour, sugar, and cocoa. It really just didn’t do anything for me.

Now I could adapt a recipe, make it my own. Throw some more ingredients in there that are more attune to what our young family enjoys, however I probably won’t… as instead I revisited the humble custard tart.

And that dear people, was well worth the revisit.

Given that I have a long held history with custard anything, it would have been a shame if this one didn’t cut it. At times in my younger life I may have been held up by custard. It’s not the first time I’ve mentioned the love for custard on the blog, (nor probably the last.) But what I will mention is the tart disappeared far quicker than the chocolate pudding, which unfortunately seemed to quietly whither within the fridge over a period of days.

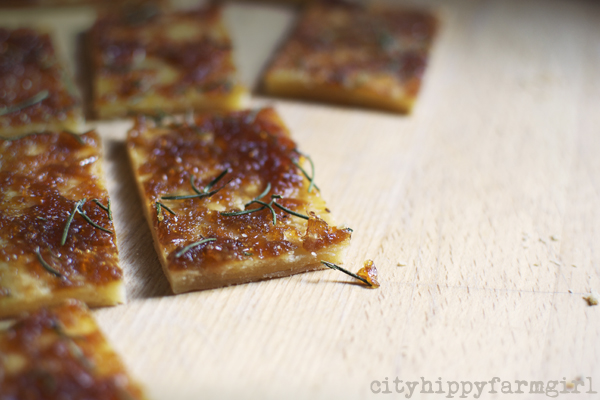
This recipe isn’t very complicated. There is no resting of pastry, no straining of custard, and if you feel like that second slice…I say go right ahead.
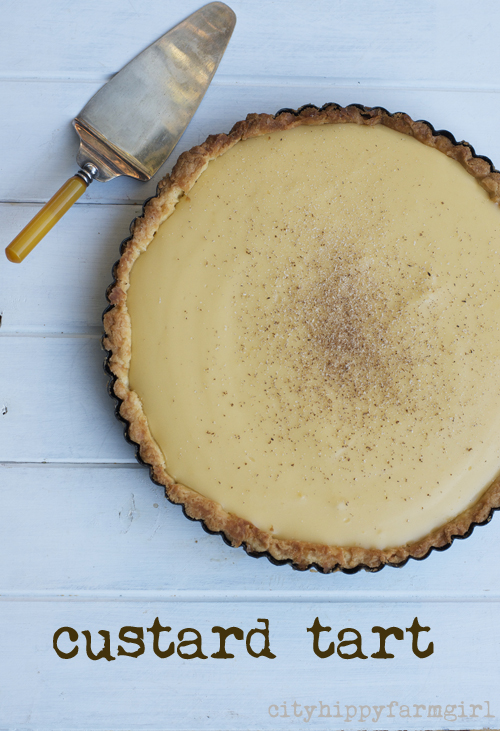
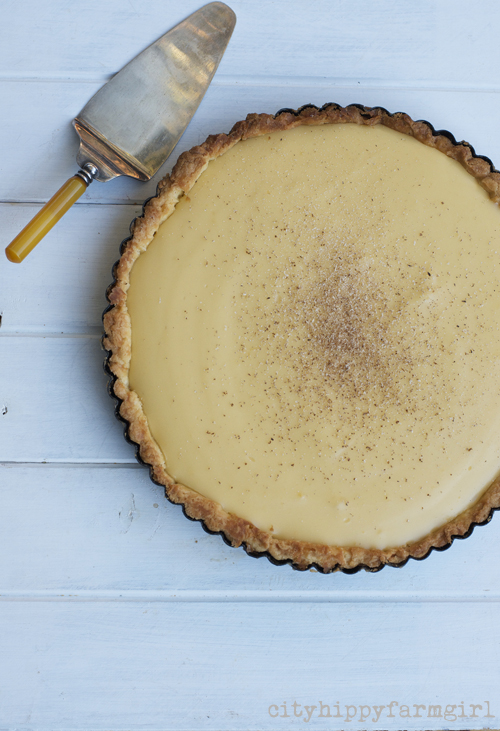
custard tart || cityhippyfarmgirl

Custard Tart

Pastry

180g cold cubed butter

50g icing sugar

1 egg

250g plain flour

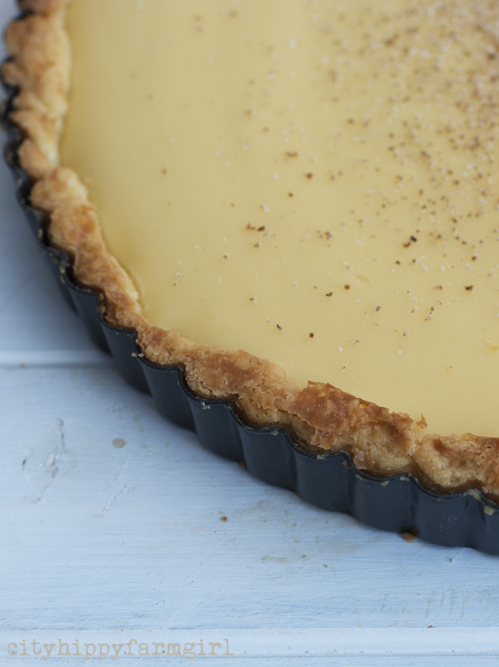
In a blender pulse, butter, flour and sugar together until it forms bread crumbs. Drop an egg in and a give it a quick whizz. Pop the mixture out on to a lightly floured bench top and gently knead until the dough comes together. Between two baking sheets, roll it out to about .5cm thickness. Plop the dough into your greased pie or tart dish, keeping one side of the baking paper on there. With the baking paper side up, add pie weights or something to weigh the pastry casing down- bake blind for about 20-15 minutes or until golden at 180C.

Custard

600mls milk

2 tsps vanilla

4 egg yolks

3/4 cup sugar

1/2 cup cornflour

50g melted butter

nutmeg

Add all ingredients except milk and nutmeg together to form a paste like consistency. In a pot over medium heat, add all of the paste and slowly add the milk, stirring continually. Keep stirring until the custard just comes together and then take it off the heat. (If by chance you get side tracked, and your custard gets a little lumpy- wizz it with a hand held mixer- voila! smooth custard.)

Pour custard into the tart shell and grate a little fresh nutmeg over the top.

Eat with enthusiasm and noisy laughter.

simple custard  tart recipe || cityhippyfarmgirl

caramelised onion tart…the post that nearly wasn’t

caramelised onion tart

caramelised onion tart

I’m not sure why but this post is the one that keeps getting bumped to the bottom of the pile. Time and time again this is the post that gets discarded and ignored.

Why? I’m not really sure. I love the caramelised onions, I love the tart and have made it several times now, so why do I keep bumping it off? One of the many mysteries of the blogging world I suspect.

Not today though. Not today will I bump it off in favour of a shinier post.

Today I will keep typing and press publish. It’s the right thing to do.

How about you? Do you have a blog post that for 547 reasons, has yet to see the light of day?

caramelised onion tart

caramelised onion tart

Pastry

(in a blender)

300gms plain flour (2 cups)

and

200gms cold butter cubed

pulse until resembles bread crumbs

tip out to a mixing bowl

and add

110gms natural yogurt and

1 tsp white vinegar

Mix together. Quick knead on a floured surface until a dough ball forms. Cover with clingwrap and pop in the fridge for about an hour. Cut ball of dough in half and roll out to the shape you want. I rolled out to a rough rectangular shape 1/2 cm thick. Prick with a fork all over and into the oven for about 15-20 minutes or until golden at 200C. While that’s cooking make the onions up.

Caramelised Onions

6 onions or so into 1/8th’s and pulsed in the blender

tip into a wide bottomed pot and add

4 good slugs of olive oil

 and now cook them off on medium heat (about 20 mins or so)

add 300g brown sugar

and 3tbls of balsamic vinegar

and again on medium heat for another 15-20mins or until mixture thickens slightly and looks darker and glossy. (Easy to store in a jar, and keep in the fridge.)

Spread the onion mixture over the cooked pastry, add some fresh rosemary. Back in the oven for 10 or so minutes at 200C.


birthday thinking and a berry meringue tart

I’ve just celebrated another birthday rolling around. Time spent with lovely people, delicious food and lots of happy moments.

I’ve also been thinking of another that is no longer here.

Thinking of my grandfather who left me with a head full of happy memories, that I frequently bring out and go through. Flicking through those memories like a well worn scrap book, with mental scribbles, loved pictures and happy moments.

Ours was a shared birthday. It was always such a special feeling knowing that our birthday was on the same day. Giving me a loving connection with the grandfather I adored.

A man, who to me always smelt like smoked apple wood, and occasionally raw onions as he loved them on sandwiches.

He had a sweet tooth for certain things, introducing me to sugar coated jubes that would get soft and squishy in the car. There were scoops of vanilla icecream with spoonfuls of his home made jam on top. He also knew answers to more trivia questions than I could ever hope to know in a lifetime. Answers would roll off his tongue like a well rehearsed dialogue. No pause for thought as the reply seemed so easily retrieved.

Big boxes of locally grown apples would be brought by him when ever he came to visit, followed by bulging jars of loose change to be carefully counted and divided amongst the grandchildren. Counting was always my job, as I was the eldest. Every cent was divided up and then we could spend it in any way we wanted.

He was there when I first rode my bike. He was also there, teaching me to dive in the pool during summer. Tuck the feet in, tuck the feet in…

We would go to visit and on his arriving home after a long day, we would hear the sounds of his footsteps coming up the stairs.

Clomp, clomp, clomp

The stairs always lasted forever as he continued stepping on the same few top stairs, making it sound like they were ten stories high. Building up the excitement, my siblings and I giggling with anticipation of him being so close. Long squashed hugs would follow, as we would all scramble for his attention.

In his last year, while he was sick, I got to tell him that I had met the man I was going to marry. This comforts me in a funny kind of way. Even though he didn’t get to be at my wedding or get to know any of his great grandchildren, he at least got a glimpse of the path I was about to head down. A path, I think that would have made him incredibly happy.

As long as I have these special memories and a hundred others, he will always be with me. Not mourned over for his loss, or the unfairness of a life taken away too soon but celebrating in the life that he did have. A life that I got to share a little part of, which I’m incredibly grateful for those years, and those birthdays we did get to share together.

******

…and I also think he would have quite liked a slice of this birthday berry tart.

Drawing from  my last years ‘a rather tall birthday cake‘ and also inspired by a gorgeous recipe from Jamie Oliver’s ‘Jamie does…cookbook‘. This little number was the result.

Berry Meringue Tart

Pastry (recipe here) base can be cooked the day before. Pastry pricked all over and then baked blind for 20 minutes at 180C in a greased tart pan (the kind that pops out is good) and then a further 10 minutes uncovered. Pastry should be crisp and golden.

Meringue (recipe here) clusters baked on a tray at 130C until crisp all over, this will take an hour plus. (I used 4 egg whites/220g sugar.)

Mascarpone vanilla bean cream. Whip 300mls cream to soft peaks, then add 1/2 cup icing sugar and one scraped vanilla bean pod. Add 250g mascarpone and gently whip again until mixed through.

Berries- strawberries, blueberries and cherries.

Smooth out several spoonfuls of the mascarpone mixture on to the base of the cooked pastry. This will help the meringue stick a little. Break the meringue up and build a decent sized layer, Spoon the remainder of the mascarpone mixture all over, filling in any meringue holes and then cover with your favourite berries. Dust with a little icing sugar.

cannoli time

 Cannoli had been on my ‘to do’ list for a couple of years now. Those tasty little Sicilian pastry desserts, with a crispy outer shell and sweet soft goodness inside. Ricotta, mascarpone, custard fillings…mmm, there is a lot to like about cannoli. A whole lot.

Now when the lovely Joanna from Zeb Bakes sent me some cannoli moulds, well it was a sign, wasn’t it.

It was time….it was cannoli time.

But which recipe to try? On the internet there were so many to choose from, I couldn’t decide, so after reading about twenty different recipes, it was back to hack baking again. I played. Maybe not the wisest choice considering they were supposed to be a little tricky, but my choice none the less. So, below is how I did it. These are not perfect. They’re good, but not perfect. They need tweaking, so they will definitely be made again.

The pastry was good, (smelt fantastic with the marsala in it) but I didn’t get that complete crispness that I was after. I’m not sure if it’s because I didn’t deep fry them, only shallow fried them, and I did have a bit of trouble getting the right temperature of the oil to cook them in. Or it was the pastry after all?

I liked the mixture inside, (it’s mascarpone right, and we’re friends from waaaay back.) The jam added was a little taste tweak, which worked. I would have added some lemon zest as well, but was all out.

Next time though.  And yes, there most assuredly will be a next, cannoli time.


Cannoli

Cannoli dough

400g plain flour

125g butter

85g (1/2 cup) icing sugar

125mls marsala

1 egg

In a food processor, pulse icing sugar, butter and flour. Until it looks like bread crumbs. Tip out to a bowl and add marsala and beaten egg. Mix, and bring together quickly with one hand. Form a ball, cover in cling wrap and pop in the fridge over night.

Next day, roll out in circles as thin as you can get without tearing, cutting circle sizes to fit cannoli molds.

Lightly oil cannoli molds with vegetable oil, (just the once is all that is needed.) Wrap the dough around and cook in oil until golden. Pull mould out while still hot/warm, (as if it’s cold it will get stuck.) Allow to cool on a rack.

Ricotta mixture

250g ricotta

250g mascarpone

85g (1/2 cup) icing sugar

1 tsp vanilla

1 heaped tbls strawberry jam

Whip it all up, for a minute or two and then pipe. One side and then the other.

Only pipe the mixture just before serving. Dust with icing sugar.

Unfilled cannoli shells will last for about a week in an air tight container.

Lemon and Rhubarb Pie

Tarty. Very tarty.

Not in a fishnets, leather and red stilhetto kind of way. More eye squinty, and lip smackable. Just the way I like it.

When I cook, I usually have someone in mind, with whom I’m trying to appeal to their taste buds. Fried rice, with all the vegetables raw and lined up on the side, that would be The Monkeys. Pasta after a really busy day at work, with floating double smoked bacon, followed by two blocks of his favourite chocolate? Well clearly that would be Mr Chocolate.

This time around though, and it was all about my taste buds. I had pie on my mind, rhubarb in the fridge and a bench full of backyard lemons that were all yelling one thing to me. Make me into something delicious!

So I did. Something for me and my tastebuds. A little selfish? Oh hell no. They get enough Monkey friendly, Mr Chocolate friendly things to eat. Of course they were more than welcome to eat the tarty fruity pie in front of them, and if they didn’t like it… well, not much of tragedy there really is there?

Little Monkey tried it. Monkey Boy tried it.

Both scoffed it down and would like another piece please. Oh…didn’t quite make it tarty enough now did I.

Mr Chocolate tried it, and did the eye squint I was expecting from him, yep, it’s good, but you know it’s not really my thing… thank goodness for that.

Now I just had to muscle the two kids out of the way for that last piece.

Lemon Rhubarb Pie

Pastry

200g cold cubed butter

300g plain flour

110g natural yogurt

50g sugar

1 tsp white vinegar

In a processor add flour, sugar and butter. Pulse until resembles bread crumbs. Tip into a bowl adding the remaining ingredients, mix together and then give a quick  knead on a lightly floured surface then cover and pop into the fridge.

Rhubarb

1 bunch of rhubarb

100g sugar

Trim edges, and cut into equal lengths, pop in a pot with the sugar over a medium heat, and cook until rhubarb has disolved to rhubarby mush. Put aside.

Lemon mixture

100mls lemon juice

1/2 cup sugar

2 tbls cornflour

100mls water

Mix cornflour and water together, then add to remaining ingredients in a pot. Whisk over a medium heat until mixture thickens.

Roll out your pastry on to lightly floured bench, and then line a greased pie dish with it. Layer the lemon mixture on, then the rhubarb. Roll out a second pastry top and slit it, gently pulling it sideways to open up a little. Press down the edges and bake at 180C for about 50minutes.

one vanilla slice and a small serving of copyright please…


 The humble vanilla slice is one of those bakery treats that I’ve always found hard to walk past. I’ve written before of my love for all things custard, with the peak of the custard love sitting right in wedged between two lots of pastry.

This recipe had sat for four years in my ‘folder’, awaiting the day when I would finally give it a crack. I know the day I ripped it out of the magazine, as the date is on the bottom. Torn out from The Good Weekend, a magazine insert from the weekend paper The Sydney Morning Herald. Also, it’s a recipe from Matthew Evans. It seems I’ve been unknowingly drawn to his cooking long before I pushed him up on to my gourmet farmer pedestal.

So there the recipe sat. Waiting for the right moment. I had posted about custard biscuits and a reader commented on snot blocks. Snotblocks were otherwise known as the  vanilla slice in certain parts of 70’s Australia. With the mere mention of the snot block, I was drawn back to the torn out folded recipe, wedged between the caramel mudcake and profiterole recipe.

What exactly was holding me back from giving it a go? Right, get cracking girl. So I did. I even followed the recipe to the letter, every little step of it. I didn’t stray, not even a tiny tweak, (well almost). Which was very unlike me.

So did it turn out? Ohhh, yes. Yes it did. It actually exceeded my expectations as the recipe didn’t have an accompanying picture. I just crossed my fingers that it was going to work out, and kept visualising my snot block, I mean vanilla slice.

So I made it, it was delicious, now where’s the recipe?

This was where I came a little undone. I had followed the recipe to the T. No adaptations, no deviations, no tweaking and definitely no hack. There was no evidence of the recipe online, the magazine isn’t even on line, so I couldn’t really give credit where it was due. I didn’t want rip off the magazine I’d been reading for the past 20+ years and I didn’t want to rip off Matthew Evans.

I ended up asking a Good Weekend editor what to do, and some emails were sent back and forth without any conclusion being made. Maybe I was too small of a blog to be bothered with and maybe they just weren’t sure either of what to do? I read David Lebovitz’s post on recipe attribution, then I read it again.

Just when I had decided to let it all go, approval came through. The recipe was given the nod as long as it had all the appropriate acknowledgements.

Vanilla Slice 

from Matthew Evans- Good Weekend December 1st, 2007

2x 25cm square pieces butter puff pastry

80g 2/3 cup cornflour

1 litre milk

40g butter

6 eggs

200g (1 cup) sugar

3 tsp vanilla essence

130g (1 cup) icing sugar

1 tbls extra milk

Oven on to 220C. Pop the pastry on to baking trays and prick all over with a fork. Use something with some weight and it can go on top of the pastry to stop it from rising, just use some baking paper to prevent sticking between it, (I just used a spatula to flatten it half way through cooking). Bake 15 minutes or until golden brown and cooked through.  Cool and trim pastry to fit 22cm square cake tin (or something similar). Line the tin with a strip of baking paper to lift the slice out once it is set. Pop one piece of the pastry in the bottom.

For the custard, add a little of the milk with the cornflour to dissolve. In a pot, heat the remainder of the litre of milk with the butter. While it come to the boil, crack the eggs into the cornflour paste, tip in the sugar and whisk until smoooth. Whisk in the milk, and then return to the heat in a clean pan.

Whisk continuously until the mixture comes to the boil and simmer for 1 minute. Remove from the heat, add the vanilla, then tip the custard into cake tin. Top with the other piece of pastry, turning it over- smooth side up. Press down and allow to cool.

Next either make a barely runny icing with the icing sugar and extra milk or simply dust with icing sugar. Pop in to the fridge until cold. Remove from tin and cut into squares, wiping blade between cuts.

Should make about 16 squares, (unless you do monster sized ones.)

*******

One other little thing I did do differently, was the pastry. Mathew Evans reccommends the Careme butter puff pastry or as second choice Pampas, (likening all others to ear wax). I did get the Careme, but didn’t pay attention to how many grams there were in there, so fell short of the amount of pastry I needed. I baked it as per instructions but then really carefully halved it. Because the pastry was lovely and obliging, it was pretty easy to do, and it was still enough pastry to withhold all the custard.

So what did I learn from all this?

Waiting, and making sure I felt comfortable with the whole re-publishing process definitely paid off. Getting approval to use the recipe on my blog without all the lip biting and frowning that was going on before, felt right.

And I still love vanilla slice.

It’s delicious.

*******

Good Weekend is a weekly magazine insert within the Sydney Morning Herald. 

Matthew Evans is Gourmet Farmer, author of The Real Food Companion and sells via Rare Food.

If you are not sure about posting a recipe, this is a really good place to start.

Vanilla slice sounds much nicer than snot block.

chunky chicken macadamia pie

Finally a pastry that I’m really happy with. Natural yogurt, where would I be without you…

Pastry

200gms butter

2 cups plain flour (300gms)

110gms natural yogurt

1 tsp vinegar

In a food processor pulse flour and butter until resembles bread crumbs. Tip out into a bowl and add yogurt and vinegar. Mix through and then knead until a smooth consistency and then pop into the fridge for awhile. Take out and roll to the thickness you want. With a ramekin that’s been turned up side down and wrapped with baking paper, drop it over the top and squish it in a bit.  Then into the oven at about 180C until golden. (I used a spatula about half way through the cooking to flatten the top (which will be the bottom) you don’t have to do this though.

When they are cooked, just flip it gently out and fill with your favourite pie flavours.

Chunky Chicken Macadamia

In a pot add

a good slurp or two of olive oil

4 cloves of diced garlic

chopped up chicken breast or thighs

cook them up until the chicken is cooked through

add two chopped zucchini

a lemon rind strip

a good grind of black pepper

2 tps stock powder

a little water

1 tps dried oregano

and lastly 3 heaped teaspoons of plain flour

cook it all until it thickens a little and smells lemony chickeny.

Pop spoons of the mixture in to the pie shells and add some toasted macadamias or whatever other nut you may have locally.

Rustic Apple Plum Pie

Have some pastry, and fruit? Dessert doesn’t have to be fancy to taste good. I will quite often make a double batch of pastry, so it’s always in the freezer and ready to go. For this use what ever fruit is  season, or if you have a batch of fruit from last season still lingering in the freezer, then it might be time to reacquaint yourself with it.

Roll out pastry, dollop on either cooked fruit, fresh berries, thinly sliced apples/sultanas/spices and then simply fold up the sides of the pastry and bake at 180C until pastry is golden. Done. Super easy, yes it is. Dust it with a bit of icing sugar if you want to ‘fancy’ it up.

If you would like to make your pie to look a little different, but not too much extra effort, try the stretched lattice look for a pie top. First up a pastry that is not going to crumble if you look at it.

Pastry

150gms chilled butter

1 2/3 cups plain flour

1/3 s/r flour

1/4 cup sugar

2 heaped dessert spoons of natural yoghurt

In a processor add the cubed butter, flour, and sugar. Process until it resembles bread crumbs. Turn out to a bowl and add yoghurt. Mix well and then knead until well combined and smooth. Pop it in to the fridge and let it have a little rest (approx 30 mins). Now roll your pastry out to the thickness that you require. Line the pie dish, cutting any extras off. Spoon in the pie middle. I used a plum and apple mixture but you could use anything that you have at hand. Roll out the remainder of the pastry and slit it intermittently with a knife.

Once that is done, gently stretch the top over the pie. This stretches out the the slits, opening up the latticing.

With this one I then brushed it with milk and sprinkled it with raw sugar. Bake until golden.

Serve with a dollop of home made yoghurt or mascarpone.

Two easy ways to make a rustic* looking pie.

* Rustic meaning I didn’t spend hours making it look pretty. Still tasty and still got The Monkeys jumping up and down yelling for PIE!!

Strawberry and Black Pepper Jam Tarts

The queen of Hearts she made some tarts

All on a summers day

The knave of Hearts he stole those tarts

And took them clean away.

****

The humble jam tart is always an easy one to whip up for when people come over, an easy little dessert, or an afternoon treat. If you have some pastry already in your freezer it makes it even easier.

First roll out your pastry and cut out to your desired shape. (Really you can use what ever you have at hand. A big long tray can also look great. Just cut the pieces to suit then.) For a pastry recipe, you also try here.

Grease tray, and place strips of baking paper down. All this does is makes it super easy to flip out when they are cooked. Rather than baking blind, I pricked the pastry with a fork and baked until golden at 180C. When the pastry shells are cooled, you can add ANY jam you want. It all tastes good. For these little numbers. I melted a little dark chocolate and then drizzled a small amount on the inside of the shell. This just gives a thin layer of chocolate underneath the jam mixture. Then spooned a strawberry jam mixed with freshly ground pepper. The pepper isn’t overwhelming just gives a gentle hint of… ooohh, whats that?

The King of Hearts called for the tarts

And beat the Knave full sore

The Knave of Hearts brought back the tarts

And vowed he’d steal no more!

****