The Crumpet Trumpet

Top tips for Sourdough Crumpets || cityhippyfarmgirl

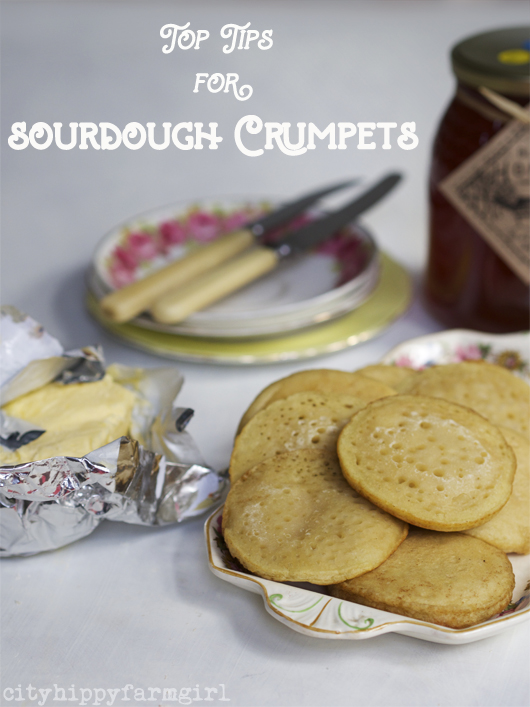
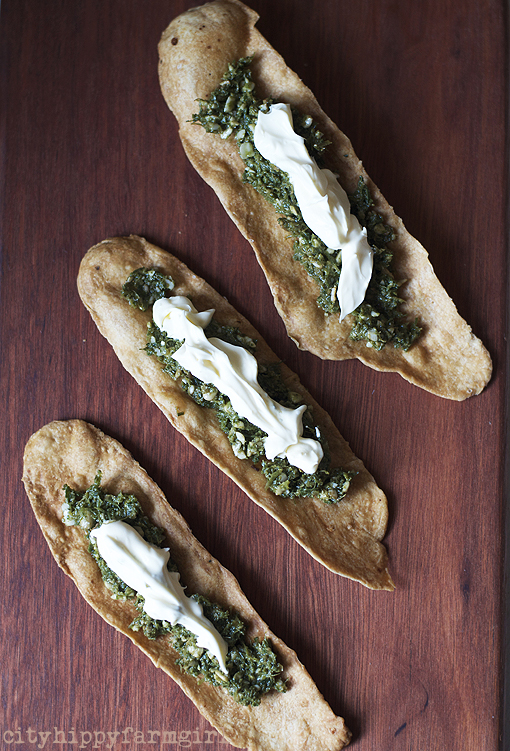
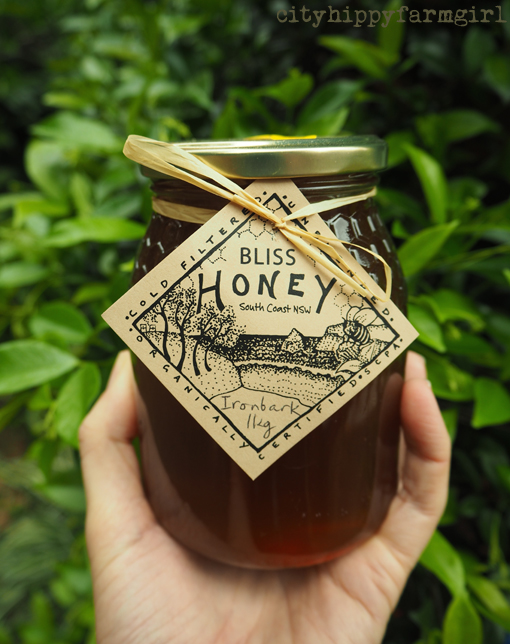
Talk of crumpets and it usually leads to other words like buttery fingers, dripping honey and piping hot cups of tea.

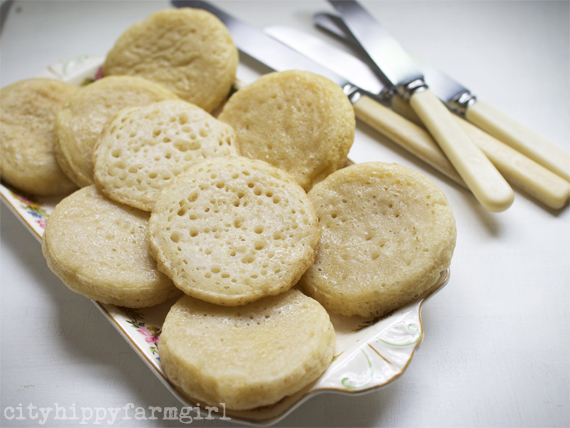
Crispy on the bottom, soft in the middle. There was something about the humble crumpet that most certainly appealed.

When I started making sourdough crumpets, (now not to blow my own crumpet trumpet here) well that appeal went through the roof.

The fact that they are dead easy, tasted good AND so much easier on the tummy being sourdough…well the requests started to pile up.

It seems everyone else in the family wanted in on the crumpet action as well. There really was quite a loud trumpet for crumpets.

Buttery fingers, dripping honey and piping hot cups of tea? Seems it really is the only way to eat crumpets.

Sourdough Crumpets

1 cup of sourdough starter

1/2 tsp bicarbonate soda

1/4-1/2 tsp salt

extra melted butter

You’ll need a whisk, egg rings and a frying pan to cook them in.

sourdough starter || cityhippyfarmgirl

Top Tips for Sourdough Crumpets

* Your starter doesn’t need to be refreshed for this to work. Straight from the fridge is fine, just leave it on the bench for a little to bring it back to room temp.

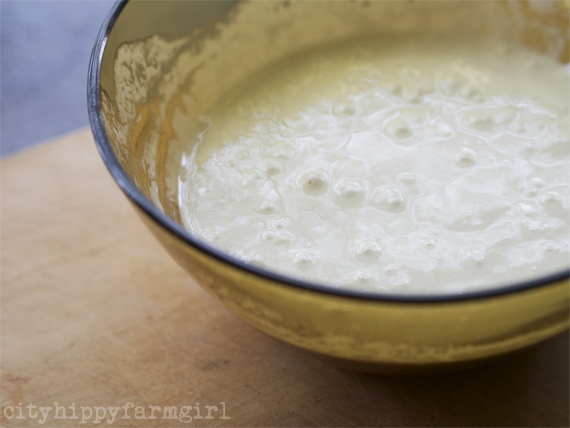
* Work on a fairly liquidy starter, if it looks to thick, just add a little extra water. You should see bubbles within the egg ring when you cook them. If it’s too thick you won’t see this.

* If you like the big holes, divide your starter mixture in half before adding the bicarb and salt, stagger the timing and add the second lot just before you start to cook them.

* Use a whisk when adding the salt and bicarb.

* When cooking them, pour the batter into the egg rings- gently rub some melted butter round the edges so the batter doesn’t stick.

* If your crumpets don’t have the bubbles you are after, take the heat up a smidge in the initial cooking period, then turn it down a little.

* After a few minutes of cooking gently jiggle the ring off and leave the crumpet to continue to cook. You can either flip it over to cook the top a little or once the crumpet is 75% cooked, add a lid and steam the last bit of the crumpet. This is purely to keep your holes completely intact so you are not squashing them.

* These can easily be frozen and toasted again later (once cooked the first time of course.)

* Great camping food.

* Also good for kiddo’s to do on the weekend.

****************

If you don’t have a sourdough starter and you are keen to give it a crack. This tutorial here will get you started.

sourdough crumpets || cityhippyfarmgirl

Banana Smoothie Ice Cream

Banana Smoothie Ice Cream || cityhippyfarmgirl
 This isn’t rocket science here. It may not even be life changing…

but it might just be helpful!

What to do- Make your every day banana smoothie as you normally would (go on, add in an extra banana for good measure.) Now pop it in the freezer and leave it for a little. For ease of eating, don’t wait until it’s frozen through.

Guaranteed to make small people happy on hot summer days, and big people rather content.

To make this, I whack in…

4 bananas

1 tsp vanilla

some milk

Whizz it all up and into the freezer. Drizzle on some honey just before eating and spoon out as you would regular ice cream. Just the thing for cooling off on a hot day.

************

Do you have any regular foods you tweak for extra hot days?


Crackers, pesto and for the love of good honey- ELC #9

Eat Local Challenge  || cityhippyfarmgirl 

Super duper easy rustic style olive oil crackers, with a carrot top pesto, creme fraiche and a little salt on top.

I had a proud moment with this one, all local, easy, seasonal, very frugal and kid friendly. Yes, kid friendly was the ultimate winner for me. They were gulping them down!

Bliss honey- south coast NSW || cityhippyfarmgirl

They were also keen on getting their hands on this honey. Honey is always a favourite staple in this household and local harvested honey always seem to crop up just at the right time, (like when we are about to run out.)

This one will be drizzled on natural yogurt for an easy after dinner dessert, popped into smoothies, spread on toast with tahini and baked with an oaty combination in the oven. Every drop used.

So where did it all come from?

flour- Demeter Farm Mill

olive oil- Lisborne Grove, Hunter Valley

carrot tops- Rita’s Farm, Kemps Creek

lemons- Champion’s Organics, Mangrove Mountain

creme fraiche- Pepe Saya

Honey- Sth Coast NSW (bought when we were visiting the area)

Eat Local Challenge || cityhippyfarmgirl

Interested in taking the Eat Local Challenge?

Just how local is local? Well this depends entirely on you. Only you know how you and your family eat. Raise the bar just a little from what you already do. If making sure the majority of your meal includes solely food produced in your country, than make that your challenge. If you want to make it a little trickier, go for produced in the same state…trickier still within 160km.

My aim is to really know where my food is coming from for at least one meal a month, (where I will be posting here in the last week of the month).

Eat Local Challenge #8

Eat Local Challenge #7

Eat Local Challenge #6

Eat Local Challenge #5

Eat Local Challenge #4

Eat Local Challenge #3

Eat Local Challenge #2

Eat Local Challenge #1

eat local challenge || cityhippyfarmgirl

Ricotta Pasta- Frugal Friday

ricotta pasta- cityhippyfarmgirl

pasta- cityhippyfarmgirl

The secret to this dish is quality ingredients in the pasta and the ricotta. Pay that little bit more or even better make your own of both.

Super quick, easy and frugal for a Friday.

Ricotta Pasta

cook up some great pasta

stir through some excellent ricotta

in a pot add some

local garlic and olive oil

quickly stir through some

frozen peas or if you are lucky, fresh ones

pop that on top of your pasta

and roughly rip some garden mint on top

and eat with gusto.

frugal-friday-pasta || cityhippyfarmgirl

Baked Ricotta- Frugal Friday

baked ricotta

This is a ridiculously simple dish, where the possibilities are endless of what to team it up with. Add extra different types of cheese, fresh garden herbs, chilli, bacon pieces, shallots… endless I tell you.

A side salad or some roasted vegetables to go with it and a simple Friday night dinner is done. Five minutes tops, to put it all together.

Baked Ricotta

350g ricotta

3 eggs

75g self raising flour

50g melted butter

1 tsp oregano

salt and pepper to taste.

Beat eggs, mix through everything else except flour, and then fold that through too. Pop it into a greased pie dish (or something similar) and bake at 200C until puffed up and golden, (about 35 minutes.)

everyday rolls

rolls

If you are a regular reader of this blog, you might have noticed I bake a little bread… ok, rather a lot of bread.

Bread making doesn’t have to be a chore. Once you get the hang of it, it can just become a part of your weekly routine. I make bread about twice a week these days, the kind of dough always varying depending on my time, tastes and what I might have on hand to chuck into the dough.

These everyday kind of rolls frequently pop up though. They are quick to make, always reliable, and easy to throw into the freezer to be retrieved later for school or work lunches.

Making your own bread keeps costs down and you get to decide what goes into it. No paragraph of “stuff” in my bread please.

For an easy ‘how to’ post, see here (how to make bread for the person who thinks they can’t, but really they can.)

Now this ratio is entirely adaptable. If you don’t want bran in it, simple replace it with flour or something like linseed/ sunflower kernels.

No olive oil? Replace with a little extra water.

If you don’t have a starter, just replace the 150g with another tsp of commercial dried yeast. (If you would like to make your own starter- like the lovely Laura did recently- step by step instructions are here. )

cityhippyfarmgirl

Everyday Bread Rolls

150g starter

1 tsp dried yeast

300mls water

1/2 cup unprocessed bran

2 1/2 cups flour

1 1/2 tsp salt

3 tbls olive oil

Add starter, yeast and water together. Whisk and leave for 10 minutes or so. Mix remaining ingredients together and leave for about 30 minutes. Add the salt and then mix or knead again, (I use my mixer.) The dough needs to be smooth and elastic. Leave to prove for a couple of hours, with a couple of knock backs in between.  Shape into rolls and place on a lined tray, allow to prove for another hour or so.

Cook for about 15-20 minutes at 220C-230C with steam.

Pistachio and Vanilla Panna Cotta with Persian Pashmak

panna cotta

I was a little nervous about using the Pashmak. I hadn’t really understood why until it came out in an email to the revered foodie Tania. I had asked her for some input on what to make with the goods and suddenly it became abundantly clear to me… I was nervous because this Persian fairy floss was dainty and delicate.

Dainty, delicate… and pink!

Not three words that I would usually string together in my cooking. Rustic yes, every day yes, basic yes…but dainty and delicate? Not really.

I’d bought it with grand visions, plans changed, ideas came and went, and so did the time. When are you going to use that stuff? said Mr Chocolate helpfully… Soon, really soon.

Cupcakes possibly… a cake could be good…or perhaps a little panna cotta?

Now panna cotta sounded like the right thing although along with never having played with pashmak before I’d never tried making panna cotta before, or used gelatine for that matter.

Well that was my answer wasn’t it. The one that I had the least amount of knowledge on, and only a fluffy idea forming, well that would be the one. Of course it would be, it’s the cityhippyfarmgirl way. Hackbaking I like to call it, (and if it all ended up in colourful sloppy mess in a bowl? I had a sneaking suspicion we’d still eat it.)

cityhippyfarmgirl

Pistachio and Vanilla Panna Cotta

300mls cream

150g natural yogurt

50mls water

75g raw sugar

 1 tsp vanilla

60 mls water

2 1/2 tsp powder gelatine

Sprinkle the gelatin over the water, dissolving it. In a pot add the cream, yogurt and sugar- gently heat to dissolve the sugar. Cool a little, and add the gelatine mixture and vanilla, dissolve again.  Pour into individual glasses and chill for about 3 hours.

40g lightly roasted pistachios- roughly crushed

Persian Pashmak*

*********

* Pashmak wilts in humidity…a lot!

If you like rose water, you can swap this for the vanilla.

a hot King’s crown

felt crown- cityhippyfarmgirl

felt crown- cityhippyfarmgirl

felt crown- cityhippyfarmgirl

It’s been hot here lately, really hot.

Tuesday got up to 43C, (that’s around 110 farenheit I think). Tuesday night 9.45pm, I was bringing the washing in and it was still 36C. With a not so lovely straight from an oven hot dry wind to add to it. During the day, with the blinds drawn, the kids playing in a cool water bath, my head turns to thoughts of- why oh why does this country not build better insulated houses? Insulation, double glazing… that’s what I was thinking about sitting on the floor of my bathroom. A country filled with well insulated houses and not an air conditioner to be seen…imagine that.

On hot days like this, going outside wasn’t particularly appealing so I needed an indoor activity that would keep The Monkeys interested. Monkey Boy had been asking me all about Kings and Queens that morning so a crown seemed like a good project.

Will you make me one Mama?

Your Majesty…it would be an honour.

Scrap felt and buttons from my stash, made two crowns. One for The King and the other for his brother the young Prince.

felt crown- cityhippyfarmgirl

a triumphant beetroot

We eyed each other off. Me on one side, it laying boldly on top. My shoulders slump a little, my breath exhales slowly and I gingerly pick it up.

I can’t help but sigh. There we were again, looking eye to… well foliage, with the same old dilemma. What to do with you beetroot?

You see, beetroot and I were not friends. We never were. Sure, his trashy cousin from the can was fine. Actually rather enjoyable slapped on to a weekend burger, but it was this guy. The plump, rounded, red, rooted vegetable that kept cropping up in my vegetable box. Time and time again, there he was. When will this damn beetroot season end?

I had tried to like it, I really had. Steamed…ick. Pan fried…ick. Drowned in balsamic and goats cheese…ick. Chocolate cake…ok, that one was fine, but I didn’t want to be making that all the time. Nothing seemed to make those red bulbs tasty, the earthy taste of it just stuck to it. I didn’t like it as a kid and I didn’t like it as an adult.

So I gave them away. Happily dropped them off to a neighbour. Passed them on to a friend at school. No dilemma, no thought… here you go, they’re all yours! Big lovely red bunches of them.

Another week went by and it happened again. A top of the vegetable box, sitting proudly in all its rounded red glory, the plumpest, most delicious looking fat beets you had ever seen. (Yes, despite me thinking they tasted ick, I could still value their beauty.)

I sighed… come on, you can do this I whispered to myself… try again. So I instagrammed them, got a lovely lot of suggestions of what to do with them and then turned my oven on. Roasted was suggested, and roasted it was. I hadn’t tried that way yet, maybe, just maybe this was the way to make it slightly palatable.

And it was, it so was. That earthiness that I couldn’t shake before seemed to have disappeared. Leaving instead a sweetness (that rather surprisingly) was quite delicious.

Roasted Beetroot and Pistachio Dip

On a tray into the oven with your whole fat beets at about 180C, (they’re done when you can slip a knife in easily.)

the skin can easily be peeled off when you’ve done this-

chop in to rough pieces and add

a handful of roasted pistachio

salt and pepper to taste

blitz it all with a hand held mixer

and then stir though four heaped dessert spoonfuls of natural yogurt

******

We ate this with a little spelt sourdough, and also on top of pumpkin soup- which had some great colours.

For all those who already eat roasted beetroot and are thinking well, duh Brydie…of course that’s the best way! What can I say? Sometimes, things run a little slower round these parts.

eight eco friendly Christmas gift ideas


local honey– use as a face wash and natural exfoliant, stirred into your morning chai, or drizzled over toast

box of homemade biscuits (recipe below)

gift tag card made up from a dried pressed flower

lunch date voucher- favourite packed picnic lunch

giant gingerbread person in a crocheted pocket

jar of homemade almond pesto

gift wrapping- I’ve talked about using old maps as wrapping paper before. This particular one was gold, as I had found an unwanted old atlas on the street that someone had lazily put out there. At first I was dismayed at the thought of it sitting out there unwanted and unloved, getting rain damaged. We certainly didn’t need another atlas… then I remembered wrapping paper. Sure it was a bit sad that I was cutting into this large beautiful book, but I was certainly better than just going in the recycling bin which is where it was headed. Team it up with some wool to hold the folding in place, and no tape is necessary.

For more wrapping ideas, have a look at this rather awesome site on furoshiki, other wise known as the Japanese art of fabric gift wrapping.

(For last years 12 eco friendly Christmas gift ideas, see here.)

Coconut Strawberry Hearts

250g softened butter

1 cup (220g) sugar

2 tsp vanilla

1 tsp coconut essence

1 beaten egg

1/2 cup desiccated coconut

3 1/2 cups (525g) plain flour

strawberry jam

Cream butter and sugar together in a mixer until pale. Add vanilla, coconut essence and egg, then mix through rest of ingredients. Lightly knead biscuit dough and roll between two sheets of baking paper to about 5mm. Pop into the fridge for an hour or so until firm, and cut out to shapes. If the dough comes back to room temperature while you are still cutting, being tricky to handle, just pop it back into the fridge for a bit.

Bake at 170C for approximately 15-20 mins, a very light golden colour. Allow to cool and then add half a teaspoon of strawberry jam in between the two biscuits.

Eat two immediately to see if they are ok to gift. Yep? Ok, should be good to go.

For a similar recipe see Coconut Jam Drops.

old fashioned brownie


My grandmother recently gave me her mother’s recipe for brownie. Now this is brownie not as most of the world today knows brownie, (a chocolatey, decadent dense slab.) This is brownie that was born out of two world wars and one great depression. A time when making do and frugality skipped hand in hand and landed with a plop on your kitchen table top.

During this period, sugar was readily available, locally grown sultanas were in abundance and a simple slab of this would easily fill up hungry bellies. My grandmother in the 1960’s did the same thing with her children, reducing the sugar somewhat (it’s achingly sweet) and filling my dad’s childhood bottomless belly along with that of his siblings. I remember eating great squares of it when I would go and visit. The ting of the metallic cake tin as eager hands would cut just a little more.

Twenty plus years went by and speaking with Grandma she reminded me of it again. Asking whether I would like the recipe for the bottomless bellies of my own Monkeys. I sure did, but…. couldn’t promise I would adhere strictly to the recipe. (I have a proud “Hack Baker” reputation to uphold here!)

(original recipe without the mixed spice)

First go, and I did follow it to the letter, (well almost, I didn’t have any mixed spice, which sort of loses the ‘brown’ effect. Ooops.)

It’s tooth achingly sweet, but gets a thumbs up from Little Monkey and visiting friends tasting it. One friend said it’s exactly as her grandmother would have served up during the same era in the UK. I do like it, it’s very plain and simple, but I think I could probably fiddle with it and jazz it up just a little.

So I did.

Now I had set my self rules with this though. It still had to be frugal and simple, with minimal butter, and no egg at all. I did wonder to myself as I handed out another slab for The Monkeys to eat, what my Great Grandmother would have thought about this slightly jazzed up version of her trusty old recipe.

I like to think she’d have liked it.

Great Grandma’s Brownie

1 cup sugar

1 cup water

1 cup sultanas

1 tbls butter

1 cup plain flour

1 tsp cinnamon, nutmeg, mixed spice and baking powder

Boil water, sugar, sultanas and butter together for approximately 5-10 minutes. Allow to cool, add remaining ingredients. Bake in a greased and lined tin at 180C for approximately 30 minutes.

My Old Fashioned Brownie

1 1/2 cups currants and raisins (or mixed fruit)

2 cups water

3/4- 1 cup brown sugar

50g butter

zest of a whole orange

1 tsp cinnamon

1/2 tsp nutmeg

1/2 tsp ginger

3 cups self raising flour (450g)

Add all ingredients together (except flour) in a pot and boil for about 5 minutes. Allow to cool completely. Add flour, fold through and pour into a greased and lined square tin.

Bake at 180C for approximately 40 minutes.

first you need the rotten bananas… then you get the cake

So what do we need to make a smoothie?

Rotten bananas… milk… honey… vanilla,  and some yogurt.

A little chuckle might have escaped from me at the first ingredient mentioned. I would have said it a tad more delicately, but hey, the kid was right. Rotten bananas make great smoothies.

I’m trying to teach The Monkeys that not everything needs to look their pristine best before using, and can be turned into other things. Those blackened bananas were just the obvious ones. Now what else could you do with those old apples, stale bread, drying rice?

Monkey Boy does get it, and the way his answers roll off his tongue so effortlessly makes me proud. Hopefully he won’t be one of those kids from my childhood saying “EEEEWWWW, look at your manky banana!” Instead, he’ll say “oh look, your bananas looking a little past it, why don’t you take it home and make it in to an enjoyable  smoothie or a cake”. He’ll say this just after he’s got his final exam results of straight A’s, and then probably ride off into the sunset on his white horse.

Or at the very least he might say, hey you’ve got a rotten banana, let’s go make a cake.

Either way I’d be happy.

Banana Cake

150g softened butter

150g raw sugar/brown sugar

350g  mashed banana (or 3 rotten ones)

2 tsp vanilla

2 beaten eggs

2 heaped spoonfuls golden syrup

2 cups self raising flour

*****

Whack it all in a mixing bowl. Mix it up. Grease and line a springform tin, then bake it at 180C  for approximately 45- 60 minutes.