I hadn’t heard of kombucha before I started blogging. Then I started, and voila, really it was a whole new fermentation food world opening up before me.
I started making sourdough, and the steady supply of all things fermented slowly trickled their way in. There were experiments of pickles, mead and kefir. Whole hearted love for sauerkraut, ginger beer and sourdough, and sometimes there was just talk. Kombucha was one of those talks.
I talked and I talked, until I really had to walk my talk. Kombucha was one of my last men standing so to speak, because in my head I had made it far more daunting than all the others for some reason. I kept putting it in the all too hard to think about basket.
Then something flicked, the idea had fermented enough *ahem*. Water kefir and I had done our dash, ginger beer was already established and I really was ready to move on to another drink. Ready for a new fermentation project to get to know and bring into our family’s life.
Kombucha, lets do this.
I had two false starts initially. One with a cranky scoby, (I say cranky, because the person who gave it to me was a little distempered and it seemed the scoby had a similar temprament. The scoby didn’t do anything and seemed long past it’s useful date. The second attempt was no scoby and instead, growing it from scratch. This method could have worked, maybe even should have worked but it didn’t and it was time for me to move on.
Then stepped in the lovely Sarah from Remedy Kombucha. Listening to my tales of kombucha woe on instagram, she offered to send me a scoby, would I like one? Well yes, yes indeed I would!
I’d had some of their kombucha at a Sandor Katz talk earlier on in the year. I knew it was good. I knew they knew their kombucha and I also knew if I couldn’t get this funny sounding little fermented drink happening with their help?…well, I may well have to hang up my fermenters flag for a bit.
First up a little info…
What is it?
It’s a fermented tea drink.
Why would I want to make it?
Because it’s good for you, full of probiotics, and who doesn’t like a little science experiment on their bench top now and then.
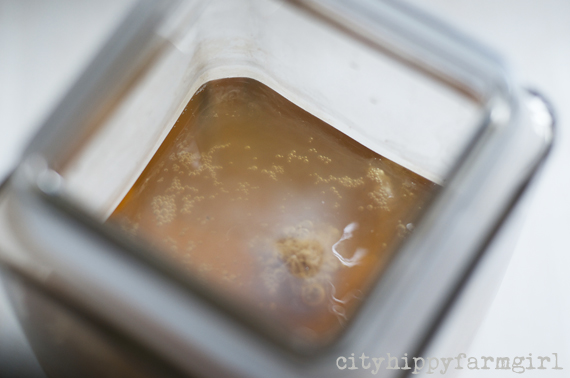
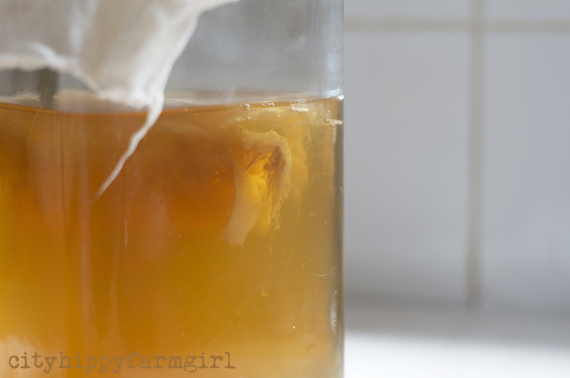
What is that thing on top? That’s a scoby, and a rather amazing little gelatinous thing that keeps growing more and more layers as time goes on. You can pass them on to other fermenting enthusiasts as a starter, (go on they’ll love you for it.)
So did I get it work? Yes, yes I did, and have been happily fermenting and drinking batch after batch of kombucha ever since. Thank you to Sarah for being so generous, helpful and best of all sharing tips on kombucha brewing.
I think I’m rather hooked on this stuff!
REMEDY KOMBUCHA’S EXTRA HELPFUL TIPS
* 175g raw organic sugar
* 35g organic tea
* 3.85L glass jar
* Muslin cloth (and rubber band)
* MOTHER (i.e. Symbiotic Community of Bacteria & Yeasts) & feeder (500ml)
Directions (makes 3.5L of Kombucha)
- Boil 1L of filtered water (let cool until water temp approximately 90 °C)
- Add tea (steep for between 5 and 6 minutes)
- Strain Tea
- Add sugar and stir until dissolved
- Fill glass jar with 2L of filtered water (room temp) *It’s important to use filtered water (including the water you boil)
- Add tea / sugar concentrate (i.e. 1 L) to glass jar
- Test temperature of full jar (body temp is perfect)
- Add feeder & MOTHER culture (0.5L)
- Cover with muslin cloth
- Place jar in a well-ventilated and warm area (24°C is the perfect temp), out of direct sunlight (but not in a cupboard).
- At around the 3 to 4 day mark a slight film (MOTHER) will have developed on the top of the Kombucha.
- Leave for 4 to 5 days before taste testing (it’s important not to stir or mess with your MOTHER during these early stages!). An easy way to taste test is to use a straw (i.e. push the straw down the side of the jar past the MOTHER).
- After approx 7 days the brew will be slightly sour but still fairly sweet (it will be perfect for drinking at this stage).
- The longer the brew is left the stronger (more sour) it will get. It’s personal preference how long you leave it at this stage – please be aware that if left for a long period the brew will eventually become Kombucha vinegar (and not really suitable for drinking – but great as a vinegar!).
MOTHER ongoing: for the first couple of brews, transfer the entire MOTHER from the previous brew. After your 3rd or 4th brews (once the MOTHER looks healthy and approx. 2cm thick) you can peal the new MOTHER (BABY) that grows on the top of the older MOTHER and use this in your new brew. Alternatively you can just rip the MOTHER in half and add this to the brew (and donate the other half – or make a 2nd brew!).
If you don’t have a scoby you can still grow your own-
To grow your own kombucha mother (scoby), pour a couple of bottles of Remedy Original (or another unflavoured brew) into a wide mouth bowl, cover lightly and leave on counter for a week or so. You will start to notice a thin film growing across the top of the liquid…that’s your new kombucha mother! You can then use this mother and the kombucha liquid to start another kombucha brew.
* I’m using organic green tea at the moment which seems to be working well.
Remedy Kombucha is on Instagram, Facebook and Twitter if you would like to know more about kombucha.
The book The Art of Fermentation is excellent if you want to really delve into the world of fermentation. It’s one of those forever books that I will always keep going back to.
***********
Do you brew kombucha? Would you like to give it a crack if you don’t already?


