Top Tips for making Beetroot Kvass

how to make beetroot kvass || cityhippyfarmgirl

Whether you are are just starting out on your fermentation journey, or have been dabbling in the delights of beneficial bacteria for awhile now, making beetroot kvass should be on your to do list. Here’s a couple of quick wonderful reasons why.

It’s Easy- Really, dead easy. Doesn’t require any crucial measuring of ingredients and is incredibly satisfying seeing the fermentation process begin within a relatively short space of time.

Your Liver- Will thank you, yes it will. Lots of info on what it does can be found here.

Probiotics are your friend- That’s good bacteria in a nutshell. You want your gut full of this stuff, full of a wonderful diverse array of different bacteria and enzymes. (Anything naturally fermented helps with this.)

seasonal beetroot || cityhippyfarmgirl

Now importantly how does it taste?

If you are already accustomed to the earthy tones of raw beetroot in fresh juices, this stuff won’t be pulling any surprises. Seeing as though I’m a relative newcomer to actually liking beetroot in it’s (ahem) uncanned state, to me it tastes like…licking dirt.

Being an avid fan of anything fermented though, I shall persist and my liver will thank me for it. (Or it had better, there has to be some perks of drinking this garden tasting juice.*)
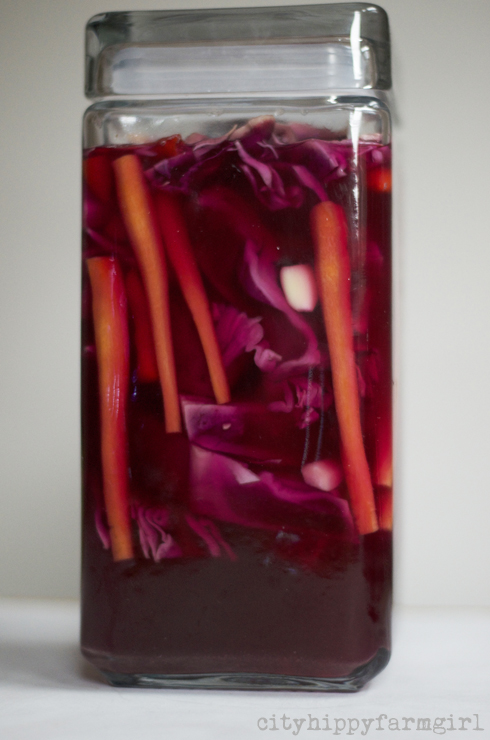
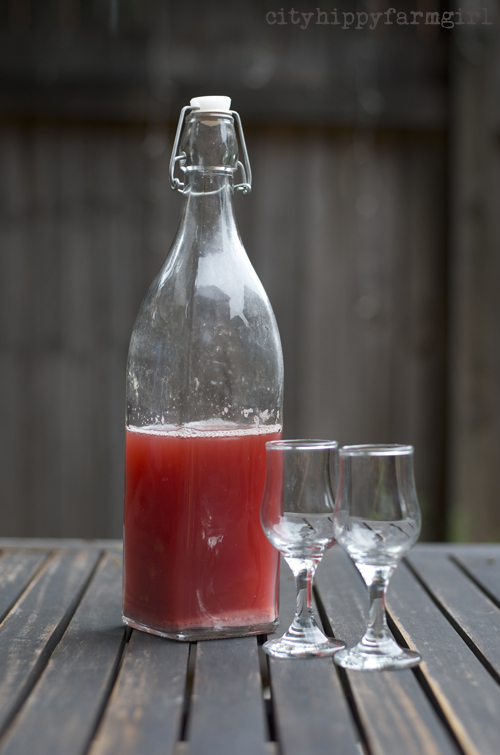
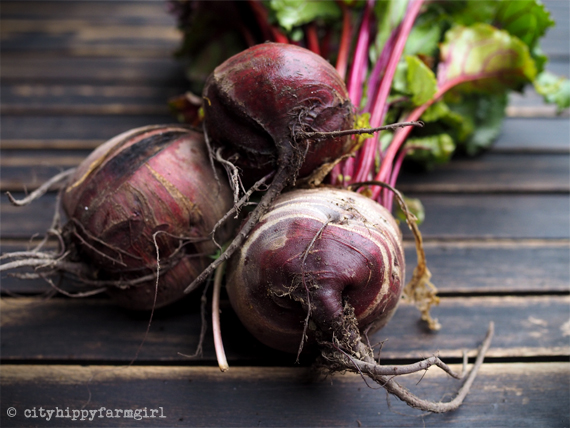
Making Beetroot Kvass || cityhippyfarmgirl

Beetroot Kvass

3 medium sized beetroot

1.5 litres cool boiled water

2 pinches of salt

Peel the skin off your beetroot and dice them up, approximately 1cm squares, if they are 2cm it wouldn’t be a tragedy however.

Pop the beetroot in a large clean glass jar, something with a wide mouth. You need the air yeasts to get to the kvass, so a large wide mouth jar is great to use. Add your salt and water, give it a little swish around to make sure the salt is dissolved and cover with a square of muslin (or paper towel) and a rubber band. Now to get things cracking a little earlier, I did add about 1/4 cup of sauerkraut juice to kick-start things a little, you could also add whey (as per Sally Fallon’s Nourishing Traditions) or nothing and just be dependent on the air yeasts that will get things fermenting.

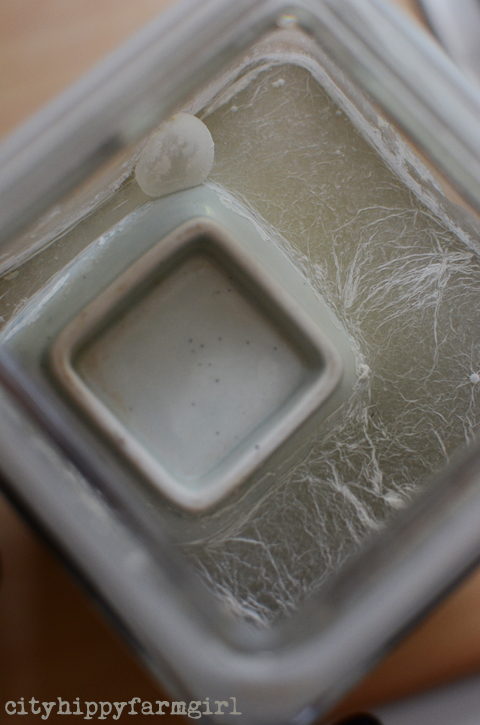
Have a good smell of it before you put the muslin on. Your nose, eyes and taste buds are the key to great fermenting. Smell the changes as they take place, see them and lastly give it a taste test. Let those three things guide you.

I started seeing bubbles with 24 hours surprisingly, however I let it ferment for a further few days. The length of time is going to depend on the season and how warm it is in your kitchen.

*************

If you are new to fermenting I highly reccommend Sandor Katz’s book The Art of Fermentation it’s easy to follow and really is a ‘forever’ book that you’ll keep dipping into dependent on what you’re interested in at the time.

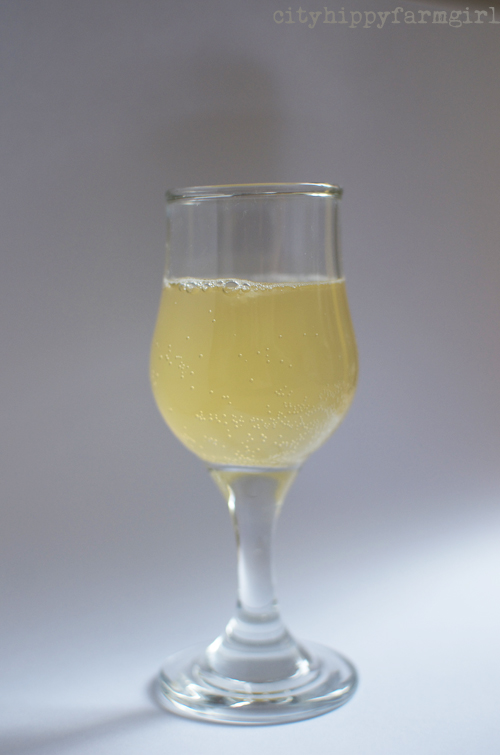
* You can add ginger lemon rind etc as a second ferment to tweak the flavour a bit.


7 of the Best Natural Cold Remedies

Sore throat? Hacking cough? Nose that’s doing its best impression of a tap turned on?

Yep, it’s that time of year. Time to fight bugs with your natural super powers, (most of which you’ll find conveniently already in your kitchen ready to go.)

Now, most of the time I feel it’s fairly inevitable that our family is going to get sick at some stage. Especially with three small kids, two of which are in school. While I can monitor hand washing and keep sick ones slightly separate here at home. At school? Well it can just be a washing machine of germs. I can’t do much about that, but I can prepare my family with the best cold remedies.

master tonic || cityhippyfarmgirl

7 of the best Natural Cold Remedies

Turmeric Tea– immune enhancer, liver detox, soothing, healing, anti inflammatory, all that good stuff is attached to turmeric.

Green Ginger Wine- I find it’s a good preventative one if you’ve got the beginnings of a scratchy throat, not one for the kiddo’s though obviously.

Citrus and Honey Shazzam- In a mug add, the juice of a lemon, juice of an orange, grated knob of fresh ginger, top it up with water and heat gently. Add 1 tsp of honey just before drinking and stir, (top picture.)

Master Tonic– I wrote about my experiments with this one recently over on Milkwood. Firey hot, but worth it, I’m completely won over with this one.

Tanya from Ecolosophy recently posted her Nanna’s Old Cold Remedy

Honey- immunity booster and cough suppressant. Dry coughs can be soothed a little by a teaspoon of honey (not for bubbas though.)

Garlic- get it into you, oodles of benefits in there.

************

What are some of your favourite natural cold remedies? 

kombucha- and how to make it

kombucha- how to brew it and how to look after your scoby || cityhippyfarmgirl

I hadn’t heard of kombucha before I started blogging. Then I started, and voila, really it was a whole new fermentation food world opening up before me.

I started making sourdough, and the steady supply of all things fermented slowly trickled their way in. There were experiments of pickles, mead and kefir. Whole hearted love for sauerkraut, ginger beer and sourdough, and sometimes there was just talk. Kombucha was one of those talks.

I talked and I talked, until I really had to walk my talk. Kombucha was one of my last men standing so to speak, because in my head I had made it far more daunting than all the others for some reason. I kept putting it in the all too hard to think about basket.

Then something flicked, the idea had fermented enough *ahem*. Water kefir and I had done our dash, ginger beer was already established and I really was ready to move on to another drink. Ready for a new fermentation project to get to know and bring into our family’s life.

Kombucha, lets do this.

scoby forming

scoby forming

I had two false starts initially. One with a cranky scoby, (I say cranky, because the person who gave it to me was a little distempered and it seemed the scoby had a similar temprament. The scoby didn’t do anything and seemed long past it’s useful date. The second attempt was no scoby and instead, growing it from scratch. This method could have worked, maybe even should have worked but it didn’t and it was time for me to move on.

Then stepped in the lovely Sarah from Remedy Kombucha. Listening to my tales of kombucha woe on instagram, she offered to send me a scoby, would I like one? Well yes, yes indeed I would!

I’d had some of their kombucha at a Sandor Katz talk earlier on in the year. I knew it was good. I knew they knew their kombucha and I also knew if I couldn’t get this funny sounding little fermented drink happening with their help?…well, I may well have to hang up my fermenters flag for a bit.

First up a little info…

What is it?

It’s a fermented tea drink.

Why would I want to make it?

Because it’s good for you, full of probiotics, and who doesn’t like a little science experiment on their bench top now and then.

What is that thing on top? That’s a scoby, and a rather amazing little gelatinous thing that keeps growing more and more layers as time goes on. You can pass them on to other fermenting enthusiasts as a starter, (go on they’ll love you for it.)

kombucha scoby || cityhippyfarmgirl

So did I get it work? Yes, yes I did, and have been happily fermenting and drinking batch after batch of kombucha ever since. Thank you to Sarah for being so generous, helpful and best of all sharing tips on kombucha brewing.

I think I’m rather hooked on this stuff!

REMEDY KOMBUCHA’S EXTRA HELPFUL TIPS

* 175g raw organic sugar

* 35g organic tea

* 3.85L glass jar

* Muslin cloth (and rubber band)

* MOTHER (i.e. Symbiotic Community of Bacteria & Yeasts) & feeder (500ml)

Directions (makes 3.5L of Kombucha)

  • Boil 1L of filtered water (let cool until water temp approximately 90 °C)
  • Add tea (steep for between 5 and 6 minutes)
  • Strain Tea
  • Add sugar and stir until dissolved
  • Fill glass jar with 2L of filtered water (room temp) *It’s important to use filtered water (including the water you boil)
  • Add tea / sugar concentrate (i.e. 1 L) to glass jar
  • Test temperature of full jar (body temp is perfect)
  • Add feeder & MOTHER culture (0.5L)
  • Cover with muslin cloth
  • Place jar in a well-ventilated and warm area (24°C is the perfect temp), out of direct sunlight (but not in a cupboard).
  • At around the 3 to 4 day mark a slight film (MOTHER) will have developed on the top of the Kombucha.
  • Leave for 4 to 5 days before taste testing (it’s important not to stir or mess with your MOTHER during these early stages!). An easy way to taste test is to use a straw (i.e. push the straw down the side of the jar past the MOTHER).
  • After approx 7 days the brew will be slightly sour but still fairly sweet (it will be perfect for drinking at this stage).
  • The longer the brew is left the stronger (more sour) it will get. It’s personal preference how long you leave it at this stage – please be aware that if left for a long period the brew will eventually become Kombucha vinegar (and not really suitable for drinking – but great as a vinegar!).

MOTHER ongoing: for the first couple of brews, transfer the entire MOTHER from the previous brew. After your 3rd or 4th brews (once the MOTHER looks healthy and approx. 2cm thick) you can peal the new MOTHER (BABY) that grows on the top of the older MOTHER and use this in your new brew. Alternatively you can just rip the MOTHER in half and add this to the brew (and donate the other half – or make a 2nd brew!).

 If you don’t have a scoby you can still grow your own-

To grow your own kombucha mother (scoby), pour a couple of bottles of Remedy Original (or another unflavoured brew) into a wide mouth bowl, cover lightly and leave on counter for a week or so. You will start to notice a thin film growing across the top of the liquid…that’s your new kombucha mother! You can then use this mother and the kombucha liquid to start another kombucha brew.

* I’m using organic green tea at the moment which seems to be working well. 

kombucha ready to go || cityhippyfarmgirl

Remedy Kombucha is on Instagram, Facebook and Twitter if you would like to know more about kombucha.

The book The Art of Fermentation is excellent if you want to really delve into the world of fermentation. It’s one of those forever books that I will always keep going back to.

***********

Do you brew kombucha? Would you like to give it a crack if you don’t already? 

When you can’t stop saying the F word

water kefir grains || cityhippyfarmgirl

water kefir grains

It quite often brings on a wrinkle of noses, pouty lips, raised eyebrows and sometimes, just plain disgust. It’s a word certainly not to everyone’s taste, and yet…

I just can’t help myself.

I repeat the word again and again, while most people switch off. Sometimes there is a low mumble of vague fained interest, with their silent words screaming bloody hippy, and yet I still can’t stop saying it.

fermented vegetables || cityhippyfarmgirl

Fermentation.

See I said it again. I say it again with joy and amazement. Fermentation, it’s not the dirty word that so many us think that it is, I promise, it really isn’t. On the contrary it’s a word that brings life and excitement to a conversation, just as it does to our palate and gut health.

The joy of coming across another fermenter in everyday daily life and talk is beyond exciting. It’s a conversation of respect, excitement and happiness. One of curiosity and intrigue and a use of words that generally don’t get thrown around together in the after school pick up line. There’s an understanding and unparalleled enthusiasm to hear more.

I’ve seen it before in other conversational areas that are usually thrown to societies fringes, (as that’s where I frequently lurk), an excitement that truly is contagious. When you hear another person, mention the mere whispered word of kefir or scoby…

Ohhh, you’re talking FERMENTATION! Yes you are, yes you are!

sandor katz || cityhippyfarmgirl

Sandor Katz at a recent fermentation talk and Nick from Milkwood

So with that enthusiasm in mind, I will not curb my tongue and lessen the frequency in eliciting the F word. I will shout it loud and shout it proud, to anyone that cares to listen. I will drop the F word into conversation where ever I see fit and from this day forth I shall proudly say…

F#%* yeah! I’m a fermenter!

the Art of Fermentaion Sandor Katz || cityhippyfarmgirl

Fermentation Bible

For more rather exciting dabbles in fermentation see these posts-

sourdough– how to make a starter

ginger beer that will put hairs on your chest

how to make sauerkraut

pride of the pickles

 mead– not just for Vikings

Mead, not just for Vikings

plum mead || cityhippyfarmgirl

I’d never really paid much attention to mead. I had heard of it certainly, but had never tried it. Not because I didn’t want to, I just well…didn’t pay it much attention.

But then fermentation stepped into my life. Sourdough certainly. Sauerkraut became a staple. Pickles started appearing and then I got a box of plums.

See it was the box of plums that pushed me to the mead. I needed to process the whole box, but space (as always) was an issue. I couldn’t store that amount of jars of jam or chilli sauce, nor could I freeze a huge amount either. I went looking, flicked through the trusty bible, figuring there must be some other way of fermenting with plums I hadn’t thought of.

So that’s how mead stepped in.

I read, planned and hesitantly started. Within 24 hours there was fermentation action happening and that was just a little bit exciting. There are just three ingredients in there- honey, water and plums. That’s it, and then the bottle started bubbling like an excitable volcano. The excitement was contagious. I continually checked and stirred it. I thought it would take about a week for bubbles to ease off but it only took 5 days (Sydney, Australia summer time). Strained and bottled, the taste test.

It was good. I thought.

I say I thought, because at this stage, I still had no idea what mead tasted like, so had nothing to gauge it by. It’s hard to tell whether there is much alcohol content. The test would be to down the bottle on an empty stomach and see what happens, but that didn’t seem likely to happen.

Ten days into the fermentation, (second fermentation period) the mead developed a thin mould layer. It had a closed lid, so I wasn’t quite sure what to do. I did what any hack city hippy would do, and shook it in, ignored it and popped it in the fridge.

But not before I had a good smell of it. I have finally gotten to trust my nose. With all my fermenting experiments I always smell them along the way. Observing differences, subtle changes and really trying to identify when and where things start to change. I trust my nose and if I’m not sure, well I don’t use it- The Plum Mead smelt fine, and while several weeks later into the fermentation process the taste was fairly underwhelming, I am keen to try it again.

golden coloured mead || cityhippyfarmgirl

Next, I started on a Honey Mead, (or honey wine). Raw honey and unchlorinated water, that’s it.

Now according to Sandor Katz, (who I was lucky enough to hear speak recently) raw honey already contains abundant yeasts- with pasteurisation or cooking killing them off.

“The yeasts are inactive so long as the honey’s water content remains at or below 17 percent (as it is in fully mature honey). But increase the water content just a little bit beyond  that and the yeasts wake right up.”

And so I did. I woke those little things up with a ratio of 1:4, following the instructions, and intermittently smelling it. At the end of three weeks I have a lovely light (green) sweet tasting mead. I can’t liken it to anything else I’ve ever had, but it’s good and I think this could be the beginning of many more meads to come.

So what do my two experiments with mead making have to do with Vikings?

Well according to Norse mythology, mead seems to be heavily linked with the Norse god Odin and along with it, anyone that drinks mead may become a poet or scholar. I’m still waiting for poetic inspiration, but perhaps I simply haven’t made or drunk enough of the honey gold beverage?

************

All of my mead making inspired by 

The Art of Fermentation- Sandor Katz

pride of the pickle

fermented pickle- cityhippyfarmgirl

It worked! It really worked!!

It’s not every day that you excitedly talk pickles with your landlord’s handy man. But I did, and here I was again, excitedly telling him over the phone that the very same pickles we had been scrutinising several days earlier had indeed worked, and I was just a little bit excited.

I had made sauerkraut before, and that was certainly easy enough, (although the last batch did have to tossed out due to a truly unimaginable miasma settling in my kitchen-due to it being far too hot to be fermenting sauerkraut. Bless my birkinstocks, and oh my goodness…it stank. It really did.)

So with the sauerkraut in mind, I was a little nervous embarking on the pickles. Consulting the fermentation bible though and it seemed hot weather was still ok to work with. I had some wonky farmers market cucumbers that seemed perfect for pickling. So lets give this pickle thing a crack.

pickles- cityhippyfarmgirl

Each day I would study the jar, looking for changes. On the third day I found them. It started going a little cloudy, then on the fourth there was a scum on the top. I wasn’t sure, I really wasn’t. I’d just seen the week before, a 20cm high mould growth from the top of someones pickles. Was this the beginning of a similar path??

fermenting pickles- cityhippyfarmgirl

surface mould on the fermenting pickles- small ceramic dish to weigh the pickles down and keep submerged.

Then the handy man came over. After tending my minor fixing-things, talk turned to the mouldy scum pickle concoction on my bench top. They’re fine, he assured me, sunlight, skim the scum off and they are nearly ready due to the change of colour. Turns out my handy man’s mother had decades under her belt of making pickles, just like the method I was trying to replicate. Luck indeed, I had in my kitchen, years of pickle knowledge; albeit once removed, (but that was certainly good enough for me.)

Now I was curious, really curious.

Another two days went by and then I was ready. Mouldy scum scooped off (since it had appeared I had done it every 12 hours) and a pickle gently rinsed.

I sniffed, smelt like pickle.

I admired, looked like pickle.

I nibbled the end…

pickle- cityhippyfarmgirl

It tasted like pickle!

Douse me in cheese and roll me in a sandwich. Yes indeed, I had myself a pickle! Well pickles. I had a whole bunch of these glorious naturally fermented pickles and I was just a little bit excited.

Which is why several hours later, when I had to make a phone call about all things handyman related I couldn’t help but blurt out over the phone…

It worked! It really worked!

theartoffermentaion || cityhippyfarmgirl

*************

Last year I tasted a three dollar jar of pickles from Germany. Aside from the massive food miles for such a simple jar of food I also got a migraine type headache within half an hour of eating one of the pickles. I did it twice more before ditching them and vowing never again, not even in a moment of pickle weakness.

Eating anything naturally fermented is filled with wonderful probiotics. If you would like to know more about the awesome world of fermentation I highly reccommend this book and if you are super duper quick (and in Australia) you get to hear and learn from the man himself.