Long Weekend Lemon and Olive Oil Cake Strikes Again

lemon and olive oil cake || cityhippyfarmgirllemon and olive oil cake recipe || cityhippyfarmgirl

Long weekends,

call for longer sleeps,

longer conversations,

longer socks,

long sips of hot chai

and lemon cake.

Lemon and Olive Oil Cake

From here on in, all long weekends held in June will be marked by the baking of lemon cakes. (Best eaten in colourful socks, sipping chai and surrounded by excitable conversation.)

Recipe here.

simple lemon and olive oil cake || cityhippyfarmgirl


Seasonal Eats- The Winter Edition

brussel sprouts || cityhippyfarmgirlbeetroot || cityhippyfarmgirl

The eggplant and basil have slowly slipped away and been replaced with potatoes, brussel sprouts and beetroot. Meals are being planned around pumpkin, mandarins are being snacked on and kale? Well kale is fairly consistently there.

I’ve said it before, but I will say it again. I feel that we are incredibly lucky living in an area that has such abundance in food varieties, despite the different seasons. The cooler seasons where in some parts of the world, the eating would start getting incredibly restrictive, here just gives us a different array of colours, tastes and still we get to keep it relatively local. That right there, is pretty damn wonderful.

Some delicious things to look out for coming into the winter season

beetroot (roasted and turned into dip)

broccoli (served olive oil and awesome salt)

cabbage (sauerkraut yes please)

cauliflower 

daikon (pickled)

kale (sausage rolls yes indeed, recipe to come for that one)

leek (leek and potato soup)

potatoes

carrots

limes

mandarins

quince

***************

What’s cooking in your kitchen at the moment? Is it now the beginnings of Winter or Summer for you?

If by chance you live in Sydney and you would like to try out a seasonal-delivered to your door fruit/vegetable box- OOOOBY is offering any readers $15 off your first box if you type in CITYHIPPYFARMGIRL as a referral code. 

Jammin’ with Mariana

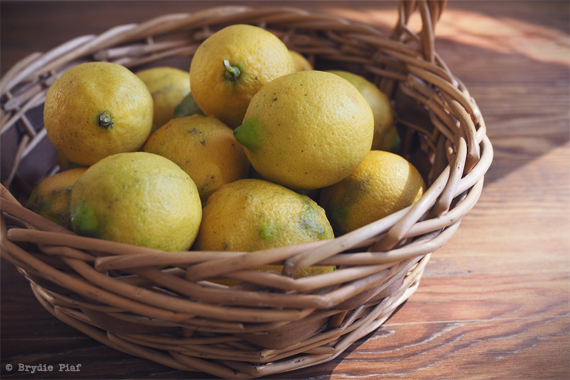
I love making jams and marmalades. For me it’s the perfect way to preserve the season. Vanilla Plum Jam- a gentle reminder of hot summer days in a jar, when eaten in the cool of winter. Tarty Citrus Marmalade- Autumn love and enjoyed every week of the year on my sourdough toast.

I started making jam and marmalades back when I was a teenager. I’d watched my mum do it countless times and just learnt by watching. A couple of decades on and I still happily make my preserves although I’m not particularly good at why I do certain things, I just do.

For this reason I thought I would do a Q and A on jam making, with the ever knowledgable Mariana from Thru My Kitchen Window. Mariana’s pantry is the kind of pantry I would quite happily raid any night of the week. Those darkened shelves, I know would be lined full of beautifully made preserves. Made with a basket full of love and knowledge, (which is a pretty awesome combination when it comes to cooking.)

how to make jam-cityhippyfarmgirl

Jammin’ with Mariana @ Thru My Kitchen Window

Q: What is the best kind of fruit to jam and do I use over ripe, or under ripe fruit?

A: Fruits that grow successfully or are native to the area where you live.  Apples would be an exception; for example I live in SE Qld and I source my apples at the local farmers market. The apple growers are from Stanthorpe (over two hundred kms away) and I know the apples were picked up to three days before market. Under ripe or close to just being ripe are the best fruit to use in jamming.

mulberries

Q: What is pectin, why do I need it and which fruit has the most? Can I use that packet stuff that says Jam Setter?

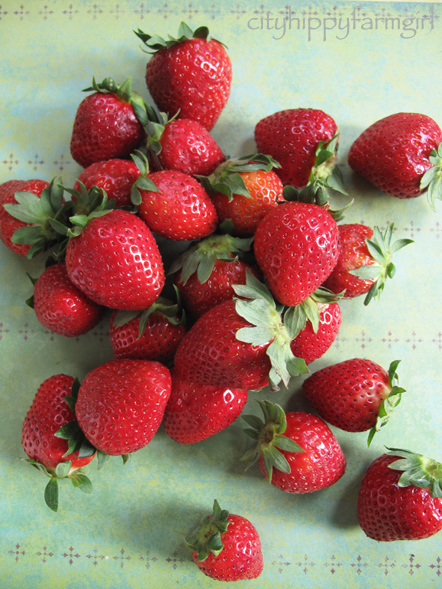
A: Pectin can be a hard thing to understand until you’ve worked with quite a number of fruits; at least it was for me. I would describe pectin as a ‘gummy-like substance’ that oozes from the fruit while it’s simmering. Adding lemon juice to simmering fruit helps to further release the pectin. Pectin levels are different in every fruit, eg; apples are high; strawberries are low.  Preserve books generally contain information about the pectin levels in most fruits; consult them or the net and use as a guide to help you achieve the best setting. It’s worth noting that once you add the sugar to the fruit you are no longer enabling the pectin to release; so do not add sugar until you’re happy with the softness or firmness of the fruit. You may think the rind in your marmalade is very soft, but once the sugar is added it actually assists in toughening the skin, so don’t be afraid to cook down fruit with rind, unless of course you like a firm rind.  The sugar will cook with the available pectin to form a gel or set; you may need to persist a few times till you get the setting right. Don’t give up, it’s all learning.

I’ve made and used my own liquid pectin stock. It’s very good; but some of the gels have been too firm so in future I’d only use it with poorer pectin fruits if at all.

I don’t use packet jam setter so I can’t comment on that one.  I’ve heard that these setting agents can reduce the intensity of the flavour in the fruit. However if you’re new to jam-making then anything that will help to boost your confidence in setting the jam can’t be such a bad thing.

how to make jam- cityhippyfarmgirl

Q. How long do I cook it for? Is timing the same for every fruit or does it vary?

A. Cooking times for jams all vary, for example strawberry jam could take 5mins to simmer and another 5 or 10mins for setting, whilst for strawberry and apple jam, simmering could take 20mins till the apples are soft and up to another 20mins till it jells. It’s all approximate unfortunately as so many factors depend on the condition of the fruit. For instance if you use overripe strawberries you’ll most likely end up with a strawberry sauce with very little chance of setting. Unblemished, just-ripe strawberries will in the same cooking time will give you a much better jam result.

jam

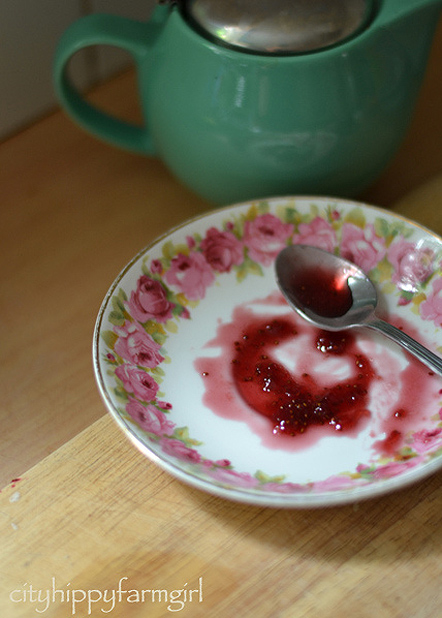
Q.What’s the saucer test, and how do I know when it’s ready? Also, I’ve heard about jam getting wrinkly, what does that mean?

A. I used to do the saucer test. Basically it’s to test how well the jam is jelling. Place a teaspoon of the jam onto a chilled saucer that’s been in the fridge.  Allow a couple of minutes to cool. Then with your finger gently push the jam from one side to see if it ‘wrinkles’. If it does then your jam has reached setting point; cease any further cooking. If it doesn’t wrinkle then presumably it needs more cooking.

These days I use my wooden spoon to determine the setting of my jam, jelly or marmalade.  Dip the spoon into the centre of the saucepan and slowly lift the spoon well above the pot. Tilt and watch how the liquid drips back into the mixture. If it runs off quickly, then keep cooking.  When a setting point is reached, the jam should fall off the spoon in small clumpy teardrops . I much prefer using this method than the saucer test but it does take practise to recognise the signs.

blueberries

Q.Skimming scum off the top doesn’t sound very pleasant, do I need to do that?

A. Yes. It’s unavoidable that some impurities will rise to the top as it should. This is a good thing.  Take a metal spoon and skim away from the sides. Don’t attempt to skim from the centre of the pot; you’ll scald yourself.  With some fruits there’ll be lots of scum while hardly any with others. Generally cooking the whole fruit albeit chopped, will produce greater scum. This is usually the case for jelly-making, and even more important to remove because jellies can be quite transparent and therefore the clarity depends on how well you skim the scum away during cooking.

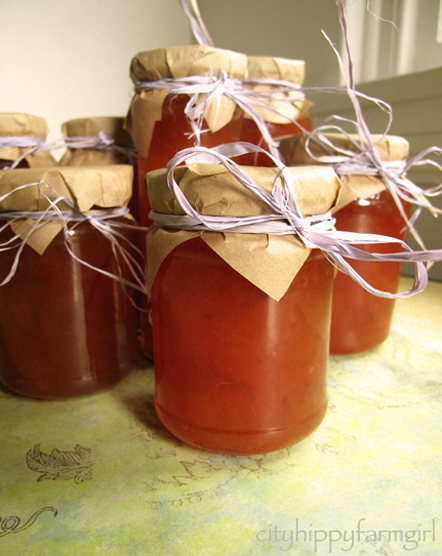
Q. How to sterilise your jars and do I really need to? There seem to be so many different methods to do this?

A. Consult ‘canning books’ or simply ‘google’ to see recommendations on how best to sterilize. I always wash the jars and lids together in hot soapy water; rinse in boiling water, sit on a rack that’s also been placed in hot water.  Arrange the jars on a baking tray bottom side down and place into a preheated conventional oven at about 80degrees; leave while the jam is cooking. Don’t put the lids in the oven till five minutes before the jam is ready. Your jars and lids should be quite ‘hottish’ just before filling. Once you’ve filled your jars, seal immediately. Place the jars side by side in a high sided tin or tray.  Cover with a tea towel to help cool down slowly.  I’ve yet to encounter a problem doing it this way. I read that filled jars should be reboiled for ten minutes, but I find it all so tedious and an extra step in what can already be quite an arduous task.

jamjars

Q. How long does the jam keep for?

A.The greater the sugar content the longer the keeping time. If you use one cup sugar to one cup of fruit then easily a year and even up to two years. You may get some discolouration of the jam as it tends to darken a little the older it is. These days I prefer to use a ratio of between sixty or seventy five percent sugar to the fruit. In this case it’s best to use the jam between six months and up to a year. At least that’s my experience.

citrus

Q. If I have never made jam before, what might be an easy fruit to start with?

A.Choose a fruit that’s in season, one with reasonable pectin levels.  Add some Granny Smith Apples – this will improve your chances for a really good set – and help your confidence for the next jam-making session.  If you want to be really adventurous, go for making marmalade. You’ll have extra work with finely shredding rind, but your chances for a good setting will be excellent as citrus have high levels of pectin.

Q. And lastly, what’s your favourite jam?

A. I love a really good orange marmalade; it’s hard to beat.  However; dabbling in lilly pillies and jaboticaba fruit the last couple of years has been thrilling and has produced some wonderful discoveries.  And the mulberry season this year was one of the best ever. The mulberry and lime jelly I made was so intense in flavour it was unbelievable. My gifts to people turned into a nightmare! They were begging me to buy more of the stuff, so I’ll have to say mulberry jelly is my favourite. One thing it did confirm, there’s nothing quite like the taste of a home-made preserve.

************

A huge thank you to the lovely Mariana for taking the time to do this and if anyone has any other questions that haven’t been covered here, please do ask in the comments. Hopefully I, Mariana, or someone else can jump in and answer. Jam making isn’t scary or complicated, it’s following some general rules and then you are away, ready to preserve the season. 

the vegetable that everyone forgot- Frugal Friday

Cauliflower.

Remember that one? It’s got a bad rep, as the tastless tree like cousin of broccoli. It’s not though.

In season now, it’s cheap, tasty and adaptable to oodles of dishes… just right for Frugal Friday.

Cauliflower and Potato Soup

A splash of olive oil

Half a head of cauliflower

One large zucchini

Six small dutch cream or kipfler potatoes (the waxy kind)*

One cube vegetable stock (or your own if you have it)

water

Cook it up until soft. Then blitz it up with a hand held blender. Serve with a scattering of lightly fried sourdough breadcrumbs, for some textural crunch.

* Remember all potatoes are not created equal. A good potato can be the making of your dish.

seasonal cooking for June

The seasons have changed and along with it so has what comes out of the kitchen.

I like that. Seasonal menus and changing what goes on our plate according to availability and the weather outside.

Orange and Coconut Cake, an easy one to make up a head of time. Keeps well, using some of the delicious new season oranges about. Try to find some organic oranges, as they shouldn’t be waxed. You don’t particularly want zest of wax in your cake do you?

I was lucky enough to get a lovely load of my dad’s backyard citrus.

Ribollita adapted from this Jamie Oliver recipe. A really easy meal based on vegetables on hand and using up stale bread. Frugal, seasonal, healthy, local produce and tasty. It doesn’t get much better than that.

Will the kids eat it? If you have miracle children they might, mine wouldn’t touch it.

So what else is looking tasty round these parts in June?

mandarins…. eaten by the bucket load at the moment. Easy snack.

radish… finally sliced in salads

pumpkin… thai pumpkin soup with a swirl of coconut cream.

cauliflower… I’m thinking this risotto, with extra chillies please.

kale… raw or cooked green goodness. SUPER food.

leek… base for a hearty soup or sitting in the bottom of a quiche.

mushrooms… cooked up in some olive oil with a side of polenta. Yum!

********

What seasonal cooking are you doing?

puddings and puddles

The sun sets early now, when there is a sun that is.

It’s been cold, wet and grey here lately. The days have the stamp of winter on it.

Looped scarfs. wet puddles to jump in, bare trees and mornings starting with wailing black cockatoos overhead.

This is our winter. Not a winter with snow, and sub zero temperatures but a Sydney winter non the less. A winter that calls for heartier food. Slow cooked soups, polenta dishes and perhaps the odd pudding or two.

Sticky Date Pudding

125g softened butter

80g brown sugar*

2 beaten eggs

1 tsp cinnamon

zest of an orange

300g self raising flour

220g dates (I used medjool dates)

1 tsp bicarbonate soda

125mls boiling water

Take any seeds out of the dates and split the dates in half. Pop them in a bowl, add the bicarb and boiling water, set aside.

Cream butter and brown sugar together. Add beaten eggs, orange zest, and cinnamon mix well. Then add date mixture and fold through the flour.

I baked these in individual size cake pans for approximately 25 minutes at 180C. You can easily bake it as a whole cake, and adjust cooking time to suit.

* you could add more sugar if you like your whole pudding experience to be on the sweeter side. I think there is enough sweetness in the sauce though.

Sauce

300mls cream

110g dark muscavado sugar

100g butter

Bring cream to a simmer, add sugar and butter. Stir continuously until butter has melted, (and don’t let it boil over!)

Now with all that pudding energy…best go find some puddles to jump in.

Golden Syrup Ginger Puddings

Winter has drawn to an end, and along with it the need for heavier, warming desserts after dinner.

Eeeek, hang on a second… I’d barely got started! I had mental puddings lined up, still waiting to be made. Hold off blossoming flowers, sit tight warming day time temperatures… there are puddings to be made. 

I wanted to make something without a whole lot of hassle, and not crazy, crazy sweet. (If you want to up the sweet, put more golden syrup in the bottom.) Easy to quickly put together and heats well over the next few days… or eaten cold in the middle of the night when hunger knocks on your door...*ahem*

Golden Syrup Ginger Puddings

200g softened butter

100g brown sugar

2 tsp cinnamon

2 beaten eggs

2 cups of flour (300g)

1/2 cup yogurt (125mls)

handful chopped uncrystallized ginger

Cream butter and sugar, add beaten eggs and remaining ingredients. In ramekins, a couple of spoonfuls of golden syrup (depends how sweet you want it) and then spoon pudding mixture on top. Place ramekins in a tray full of water in the oven. Water should come about half way up the sides of the ramekins. Bake at 190C for about 40 minutes, (cooked when a skewer comes up clean.)

sunshine, bare toes and biscuits

Sunshine. A whole bundle of it.

24C and it’s still another month of winter to be had. I think the winter season might have other ideas though…

That’s all people, we gave winter a red hot go. You all wore your scarves, your gumboots, your big jackets, and complained a whole lot. The other seasons and I have had a little regroup and decided that spring may as well pop on over as they wasn’t much else happening in her neck of the woods anyway. Enjoy. 

Fair enough I say. Enjoy we shall. You can’t really complain about clear blue skies, and a warming sun on your back to warm some tired old bones. Tired old bones this week as the Little Monkey and I have been wallowing a little in self pity. Trying to fight off a rotten cold that just won’t seem to go away. I tried wallowing for a little, it didn’t much work for me though. Monkey Boy still needed to get to school, Mr Chocolate was busy working and dinner still needed to be on the table. Nope, wallowing had to be put aside. Besides, Little Monkey was far sicker and needed a calm hand to help him through it all, as he really was feeling miserable this week.

Biscuits helped. I thought they might. Jam ones in the middle… but they didn’t help enough, (that’s when I know the little fella is really sick.) They helped Mr Chocolate and Monkey Boy though, as they happily ate his biscuits.

Then the week came to an end and so did the cold. A lingering cough for the little fella, but he’s right back to looking for his biscuits.

So an afternoon snack, packed off to the local park for  some sunshine, bare toes and biscuits.

Coconut Jam Drops

200g softened butter

1 tsp vanilla

75g raw sugar

90g desiccated coconut

150g self raising flour

75g plain flour

splash of milk- (approx 2 tbls)

jam

Soften butter, cream vanilla and sugar together. Add the other ingredients and mix well. Roll them into tight little balls and use something lying around the kitchen to make a little indentation for the jam to go in. 1/4 of a teaspoon or so of jam popped in and bake at 180C for about 20 minutes.