my history

 Weekend filled with touching base with family

Stories told, old photos softly touched. My grandparents history captured in a black and white rectangle.

My history.

Walking around streets that used to be my streets, somethings have changed. Somethings have not.

My old park stands still so much the same.

The Monkeys run, climb, explore gnarly trees, dangle legs on old cannons, and swing on swings that are so very much shorter.

No secret broken palings to slip through unnoticed into the special garden, only to be chased out again by the gardener. Instead open for everyone to explore.

Roses still there to ride bikes between. Thorns still there to break off, lick, and stick on your nose like a rhinoceros.

Bubbler still there to cool an afternoon of excited playing.

 Grass still there to picnic on, kick balls, fly kites and

run until you are so very dizzy.


one vanilla slice and a small serving of copyright please…


 The humble vanilla slice is one of those bakery treats that I’ve always found hard to walk past. I’ve written before of my love for all things custard, with the peak of the custard love sitting right in wedged between two lots of pastry.

This recipe had sat for four years in my ‘folder’, awaiting the day when I would finally give it a crack. I know the day I ripped it out of the magazine, as the date is on the bottom. Torn out from The Good Weekend, a magazine insert from the weekend paper The Sydney Morning Herald. Also, it’s a recipe from Matthew Evans. It seems I’ve been unknowingly drawn to his cooking long before I pushed him up on to my gourmet farmer pedestal.

So there the recipe sat. Waiting for the right moment. I had posted about custard biscuits and a reader commented on snot blocks. Snotblocks were otherwise known as the  vanilla slice in certain parts of 70’s Australia. With the mere mention of the snot block, I was drawn back to the torn out folded recipe, wedged between the caramel mudcake and profiterole recipe.

What exactly was holding me back from giving it a go? Right, get cracking girl. So I did. I even followed the recipe to the letter, every little step of it. I didn’t stray, not even a tiny tweak, (well almost). Which was very unlike me.

So did it turn out? Ohhh, yes. Yes it did. It actually exceeded my expectations as the recipe didn’t have an accompanying picture. I just crossed my fingers that it was going to work out, and kept visualising my snot block, I mean vanilla slice.

So I made it, it was delicious, now where’s the recipe?

This was where I came a little undone. I had followed the recipe to the T. No adaptations, no deviations, no tweaking and definitely no hack. There was no evidence of the recipe online, the magazine isn’t even on line, so I couldn’t really give credit where it was due. I didn’t want rip off the magazine I’d been reading for the past 20+ years and I didn’t want to rip off Matthew Evans.

I ended up asking a Good Weekend editor what to do, and some emails were sent back and forth without any conclusion being made. Maybe I was too small of a blog to be bothered with and maybe they just weren’t sure either of what to do? I read David Lebovitz’s post on recipe attribution, then I read it again.

Just when I had decided to let it all go, approval came through. The recipe was given the nod as long as it had all the appropriate acknowledgements.

Vanilla Slice 

from Matthew Evans- Good Weekend December 1st, 2007

2x 25cm square pieces butter puff pastry

80g 2/3 cup cornflour

1 litre milk

40g butter

6 eggs

200g (1 cup) sugar

3 tsp vanilla essence

130g (1 cup) icing sugar

1 tbls extra milk

Oven on to 220C. Pop the pastry on to baking trays and prick all over with a fork. Use something with some weight and it can go on top of the pastry to stop it from rising, just use some baking paper to prevent sticking between it, (I just used a spatula to flatten it half way through cooking). Bake 15 minutes or until golden brown and cooked through.  Cool and trim pastry to fit 22cm square cake tin (or something similar). Line the tin with a strip of baking paper to lift the slice out once it is set. Pop one piece of the pastry in the bottom.

For the custard, add a little of the milk with the cornflour to dissolve. In a pot, heat the remainder of the litre of milk with the butter. While it come to the boil, crack the eggs into the cornflour paste, tip in the sugar and whisk until smoooth. Whisk in the milk, and then return to the heat in a clean pan.

Whisk continuously until the mixture comes to the boil and simmer for 1 minute. Remove from the heat, add the vanilla, then tip the custard into cake tin. Top with the other piece of pastry, turning it over- smooth side up. Press down and allow to cool.

Next either make a barely runny icing with the icing sugar and extra milk or simply dust with icing sugar. Pop in to the fridge until cold. Remove from tin and cut into squares, wiping blade between cuts.

Should make about 16 squares, (unless you do monster sized ones.)

*******

One other little thing I did do differently, was the pastry. Mathew Evans reccommends the Careme butter puff pastry or as second choice Pampas, (likening all others to ear wax). I did get the Careme, but didn’t pay attention to how many grams there were in there, so fell short of the amount of pastry I needed. I baked it as per instructions but then really carefully halved it. Because the pastry was lovely and obliging, it was pretty easy to do, and it was still enough pastry to withhold all the custard.

So what did I learn from all this?

Waiting, and making sure I felt comfortable with the whole re-publishing process definitely paid off. Getting approval to use the recipe on my blog without all the lip biting and frowning that was going on before, felt right.

And I still love vanilla slice.

It’s delicious.

*******

Good Weekend is a weekly magazine insert within the Sydney Morning Herald. 

Matthew Evans is Gourmet Farmer, author of The Real Food Companion and sells via Rare Food.

If you are not sure about posting a recipe, this is a really good place to start.

Vanilla slice sounds much nicer than snot block.

making stuff…it really does feel good

Making stuff.

Bless my Birkenstocks it feels good. This last long weekend saw a flurry of sewing machine action, as I wasn’t home and distracted by the usual distractions. Instead distracted by these.

 Lap top cover. New lap top, needs new lap top cover. Thanks to this lovely lady, I wanted to make my own. Thanks to my mum’s 40 years of sewing expertise I didn’t throw it all in, after a hissy fit when the needle got stuck, the foot got stuck, and the foam got stuck. (Foam sandwiched between the fabric). A bit of granny geek going on here… I think it needs some crochet action on it though. Crocheted triangle or flower?

Grey cowl for my bandito Monkey Boy who stood still long enough for a slightly fuzzy photo.

Green cowl for my bandito Little Monkey who wouldn’t stand still and thought it was hilarious I could only take a really fuzzy photo.

 Quilting. I get it, I so get it. I understand why people get hooked on stitching little scrappy pieces of fabric to other little scrappy pieces of fabric. I only managed a doona cover last time, but this time it’s quilted. It’s tiny. Possibly the tiniest new baby quilt you will ever see, but I did it, and I’m itching to do more. (Sarah, if by chance you are reading this, close your eyes and forget you ever saw it.)

Making stuff…. it really does feel good.

how to make a sourdough starter

I made a sourdough starter a year ago and have been happily dibble dabbling in sourdough ever since. I love it and my family loves it. It’s easily become a regular part of our life. When I initially started it, I had no idea what I was doing, had confused myself, and so just played around until I got into a rhythm that I liked. The whole process is still very much evolving and I am by no means an expert though. How I do things, constantly gets tweaked and changed and I’m fine with that. There is a LOT to understand with sourdough and bread making in general and I still feel I only have a tiny grasp of it all.

I’m fine with this though. I’m happy to keep fiddling, tweaking and learning. I’ve had a few questions lately of how I started my starter. I partially documented it here, but was never really sure whether it would work properly. It did work though and a year down the track the starter is strong, happy to get reduced to nothing, frozen, bulked up, popped in the fridge, loved on the bench. It’s very much still there.

So could I do it again? Could I make another? Was it a fluke the first time? Were the planets aligned and the sourdough fairies happily hovering when it all happened the first time? Let’s find out. Let me see if I can make another, and this time show a bit more of the process, (as long as it didn’t turn grey, smell like vomit, smell like acetone, grow purple mould, or simply just die.)

You’ll need a ceramic bowl, an old plastic shopping bag, rye and bakers flour, tap water. Try to feed your starter at approximately the same time each day.

 Day one- Added 50g rye flour and 50mls water together. Weighs 100g.

 Smells like- rye flour and water

Looks like- rye flour and water

 Day two– First feed. Adding 50g rye flour and 50mls water to flour and water mixture. Now weighs 200g.

Smells like- rye flour and water.

Looks like- rye flour and water.

Day Three– Second feed. Adding 100g white flour and 100mls water to the mixture. Now weighs 400g.

Smells like- Fruity and floury, things are starting… Go on, take another smell to make sure.

Looks like- It’s puffed up a little, it looks a little stringy when you stir through the feed. That tiny black speck in the middle is a bubble.

Day Four– Third feed. Adding 200g of white flour and 200mls water. Now weighs 800g.

Smells like- a bit fruity, a bit yeasty, a bit…?

Looks like- more bubbles, with a few white streaks with the change of the flour.

Day Five– Fourth feed. First I need to divide the starter, (otherwise it will be too big- this just goes in the compost). Take it back down to 100g of starter and add- 50g white flour and 50mls water. Now weighs 200g. (This is repeating Day Two)

Smells like- A bit fruity, a bit yeasty, nothing unpleasant at all.

Looks like- Bubbles. Lots of action going on now.

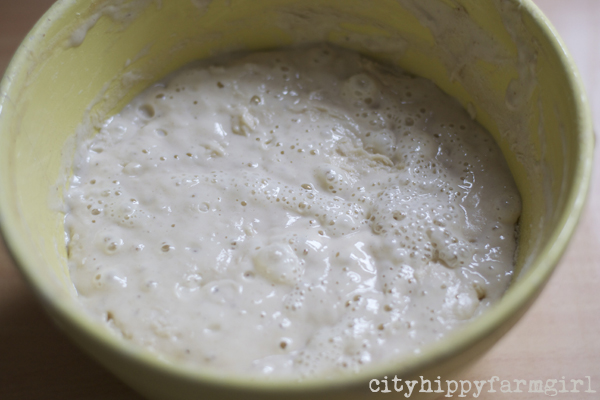
Day Six– Fifth feed. Repeating Day Three. 100g of flour and 100mls water, now weighs 400g.

Smells like- fruity/yeasty kind of action.

Looks like- bubbles, a whole lot of them.

day seven copy

Day Seven–  Changes. The smell of the starter becomes slightly more acidic smelling. As long as there are plenty of bubbles happening, you can decide whether you want to keep feeding it and bake with the discarded amount of starter or store it in the fridge, (this is now your mother.) At this stage your starter is a little vulnerable as it’s still new, but the older and more feeds it has, the stronger it will be.

By storing the mother in the fridge you slow down the fermentation process. (I store mine in the fridge, feeding and baking with it twice a week.)

Before you want to make up a dough, you will need to refresh your starter at least 3 times within 36 hours, (eg. 7am, 7pm, 7am.) Longer, if you have left it for any length of period.

*****

Now as this was just an experiment and I didn’t really need another starter (or to be using up any more flour). I decided to mix up a dough. The bubbles were good and big, and ready to rock.

Into the mixer, with 200g of starter, 375g flour, 250mls water. Quick mix with the dough hook, then forgot about it for 2 hours, (I usually leave it for 40 minutes.) Added 1 tsp salt, mixed again with the dough hooks and then by this stage it’s late and I couldn’t be bothered thinking about anything bread, so whacked a plastic bag over the top of the mixing bowl and popped it in the fridge.

Day Eight– 7am out on to a lightly floured bench, for a quick stretchy, three way fold. Then back into the mixing bowl with bag over the top, and placed in the warmest spot in the flat. Couple of hours later and it’s doubled in size. Back to the lightly floured surface. A stretchy, three way fold again, a little shaping and then on to a paper lined tray with a bag over the top again. Chase the sun once more and forgot about it for half the afternoon. Doubled in size (ish).

Pre-heated oven, then

slashed and into the oven at 240C with steam.

So did it work? Yes, I think it just might have.

*****

EDIT- Simple, Everyday Sourdough Recipe here.

If you are interested in getting into sourdough, there is some more information on other methods, troubleshooting, and maintaining the starter below. (There is a LOT of information to take in, but it’s a versatile beast that works in many mysterious ways for a lot of different people.) These people who have shared their vast sourdough knowledge on these sites have been doing it far longer than I have, so please have a read, and happy playing with your new pet.

sourdough baker

sourdough.com

wild yeast

bread cetera

the fresh loaf

Books

Bourke Street Bakery

The Handmade Loaf

The Real Food Companion

lime and orange marmalade

If I could choose one thing to successfully grow I would have a lime tree.

A happy one that just insisted on giving and giving with lime after lime.

Yes, that’s what I’d have. No lime tree here, but I do have the occasional access to a short stumpy happy lime tree that gives up plump juicy limes just begging to be picked. Actually the limes didn’t have a choice, plucked from their leafy foliage, and slung into a box rather unceremoniously. I had marmalade on my mind as my stocks were low after last years batch of Cumquat and Lime Marmalade and I needed my citrus fix.

Lime and Orange Marmalade

limes thinly sliced

oranges peeled (I only used the flesh, not the skin)

chopped fruit in a bowl, (I used half orange, half lime) water just over the top, and soaked over night

weigh it all, and equal amount in sugar

cooked up, until marmalade passes the saucer test.

dressing for the season


It’s been cold here the last few days. Not Hobart cold, not Melbourne cold, not Dusseldorf cold and not Lapland cold… but Sydney cold. Cold enough for people to walk a bit quicker. For the Monkeys to make hot breath drawings and cold enough for me to want to keep frantically crocheting something warming and useful.

It took me 32 years to work out that if it’s cold, I should dress warmly. Crazy huh? (not just by wearing jeans that are long enough.)

Why had it taken so long for me to work out and why did it take an ayurvedic consultant to point that one out to me?

I have no idea. But, I’m happy to report that since that fateful day, I have tried to dress appropriately and not looked back.

Winter now sees looped scarves, warm thick socks and sensible layers. Not that I was ever one to zip about in mini skirts and high heels in the middle of winter. I did though, regularly wear just one up from summer clothing, and wondered why I didn’t like the cold so much. The cold is only miserable, if you are cold. Once again, crazy isn’t it?

Dressing appropriately in a cold environment lets you in on a whole different world. For one, I can now actually see the world, rather than hunched over, staring at my feet, trying to generate some warm thoughts down to my frozen toes.

Thankfully I’d already cottoned on to the the fact that if you dressed appropriately in rainy weather, that also was enjoyable…and that only took me 25 years to work that one out.

calzone…or little parcels of goodness

First time I ever had one of these doughy little parcels of goodness, I was sixteen. I was walking on a crowded street with school friends on a Saturday night in southern Italy. It was cold, the middle of winter kind of cold. Cold enough for the wind to whistle up my slightly too short jeans, and leave a chilled to the bone feeling.

My jeans in those days were frequently too short, as I was quite tall. So in winter time, the wind would whistle around my ankles, attaching its cold breathy fingers to me.

Biting into a calzone was the perfect antidote. Two bites in and you would reach the molten lava that is the tomatoey mixture inside. Hot enough for you to start gasping, waving a useless hand in front of your gaping mouth. Hoping to god, that the mouthful of food would cool in your mouth before you had to spit it out and look like an idiot. In those days I would choose burning the roof top of your mouth until all that remained was a flapping bloody mess of skin, over looking like an idiot any day.

These days, the jeans length has dropped. My ankles stay warm, I don’t tend to keep molten hot food in my mouth and the happy taste memory of calzone are still with me.

Calzone to make are dead easy. It’s basically a folded pizza. What ever you like on your pizza, can go in these. I used this olive oil bread dough, (I like making up extra bread dough and keeping some in the freezer for a quick weekend lunch.) Rolled out a rough circle, shoved some cooked tomatoes, salami, mozzarella in and then folded it over. Pinch the sides and place on an oiled or lined tray. Into the oven at 240C, cook until golden and sounds hollow.

Eat…when slightly cooler.

Submitted to the lovely yeast spotting.


loving right now

Lots of energy within, but I’m having trouble knowing where to direct it. So many things to do, so many things I want to do… and I want to do them all.

A few things I’m loving at the moment…

creating with The Monkeys, using buttons and felt

my new old couch… or is it my old new couch?

making simple honey biscuits

hearing Little Monkey describe something as… wuvley

a new favourite cafe, that serve with vintage saucers and proper teapots

5.30am cups of chai. A magical time of day. It feels like bonus time, extra time. The Monkeys are (hopefully) still asleep and Mr Chocolate is long gone to work. Just me and the moment of a new dawning day…

*****

What are you loving at the moment?

how to make bread, for the person who thinks they can’t…but really they can

This is, (I hope) a really basic way to start making your own bread. It’s an adapted version of the Bourke Street Bakery cookbook olive oil dough. I’ve used it a whole bunch of times, and it’s always reliably delicious.

 You will need.

600g flour (4 cups- I use strong bakers flour)

2 tsp dried yeast

400mls tepid water

 3 tbls olive oil

2 tsp salt

In a large mixing bowl add the, 600g flour, 2 tsp yeast and 400mls water. (The slight warmth of the water will kick start things, don’t use hot; you’ll kill the yeast.)

 mix with a spoon until it all comes together. It will look a little dry and unlikely.

Now leave it for 10 minutes.

 The dough looks and feels a little different. It’s been doing its thing for the past 10 minutes.

It will feel softer and more workable.

Now add 3 tbls olive oil, and 2 tsp salt

 Mix it through with the spoon initially, for about a minute and then by hand. You will be able to feel it coming together. Now tip it out on to a bench and knead. (I don’t find with this recipe I need a floured surfaced area, but it may depend on the type of flour you are using. If it’s sticking, lightly flour the surface and your hands.

Work the dough until it comes together as a smooth, stretching mass (or use a mixer with dough hook). You want it to feel elastic.

Use the heel of both of your hands for kneading. Finger tips flick the dough up, and heel of hands push down.

 When the dough is soft and smooth, it’s a happy dough. The kneading will probably take about 10 minutes.

Then pop it back into the mixing bowl, (or a lightly oiled clean one, I just whack it back in the grubby one though) with some plastic wrap (or a shopping bag/wet tea towel) over the top. This stops it from drying out. Let it prove for 30+ minutes.

If the dough is in a warm spot (about 26C) it will just need the 30 minutes, if cooler, it may take longer. If it’s soft, and springs back when you poke it, it’s ready to be folded.

 Pop it out on to your work surface and roughly flatten it. Using your finger tips.

 Fold one third over

Then the other third over. Turn it 90 degrees, and fold it to thirds again. Pop it back in the bowl.

 looking kind of square

Another prove for about 30 minutes, (longer if it’s colder).  Then get it out and press the dough down on the working surface area and shape. Or…

Take the ball of dough out of the bowl and place on the bench. Pulling a side of the circle, and dragging it into the middle and press down. Keep going until you have gone all the way around. Then using one hand to do the same process with the heel of your hand, (side to the middle) and your other hand turning the disc. This process can be used instead of the folding after the initial prove or it can be a way to do a final shape.

 In to the middle.

 Looks like that

and then flick it over. Should be smooth and round. Once you’ve got the shape you want, pop it on an oiled tray (or a tray lined with baking paper) cover it with a plastic shopping bag and leave it to prove again in a warm spot. Should have risen by about 2/3 and feel/look soft and pillowy. This can take 30+ minutes.

This dough can be  shaped into just about anything. I used it as a foccacia base here, but have used it as a fish, mermaid, sunflower, grissini and bread rolls.

Bake in a pre-heated oven at 240C with steam. I use a water squirter bottle for the steam. 20 squirts in the crack of the door once you’ve popped the bread in or you can use a little dish of water at the bottom of the oven when you turn it on. Baking time depends on the shape you have made. Bread is cooked when dark golden in colour and sounds hollow if tapped.

*****

 The trick with bread is, you just have to practise. Make it, and if there are any problems, write down what they are so you remember for next time and can change it accordingly. I watched my mum make bread my whole childhood so absorbed how to knead it just by watching. If you have never played with dough before though, it might seem a little daunting.

Play with it.

At worst, they will be stone hard burnt unsalted bricks, (and I’ve certainly made my share of them before). Most likely though, they’ll be delicious, and you’ll never want to buy shop bread again.

Books to make you want to play further

Bourke Street Bakery

The handmade loaf

River Cottage handbook- Bread

Online

The Fresh Loaf 

Dan Lepard

Wild Yeast

gai lum potatoes- Frugal Friday

Thanks to the lovely BM@ Living a Little Greener, a little book now sits by my table. Food Rules by Michael Pollan. A handy little book that is full of wise advise like,

41# Eat more like the French. Or the Japanese. Or the Italians. Or the Greeks– People who eat according to the rules of a traditional food culture are generally healthier than those of us eating a modern Western diet of processed foods. 

With that in mind, I’m not quite sure which food culture this Frugal Friday dish is trying to harness. Olive oil in a wok with gai lum? Chinese or Italian? Would both cultures be quietly drawing in their breath and shaking their heads?

Possibly. Either way though, I still say it’s easy, it’s healthy and I was making good use of that fantastic mixed bag of potatoes and soul filling local olive oil I had got on the weekend. I didn’t want to cook the potatoes in any old fashion as I didn’t want to lose any of the flavours. So I cut them into long quarters, and dinner was quickly made up.

Gai lum Potatoes

In my trusty flat bottomed wok, (or pot)

a generous couple of slurps olive oil

added 2 stems of spring garlic

an assortment of rocking potatoes cut length ways

Cook until lightly golden on one side. Whack a lid on to steam a little.

Add chopped gai lum (chinese broccoli) or other seasonal greenery,

add lid again for a little steaming

season and drizzle with olive oil.

*****

This dish might seem too simple, but it worked because everything was super fresh, cooked fairly quickly, and the flavours of what was in there easily held their own. An easy, healthy Frugal Friday dish that had Mr Chocolate  fast becoming Mr GaiLumPotatoes.

Food Rules 14# Eat foods made from ingredients that you can picture in their raw state or growing in nature.

What’s in season Sydney?

Wandering through the Eveleigh farmers markets at Carriageworks last weekend, I was tickled pink by all the gorgeous produce that’s in season at the moment. (Speaking of pink, the pink lady apples have been delicious lately.) I was here wandering with a foodie friend, a friend who understands the subtle delight of an amazing mushroom and some locally produced olive oil. The morning was ours and wander we did.

I’d been meaning to come here for quite a while. I’d been impressed by the artisan markets on a Sunday but had yet to open my reusable shopping bag at these ones. So with a skip in my feet and coins in my pockets, we set forth.

I was also on the hunt for the Slow Food Sydney Seasonal Food Guide. Only a few people were selling them around Sydney, and I wanted one. I felt like I had been doing better with knowing what was in season, but I could still do with knowing more.

I was happy to see the smiling faces of the girls from The Little General with a stall. I had met them at the Masterchef Live foodie festival last year and had taken home some of their gorgeous extra virgin olive oil. I’m a big fan of olive oil. It’s such a simple thing that can really make any dish. Along with the prices, the differences in extra virgin olive oil tastes are huge. If you haven’t had any locally produced fresh extra virgin oil, dunked with a little crusty sourdough and perhaps a little taste of chevre… I’d suggest hopping to it. Skip the big brand imported stuff that’s on sale, (it’s probably on sale for a good reason.)

The swiss mushrooms have also been delicious. Not a week has gone by that I haven’t found a bag of good mushrooms skipping their way home. Don’t waste your time with the tasteless supermarket ones. There is no taste comparison…none.

Potatoes. Why, oh why did it take me so long to discover the wonderful world of potatoes? I’d dismissed them as a nothing vegetable long ago. Then last year I started getting Foodconnect boxes and in it were different types of potatoes. Truly a revelation. These weren’t tasteless boring, chunks of bland. Instead, little wonderous dirt covered beings and here before me was the stall that showed all those potatoes in their true glory. Toss me a potato, and get me to tell you the name and I wouldn’t have a clue, not a tooting clue though. So with that in mind, I asked for a mixed bag, (as I couldn’t decide which ones were more alluring.) Round ones, long ones, purple ones, yellow ones…

Knowing that the potatoes were grown just a hop skip and a jump away made them even more appealing. Highland Gourmet Potatoes is a family run business located in Robertson, Southern Highlands.  Sydney has two potato seasons a year, (I now know this, as I found the seasonal guide!)

saphire potato

Broccoli is one of the seasonal goodies that I can’t get enough of at the moment. Along with gai lum (chinese broccoli), kale, swiss mushrooms and pink ladies (although they are coming to an end) they have all been making regular encore presentations to the family table. Give me a plate full of broccoli cooked up with a little garlic and olive oil (The Little General), and I’m a happy woman.

and the best thing about going to somewhere like this with a foodie friend, is that you get to sample twice as much.

*****

Eveleigh Farmers Markets

every Saturday

8-1pm

smells like pink cupcakes

I couldn’t get them out of my head.

Pink cupcakes.

Everywhere I turned. There they were in my thoughts. In all their pinkness… and cupcakey-ness.

Little Monkey was even beginning to smell like pink cupcakes.

…actually I always think he smells like a pink cupcake.

Monkey Boy doesn’t smell like a pink cupcake. But he likes to eat them. Both of them like to eat them.

Now I’ve made them I can turn my attention to more pressing matters at hand, (like reading.)

*****

Pink Cupcakes

150g softened butter

150g caster sugar

2 tsp vanilla

2 eggs

3tbls natural yogurt

80mls milk (1/3 cup)

225g s/r flour (1 1/2 cups)

Cream butter and sugar, add vanilla, eggs, yogurt, milk. Fold through flour.

Bake at 180C for approximately 25 minutes.

Icing

2 dessert spoons natural yogurt

red colouring (I used a little beetroot juice)

icing sugar