an unattractive tasty plum cake

I knew in my mind the sort of cake I wanted to make. Not too sweet, using half plums, and perhaps a little almond meal in there. Could  I find a recipe within my collection that was even remotely like it, no. Not a whisker. I didn’t want to trawl the internet, so it was back to hack baking. I’m certainly no stranger there.

Springform pan greased and lined with parchment paper on the bottom. Cutting 5 plums in half, lining them up round side down and then sprinkled with a tablespoon of sugar.

In a mixing bowl add,

150gms softened butter

1 cup raw sugar (approx 140gms)

cream together, add

2 beaten eggs

1 tps cinnamon

1 cup natural yogurt (approx 250mls)

1 cup almond meal (approx 100gms)

1 cup s/r flour (approx 150gms)

Spoon mixture on top of plum halves and bake at 180C for approximately 1hour 15mins.

Now let’s address the elephant in the room. It doesn’t look pretty. It really doesn’t. I couldn’t photograph its prettier angle, as there was no prettier angle. The food stylist was clearly out for a long lunch. It is what it is, an unattractive tasty plum cake.

That’s ok though, these things happen in every day cooking.

* Edit. I forgot one litttttle thing. I flipped the cake. So the bottom is now on the top. If you would like to see how an unflipped cake looks, read on down in the comments and you will see Keri’s superb looking cake she made.

cooking with red amaranth- Frugal Friday

Red Amaranth is a delicious leafy vegetable that I had no idea what to do with. Lifting the lid of my Foodconnect box, sitting pretty up the top of the vegetables, I first wondered what it was and then what the devil I was going to do with it?

Plenty it seems. It’s used in Asian and South American cooking and can easily be used as a substitute for spinach or any other leafy greens.

*****

In a flat bottomed wok add,

diced garlic

sliced onion

vegetable oil

sesame seed oil

Cook it up for a few minutes and then add

amaranth leaves (any other leafy green vegetable you might have, spinach, silver beet…)

a slurp of kecap manis (Indonesian sweet soy sauce)

a slurp of fish sauce

stick a lid on it and let it wilt down. Team it up with a bowl of basmati rice.

In the flat bottomed wok, crack an egg. Cook it through, and pop it on top of the rice and amaranth (leafy greens).

Back to the wok, add a small handful of local nuts (sesame, pecans, peanuts, whatever you have in stock…).

Once toasted add to the top.


Blueberry Rye Sourdough

using fresh blueberries

Jamie Oliver has a recipe called Sexy Swedish Buns. They look tasty, and I would probably quite enjoy them, but they also looked rather messy to make. I must have been missing the sexy part. There were two key ingredients though in the buns that caught my attention. Blueberries and Cardamom.

Still on the hunt for new sourdoughs to concoct, I mused awhile on those two ingredients. Blueberries are subtle and as long as I didn’t go overboard with the cardamom it should work for a sourdough… But, then I was thinking rye. Rye and cardamom…

using dried blueberries

Both ingredients, to me taste of the earth. Not in the way that fresh beetroot does, but in a way that seems to feed the soul. It feels good going in. It feels right after you eat them. My belly seems to sigh a little sigh of contentment after eating either one of them. In the bread, the cardamom doesn’t overpower the rye, the two of them seem to hold hands. Lying entwined together, uncompromising of their own unique tastes.

At risk of sounding like a fluffy hippy who has had one too many snuffs of the patchouli, I have put some thought in to this. Mouthfuls have been mused on, the recipe tweaked, and then tweaked again. The blueberries, while not a strong flavour from the beginning, are just an extra subtle addition to the entwined lovers that be cardamom and rye. The three of them together, seem to make a loaf that’s subtle on the palate and easy on the belly.

Peace brothers and sisters.

Blueberry Rye Sourdough

200gms starter

1 1/2 cup strong bakers flour (150gms approx)

1 cup rye flour (150gms approx)

200mls water (approx)

1 tps cardamom

1/2 cup fresh blueberries (I’ve also used dried blueberries, which were just as good. Soak first.)

1 tps salt

Mix starter, flours, water together. Wait for 20 minutes. Add blueberries, cardamom and salt. Mix again. (Blueberries fall out a little but just keep sticking them in) Prove for an hour or two. Quick fold and shape, and then into the fridge overnight. Back out and bring it back to room temperature. Slash, and bake at 250C with steam.

This post submitted to Yeastspotting.

Blueberry Jam

Blueberry Jam

500gms blueberries

250mls water

bring it to a simmer

now slowly add

500gms sugar

1/2 lime juice

stir

a slow rolling boil until the jam thickens and passes the saucer test.


So what is the saucer test? Grab a small saucer and pop it in to the freezer while your jam is cooking. If you keep casting your eyes over the cooking jam, you will start to see the consistency changing, it will start to look like a thicker rolling boil. If you think it has started to thicken, get the cold saucer out of the freezer and dollop a small spoonful of jam on to it. Swirl it round a bit, and (hopefully) you will see that it has thickened up. Try running a finger through it. If it’s ready it will wrinkle a little and feel thicker.

Armenian Nutmeg Cake

I had a vague recolection of eating this cake once as a kid. It had popped back in my mind and the kitchen wasn’t going to be a happy place until I knocked one off.

Boy am I glad I did. So easy, and quite, quite tasty. The yogurt in it keeps it lovely and moist, letting the cake still taste just as good about 5 days later, and the nuts give it a bit of texture. It does puff up quite a bit with the bicarbonate soda in it, so don’t as I did, open the door and to peak inside, as it will deflate a little.

Also where ever you are, change the nuts on top to what’s local to you. I’m sure a lot of different kinds will taste just as delicious.

Armenian Nutmeg Cake

2 cups brown sugar

2 cups s/r flour (300gms)

125gms softened butter

mix it all together, until it looks like fine bread crumbs. Halve it. Placing one half in a greased and lined tin (approx 23cm- I used a springform), press it down firmly.

with the other half add

1 cup natural yoghurt

1 egg

1 tsp bicarbonate soda

2 tsp ground nutmeg

1 tps cinnamon

mix it together, and pop it on top of the other mixture

decorate with whatever nuts are in your area, I used macadamias.

Bake at 180C for approximately 50 minutes.

Coconut Eggplant Curry- Frugal Friday

Coconut Eggplant Curry

In a pot add

1/2 cup of desiccated coconut, dry fry it until golden coloured and pop in to another bowl.

In your pot add

vegetable oil, diced garlic, onion, knob of ginger, dried coriander, cinnamon, cumin, tumeric.

Cook it up until it smells fantastic.

Now add a diced eggplant, a can of tomatoes, a can of coconut milk or cream, your dry fried coconut and 8 kaffir lime leaves.

Leave the lid on and let it simmer until the eggplant has cooked down. Salt to taste.

Serve it with rice, a squeeze of lime or flat bread.

This recipe was originally a beef curry from The Real Food Companion. I’ve morphed it quite a bit now though so it barely resembles its parentage. The key to the curry is the kaffir lime leaves. I’m lucky enough to get them fresh from my dads tree, which I then stock in the freezer so I always have them available, (they last for months.)  If you don’t have access to these wonderfully fragrant leaves, lime zest could be substituted, or perhaps some other citrus type leaf (?)


Honey Oat Sourdough

I want to be a bread geek.

I want to know everything there is to know about yeasts, and flours. The whole process fascinates me. Every time I pull a loaf out of the oven I am amazed at what I have before me. Particularly the wonderful beast that is sourdough. Every loaf is different, each one with it’s own little personality. I want to play with so many different ingredients, then pull it all together into a simple loaf.

Will I ever get to be a bread geek?…I don’t know. My small to medium sized brain seems to struggle with the why’s, how’s and when’s, but I’m slowly getting better. I know I’m geekier than 8 months ago, when I first started on making my own sourdoughs. I also know there is a lot more to learn. I guess that’s all right though…

Bread is a fairly forgiving staple, my family all enjoy the experimenting and I get to muse on the next concoction of dough that I will play with. Wondering on the how, where and when of the loaf coming together, and  loving every part of it.

Pepper the conversation with hydration levels, protein percentages, lames, banettons, biga, poolish, wild yeast, epis and my interest will immediate be sparked. All words that less than a year ago I would have smiled politely and wondered what language you were speaking, as I hadn’t the foggiest idea what you were talking about.

I can put Mr Chocolate to sleep with my constant mutterings and musings when trying to nut out the next bready dilemma I’m having. Lying in bed I’m trying to juggle flour ratios and proving times, while he quietly says the occasional uhuh…and heads out to sleep land. I only realise he has stopped doing his job (being the sounding board that I like him to be), when my question of what do you think? Is greeted with eyes closed, soft nose whistles and the odd body twitch.

Leaving me to my own bready geek talk.

Honey Oat Sourdough

200gms starter

1 1/2 cups strong bakers flour (225gms)

1 cup whole rolled oats (I soaked these in 1/2 cup hot water first)

150mls water (approx)

2 heaped tbls honey

1 tps salt

Mix, prove, fold, prove, shape, long slow overnight ferment in the fridge, bring it back to room temperature. Slash. Bake at 250C with steam.


This post is submitted to the wonderful yeastspotting.


milk and ricotta

I recently bought unhomogenised milk. It had been so long since I had last seen it, that I just stood there and marvelled at it. A layer of cream sitting on the top, the  colour, and the little molecules of fat sitting on top of my tea. It really was worthy of marvelling at…sitting quietly looking into my tea with a contented smile and a slight raise of the eyebrows.

So what does homogenised mean? In a nut shell, it means it’s all been mixed up. All the fat and the milk has been mixed together, so when you buy it, it just comes out straight and white. Why is most milk homogenised? Because it looks better…and that’s the only reason.

There is a lot to be said about really great fresh milk. There is also a lot be said about inferior milk that is sold at really cheap prices.*  Availability is our problem. I can’t always get to somewhere that sells different brand milks. It’s frustrating that the leading super market brands don’t have much variety happening in their milk section. Especially as one of our leading generic brands smells and tastes like mouse. I thought I was the only one to imagine it, but a friend backed me up. Sipping on some milk some time ago and all I could think about was long pink tails, and tiny furry bottoms…No mousey milk for me please.

Looking at my unhomogenised milk, pondering on all the milky goodness I could be making from it. Cheese, yoghurt, ice cream, scones, breads, all using some form of the milk…

Next up I wanted to try making ricotta. Following The Real Food Companion instructions I had my lovely milk (Over the Moon), sieve, white vinegar, pot and wooden spoon all ready. I didn’t have two litres of milk so I quartered the recipe. I knew it wouldn’t result in much but as a first run, I didn’t want to waste a drop of the good stuff either on any mistakes. 500mls of milk in the pot, bring it to a foam (or 90C, not yet boiling) and then add 2 teaspoons of white vinegar to create the curds. There was a little bit of curdling action, but not a lot. The whey hadn’t separated enough. Frowning in to my pot I decided to heat it up again. 1/2 a tps more?…oops my hand slipped, make it 1 tsp more. A little gentle stir and instant separation. Ahhh, that’s better. Gently scooping it out to some muslin and a sieve, I’m left with ricotta. Really, rubbery ricotta…

Checking with the local cheese bloggers Gavin and Christine, I try to work out what I did wrong. Too hot? Too much vinegar? It tasted ok, but it really was a tad rubbery. I sat on it for an hour or two and then decided that I would try it again, other wise it would bug me all day.

Second go. Left it at 2 tsp of vinegar, different milk this time and just a fraction longer on the cooking time. We are talking extra seconds cooking time, that’s all. Those extra seconds made the difference. It was softer, more delicate, and really good….and really quite easy.

(The whey that I was left with, went into some sourdoughs.)

Third time around and I’m definitely getting the hang of it. I can’t believe how easy it is to make and how I hadn’t done this before. I’m also struck by how so many really easy recipes have fallen by the way side in order for things to be convenient for people. Such simple meals that can be made with so little ingredients, if only people knew how. This is the sort of conversation topic that could be passed back and forth over and over until the cows came home, milked themselves and made their own ricotta… but for the sake of airing a little, I’ll continue.

These simple cooking lessons that could be taught to another person in an afternoon seem to be quietly slipping out the door. Things like yoghurt, ricotta, labneh, mascarpone, sour cream, butter and all their lovely by-products, are simple to make and yet they can be quite expensive to buy. Not to mention all the plastic tubs that you are buying along with the products. Some would argue that they are recyclable, and yes they are. But if you can spare an extra 5 minutes to make a kilo worth of yogurt, than you have just saved 52 plastic kilo tubs of yoghurt per year, (going on a kilo a week, even more if you are eating daily individual tubs.) Visualising how much that would be for a single person  or a family, in a life time is….sobering. No more plastic tubs and saving a fair whack of money to boot.

Maybe a reason to go give someone a dairy cooking lesson?
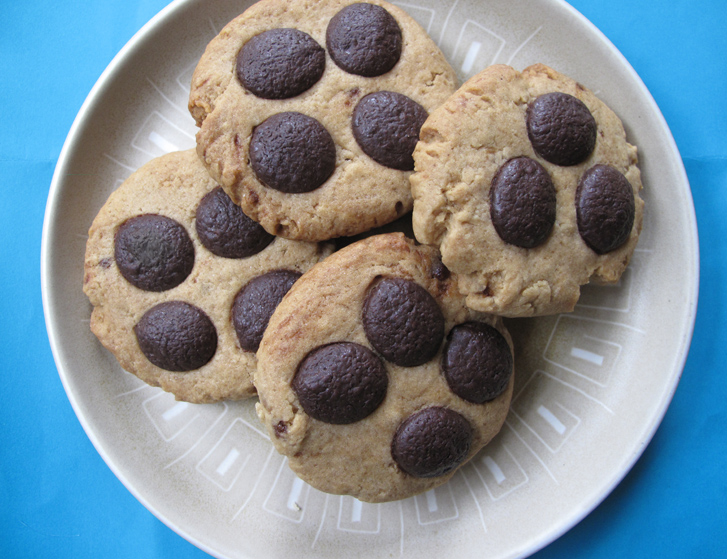
What’s for lunch?

Ricotta

raw almonds

chopped dates

drizzle of honey

* For more information on Australia’s cheap milk problems please read here.

** For a different way to make ricotta and using goat milk, have a look at Linda’s The Witches Kitchen.

summer loving jam


I don’t know if this was the best name for the jam. It’s been such an odd summer. Bakingly hot this week, a huge cyclone hitting the country and catastrophic flooding in recent weeks. The middle of the night being woken by the smell of a fire, it’s certainly been an odd summer. Fruit and vegetable prices are set to increase due to the natural disasters effecting so many farmers, so I actually feel kind of lucky to be able to even make this jam. To be in a position to cook up and store some of summers beautiful stone fruit offerings. Eaten mindfully and enjoying every spoonful that’s for sure.

Jam really is so easy to make. It’s been said countless times before, but it really is such a great way to preserve the season.

Equal parts sugar to fruit, (generally) if needed some pectin of some sort. Cook it up until it thickens and hey presto, done.

Summer Loving Jam

plums- two kinds

peaches

nectarines

juice of one lemon


ratio

1 kilo fruit

1 kilo sugar

500mls water

I just roughly chopped the fruit and then gently with a hand held mixer, blitzed any big lumps. If you don’t have that, cut it finer, (or enjoy your lumps.)

Cooking at a rolling ball, until cold saucer test stage. In to sterilised jars and store.

hamburger with the lot, thanks love…

Hamburger with the lot thanks love…

If you are an Australian, you may have heard these words before. If you like your burgers and frequent take away places regularly, you may have even heard it a lot. If you’re not Australian and are wondering why bother posting about a burger, it’s because it’s not any old burger. You see it has beetroot and pineapple on it, which are the two crucial ingredients to take it up to Aussie Burger status.

Around the country, patties have been flipped, onions have been sliced and cans of beetroot have been opened. Money exchanged, and great mouthfuls of burger have been hurriedly eaten before the whole thing lands on your lap. With this many ingredients its hard to keep a firm hand on it all and show that burger who is boss.

Back in my burger flippin’ days, we would have competitions to see who could make the biggest one, without letting anything fall. The heat of the grill, the timing of the orders piling up, challenge of building your burger to be the greatest heights a person had ever seen! However once the burger was out of your hands, and into the customers, it was up to them. No blame could be taken if their burger became a tumbling pile of slop in their lap. With beetroot stains down their post beach kaftans, it was up to them to wrap their chops around the towering extravaganza.

So how to make your own Aussie Burger with the lot?

Burger bun; I made up some sourdough rolls. Easy, and healthier than your standard old white ‘fluffy’ bun.

Now you have to build…

lettuce

sliced beetroot

sliced pineapple

tomato

fried egg

burger pattie

cheese

tomato sauce

onion

Good luck.

If you are making burgers at home, there are so many things you can add. They don’t have to be a greasy pile of slop. Swap the beef pattie for a lentil one, or some grilled tofu. Or even just keep it as a salad. Make your own tomato relish or add caramelised onions. Swap burger buns for flat breads and roll it up.

The possibilities are endless.

Now just be careful with that beetroot…


This recipe submitted to yeastspotting

Super Easy Chocolate Chip Biscuits


Now who doesn’t like Chocolate Chip Biscuits? They are easy thing to make that seem to appeal to a lot of taste buds. I always seem to be making some sort of basic biscuit, but occasionally I like to splash out and make something a bit sweeter. Keeps Mr Chocolate happy, The Monkeys quiet and gives a mama something to dunk into an afternoon pick-me-up coffee. Also a good thing to take around to a friends house… or a neighbour, or that family down the street that are now cleaning up flood water.

Go on, what are you waiting for…

Chocolate Chip Biscuits

125gms softened butter

1/3 cup muscavado sugar (or other dark unrefined sugar)

1 beaten egg

1 tps vanilla

2/3 cup plain flour

2/3 cup s/r flour

2/3 cup choc chips

Mix ingredients in that order. Roll into balls, squish them down. Bake at 180C until golden.

Now how easy is that?

Sweet Chilli Sauce

Some people love chilli and some people hate it. Some people start sweating profusely and some just get a little light glow when they eat it. Most of the time I really enjoy it. It can enhance a meal, and take it to another level. Or it can also blow my socks off, make my eyes water like two taps, and make it impossible to converse with. As the subject at hand is only… dear god, how am I going to get through this meal! (Like a recent situation at a mexican restaurant with friends.)

My new favourite chilli sauce is a Louisiana Hot Sauce that my brother gave me. Damn, it’s good. I’m rationing it out as I don’t want it to end. It’s a little sweet, a little peppery, a little hot and a whole lot of tasty. Turns every meal that I’ve put it on into a mmmmm meal.

The recent Mexican meal certainly wasn’t the hottest I have eaten. That particular chilli was a sambal eaten in Sabah, Malaysia. A tiny little family run hole in the wall in the jungle. It looked hot, you could see it was hot. It sat in the middle of the table taunting fellow diners with its fiery temptation. I liked hot, I’d built myself up for this…I could do it. I was also not stupid, I knew that there was a small dish for a reason. Small dish means take a small amount. So I did. You could not have got a smaller amount of sambal on my tongue. It was minuscule, a pin head size. I took it straight, I wasn’t scared….So. Hot. So. Darn. Hot. My eyeballs shot out. My tongue was instantly numb. My hand reached for the glass of water. Then the jug. I’m not sure what I ate for the rest of the meal as my tongue was still lying in a comatose state against the side of my mouth. With taste buds stripped. I straightened myself up and continued on with the enjoyable meal with my companions. Hey, you should really try the chilli…

Sweet Chilli Sauce

200gms long green chillies

8 small red chillies

2.5cm long knob of ginger

7 cloves garlic

2.5 cups white vinegar

2.5 cups sugar

3 tps salt

Blitz the the chilli, ginger, garlic in what ever you have at home. A couple of seconds is all it needs. Pop it in to a pan, cook off for a minute, then add vinegar, sugar and salt. Stir, and keep it at a rolling boil until it thickens a little (30-40 mins.)

Now this little number is a bit hot, but not crazy hot and it still has flavour. After seeing a demonstration by Sally Wise at the Taste Festival and seeing how quickly she pulled this together, I was inspired. I’ll never, ever buy sweet chilli sauce again. There is absolutely no need. Whack a bottle of this in the fridge and it will keep for ages. Now if you don’t like it so hot. Simply take the seeds out of the chilli or at least some of them, (I didn’t though for this batch) as the heat is in the seeds.

Now go make something delicious to serve it with.