Sticky Ginger Ninja Cake

sticky ginger ninja cake || cityhippyfarmgirl

Why I was experimenting with my recipes just a few hours before I was to present a dessert type dish to a bunch of unknown (and known) people, I’m really not sure.

Why not stick with a well worn recipe that I knew inside and out? (Well where’s the fun in that I say?) 

This recipe came out of the title really. I’d already named it before I had even made it. I knew I had pears to be used. I knew ginger is a winner with it, as I regularly make something similar. But sticky. I wanted it sticky. A little more flavoursome, and maybe just a little ninja-esque. (Well ninja rhyming with ginger, seemed close enough.)

I did also have lofty ideas of making a ninja’s face out of dusted icing sugar on each tiny square of cake, but sometimes even I have limits in complicating things just before we are due to go out.

sticky ginger ninja cake || cityhippyfarmgirl

Sticky Ginger Ninja Cake

150g sourdough starter

150g softened butter

150g brown sugar

2 tsp vanilla

2 tsp powdered ginger

2 beaten eggs

3 tbls molasses

250mls of pureed peeled and cored soft pears

150g self raising flour

75g wholemeal spelt flour

extra brown sugar to sprinkle on top

uncrystallised ginger pieces

Cream butter and sugar together. Then add vanilla, ginger, beaten eggs and molasses. Fold through pear puree, sourdough starter, wholemeal spelt and finally the self raising flour. Sprinkle the cake with extra brown sugar and press uncrystallised ginger pieces within the uncooked batter. Bake at 180C until golden and smells like a sticky ginger ninja kitchen.

sticky ginger ninja cake || cityhippyfarmgirl

Sticky Buns of the Spelt and Hot Cross kind

 wholemeal spelt sourdough hot cross buns recipe || cityhippyfarmgirl

spelt hot cross buns recipe || cityhippyfarmgirl

I do wonder what food memories I’m creating for my kids sometimes. I occasionally ask them if they have seen any food from other kids school lunch boxes that they might have rather liked the look of and would perhaps like to try as well? I’m yet to get an answer of anything different to what they generally get though. Whether they really aren’t that fussed or they are keeping those wishful lunching thoughts to themselves, I’m not sure.

Me, I longed for white bread, devon and tomato sauce sandwiches. With more butter than should be legal slapped up on the side. Plastic cheese was longingly looked at and don’t get me started on packets of chips for recess. That’s what I wanted when I was a pint sized school girl. Did I ever get it? Nope, not a once. ( Thankfully I did grow out of that one.)

Would my own kids get it, if that’s what they said they were lusting after while watching someone else unpack their lunch box. Oh hell no!…but I’m still curious.

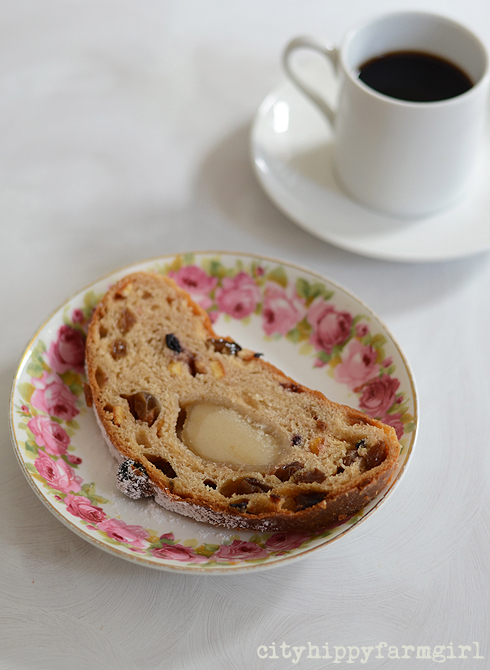
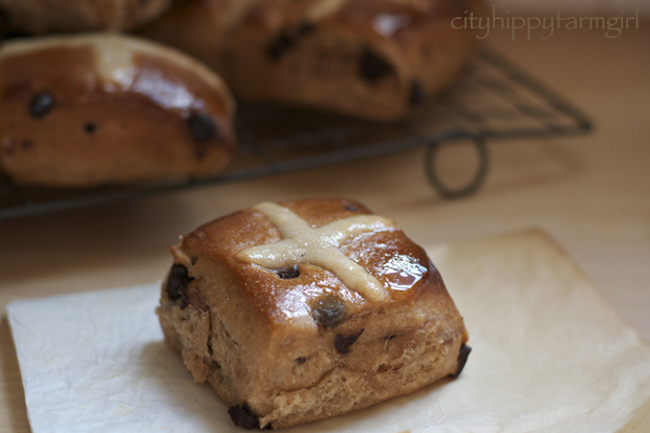
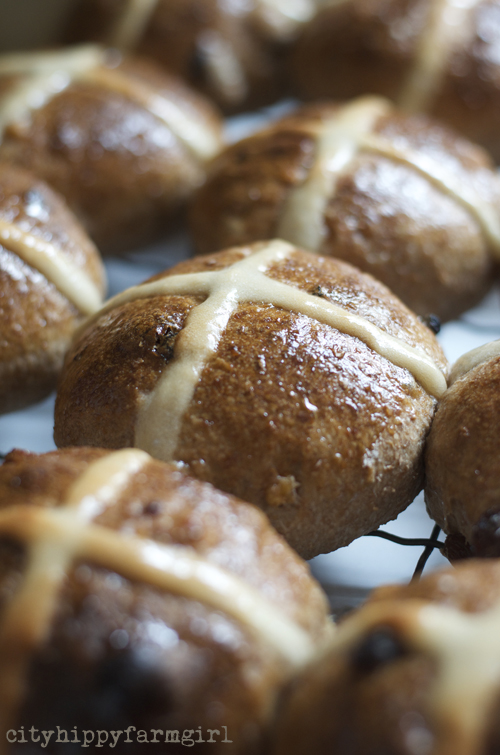
Spelt Hot Cross Buns is what the small people are packing at the moment. Easy to make, easy to eat, and easy to keep in the freezer.

Every year I seem to fiddle with my Hot Cross Bun recipe. Sourdough, semi, yeasted, chocolate and now spelt. Wholemeal spelt flour is a firm favourite round here. So much so, that I buy the 12.5 kilo bags, so it’s always on a high turn over round here, (it’s good stuff, really good stuff!)

***********

But before the recipe, for something completely different…*small polite cough*. I was wondering if you would like to vote for me for the AWC- Best Australian Blogs- Peoples Choice. Would you like to? It will be super quick, promise. Either click here, or the badge on the side bar, and a huge thank you, to those that do.

sourdough spelt hot cross bun || cityhippyfarmgirl

(If wholemeal spelt isn’t your thing, easily switch these recipes to a regular wheat flour.)

Spelt Hot Cross Buns (sourdough)

250g dried fruit

150mls hot water

2tbls brandy

(soak this mixture of three ingredients the night before)

300g starter (100%)

600g (4 cups) wholemeal spelt flour

1 tsp dark malt flour

200mls water (approximate)

1/2 tsp cardamom

1 tsp cinnamon

100g (1/2 cup) raw sugar

100g softened butter

2 tsp salt

Add all ingredients together except, 200mls water, softened butter and salt- either by hand or mixer. Mixture will look shaggy and dry. Now slowly add the 200mls water. This an approximate amount, depending on the dried fruit mixture and your flour. If it looks too wet, don’t add it all in, too dry, a touch more.

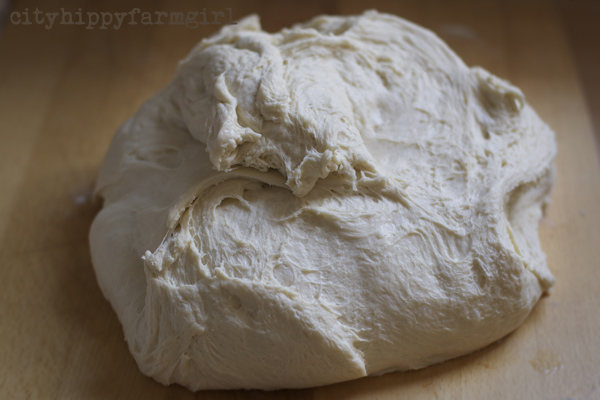
Let it rest for 30 minutes and then mix through your softened butter and salt. Dough should look smooth and coming together off the sides of the bowl.

Place a damp tea towel or plastic shopping bag over the top of the bowl. This creates a gentle humid environment for your bread to rise. Leave it for an hour or so.

On to a really lightly floured surface, give your dough a brief three way fold or knock back. Back into the bowl for another hour or so.

Divide your dough into equal portions, (this recipe makes roughly 16 portions) rolling them into balls and then on to your baking trays. Allow them to prove for roughly another 1-3 hours, (depends on the temperature- dough should neither spring back or leave an indent.) Or overnight in the fridge. Again covered by either a damp tea towel or plastic shopping bags.

Crosses

75g (1/2 cup) plain flour

100-125mls water

2 tbls raw sugar

Mix ingredients together and use a piping bag to squeeze out crosses just before popping buns in the oven.

Bake at 210-220C for approximately 20-25 minutes, or until golden.

Sugar Glaze

1/4 cup raw sugar

1/4 cup water

Heat the glaze and brush buns as soon as they are out of the oven.

spelt hot cross buns recipe || cityhippyfarmgirl

Spelt Hot Cross Buns (commercial yeast)

250g dried fruit

150mls hot water

2tbls brandy

(soak this mixture of three ingredients the night before)

600g (4 cups) wholemeal spelt flour

2 tsp dried yeast

1 tsp dark malt flour

200mls water (approximate)

1/2 tsp cardamom

1 tsp cinnamon

100g (1/2 cup) raw sugar

100g softened butter

2 tsp salt

Add all ingredients together except, 200mls water, softened butter and salt- either by hand or mixer. Mixture will look shaggy and dry. Now slowly add the 200mls water. This an approximate amount, depending on the dried fruit mixture and your flour. If it looks too wet, don’t add it all in, too dry, a touch more.

Let it rest for 20 minutes and then mix through your softened butter and salt. Dough should look smooth and coming together off the sides of the bowl.

Place a damp tea towel or plastic shopping bag over the top of the bowl. This creates a gentle humid environment for your bread to rise. Leave it for an hour or so.

On to a really lightly floured surface, give your dough a brief three way fold or knock back. Back into the bowl for another 40mins- to an hour.

Divide your dough into equal portions, (this recipe makes roughly 16 portions) rolling them into balls and then on to your baking trays. Allow them to prove for roughly another 40-60 minutes, again covered by either a damp tea towel or plastic shopping bags.

Crosses

75g (1/2 cup) plain flour

100-125 mls water

2 tbls raw sugar

Mix ingredients together and use a piping bag to squeeze out crosses just before popping buns in the oven.

Bake at 210- 220C for approximately 20-25 minutes, or until golden.

Sugar Glaze

1/4 cup raw sugar

1/4 cup water

Heat the glaze and brush buns as soon as they are out of the oven.

P is for Plums…and lots of them

plum jam || cityhippyfarmgirl

plum crumble

When a surprise box of plums comes home, there is a tiny pause then a lovely mixture of excitement and ooooh, what am I going to do with them all!

Despite my fervent wishing I still don’t have a walk in pantry, with darkened rustic wooden shelves of assorted heights to store all my preserved goodies on. On the other side of the pantry, I also don’t have a long fermenting bench where I can store all of my current fermenting goodness. What I did have was a box of plums that needed sorting asap, a crowded bench top for fermenting and a small portion of a dresser cupboard to store things in.

I also had enthusiasm, and that should never be underestimated.

So what was to be made with that of box plums?

plum mead || cityhippyfarmgirl

Plum Crumble

Plum Jam

Chilli Plum Sauce

and the most exciting of them all

Plum Honey Mead

Plum Honey Mead was such a great experiment. The picture here is of the mixture at 24 hours old. Already it’s started to bubble a little, which only increased- and almost volcanically. I was happily telling anyone that paused for longer than thirty seconds beside me, (which can be awkward at pedestrian crossings and other generally non chatty public places.) More to come on this intriguing stuff, so in the mean time how about a Chilli Plum Sauce Recipe? Dead easy and surprisingly versatile in what you can smother things with.

chilli plum sauce || cityhippyfarmgirl

Chilli Plum Sauce

8 plums washed, stoned and quartered

100g fresh chilli

1 medium brown onion

4 cloves of garlic

2 cups (420g) brown sugar

1 1/2 cups (375mls) white vinegar

2 tsp salt

Process plums, chilli, onion, garlic together in a blender and then into a pot. Add the sugar, salt and vinegar and bring to a gentle simmer. Keep it at this level until the sauce thickens. Pop into a clean glass jar and keep in the fridge, (or alternatively process and store as you would jam.)

*****************

And to the winner of the little giveaway- Congratulations Zena from Twigs and Twine, I will be in touch shortly to get your address.

As for everyone else that took the time to comment on this post. I have to say, I feel so honoured to be a part of this online community. I know time is precious and there are thousands of incredibly interesting things to be looking at on the internet these days- so taking the time to comment here means a lot.

I also found it so interesting in hearing about what community meant to different people. I think in asking the question, it’s just confirmed things even more for me. Connectedness and a sense of belonging within a community (of any sort) is so incredibly important and so many of us within this small online space here- value that.

As I send virtual loaves of sourdough and little plates of biscuits to you all- again thank you. You all rock. 

lamington cake

 lamington cake- cityhippyfarmgirl

lamington cake- cityhippyfarmgirl

Lamingtons and I have never had a firm friendship. They were always the thing of old fashioned bakeries, afternoon tea at someone else’s house or a slightly squished white paper bag to bring home for my mum as little treat. 

A favourite for childhood cake drives and always guaranteed at the local church sweets stand. It wasn’t for me though. No matter how many times I tried, I couldn’t get past the dryness. Not even a lamington with jam and cream in the middle could save these iconic coconut squares of Australia for me.

They just weren’t my thing.

Until now that is. Now that I’ve drowned it in a sweet milky goodness that can only be attributed to a can of condensed milk. I can almost hear the collective gasps of the CWA. Shrieks of, you can’t put condensed milk in a lamington!

But you can. And I did. And perhaps in doing so I have wiped out all ability to name it still a lamington. However I’m sticking to it, and this is my lamington cake.

lamington cake- cityhippyfarmgirl

Lamington Cake

125g butter

3 eggs

150g (2/3 cup) sugar

2 tsp vanilla

225g (1 1/2 cups) s/r flour

50g (1/2 cup) desiccated coconut

125mls (1/2 cup) milk

******

1 can condensed milk

50g cocoa

Cream butter and sugar. Add in vanilla, beaten eggs, and milk together than fold in dry ingredients. Bake in a greased and lined spring form pan (approx 23cm) at 180C for about 35-40 minutes. Bake until golden in colour.

While cake is still hot, leave it in the cake tin, prick it all over with a skewer or fork then pour on the condensed milk mixture. (Whisk together in a bowl, condensed milk and cocoa together beforehand.)

Leave cake to soak up mixture, occasionally bringing the condensed milk back to the centre to soak in at the top a little more. Once room temperature, pop into the fridge for a couple of hours (or over night.) Take the cake out of the tin and cover in desiccated coconut.

when stollen steps in

stollen- cityhippyfarmgirlstollen recipe- cityhippyfarmgirl

There are two kinds of people in this world. Those that like marzipan and those that would well, rather not. Not me though, I love the stuff. I mourn the shift in wedding cultures that don’t seem to have the traditional densely fruited cake covered in marzipan any longer. For me, it was the highlight of a wedding. How can they serve a carrot cake or chocolate mud instead I ask you? Oh how?

I still can’t quite put my finger on why I like marzipan. It’s a textural thing, kind of gritty and ever so slightly medicinal tasting. There’s just something about it that just quietly whispers to me.

I was first drawn to the lovely Joanna’s blog over our mutual love of marzipan across the seas of the world. I am also lucky enough to have a dear friend that would quietly slip in a little marzipan log into my bag, whenever I was having a tough day. (You see, marzipan has special healing properties, that very few people are aware of- it really is the good stuff.)

christmas stollen recipe- cityhippyfarmgirl

 As I don’t seem to be going to many marzipan laden fruit cake filled weddings at the moment, I have to find my fix somewhere else. That’s where stollen steps in.

It had been awhile since I had made it last, three years to be exact, and quite frankly it was time to give it another crack.

german christmas cake- cityhippyfarmgirl

Stollen

(makes two big ones)

500g mixed dried fruit

80mls amaretto

300g sourdough starter (or 2 tsps of dried yeast)

600g flour (4 cups)

200g softened butter

50g brown sugar/raw sugar

1 tsp cinnamon

1/2 tsp cardamon

1/2 tsp ginger

2 beaten eggs

zest of a lemon

200-250mls water

Extras

500g marzipan

100g melted butter (extra)

To begin with, soak the dried fruit in the amaretto overnight. The following day, mix the dough- add starter, soaked fruit, flour, sugar, spices, butter, eggs, lemon zest and water. (Go slowly on the water, the amount you’ll need will vary depending on your dried fruit, flour and starter.

Mix the dough for about 8 minutes on a low speed. Allow to prove for about an hour and then give the dough a quick fold. Prove again for several hours. Meanwhile divide marzipan in two and roll into a log of about 20cm long.

For the dough, divide it in half, slightly flattening with finger tips to make a rough rectangle. Place marzipan in the middle and roll it up within the dough. Place on a tray, cover with a plastic bag to create a humid environment and allow to prove for another couple of hours. Preheat oven and bake at 180C for approximately 45 minutes, or until golden. When out of the oven and still hot, brush with 100g of extra melted butter between the two stollen.

Allow to cool and wrap in baking paper oven night, the following day drench the stollen in large amount of sift icing sugar.

Serve small slices with excellent coffee and bundles of enthusiasm.

************

this post submitted to the always delicious yeastspotting

bringing the bread back

sunflower and linseed

sunflower and linseed

I’ve made a few dud loaves lately.

Distracted, not enough effort, too much effort, unhappy starter, busy…I could tick all of the above boxes. The funny thing was I felt my sourdough hat was sitting slightly skewiff, I knew it and the month that it was sitting a little wonky, well I certainly didn’t produce any of my finest loaves that’s for sure.

Come on girl get it together, where had the magic gone?

I played with a buckwheat starter…ick.

I ate a whole loaf of under proved sourdough, (toasting it three times helped a little, felt it was a tad heavy to subject the kids to)

My teeth battled through over cooked rolls, and I did have a rather long thought process of, hell maybe I’ll just start buying it again.

Then thankfully something flicked, I didn’t have to walk that supermarket bread aisle. The time was right, the starter was eager and the hands willing. My sourdough hat felt straight once more, and with it a greedy need to bake bread.

sunflower and linseed

Sunflower and Linseed Bread

600g active starter

750g strong bakers flour

150g wholemeal spelt flour

75g linseed

75g sunflower kernels

700-750mls water

1 tsp dark malt flour

3 tsps salt

Mix together in your usual sourdough bready kind of fashion. I baked these at 230C with steam for free form loaves or 220C and a little longer baking time in a tin.

Perfectly Pecan

cityhippyfarmgirl

Mmm, yum Anzac Biscuits…

They’re not Anzac Biscuits, I cut in with, probably a little indignantly…take another bite.

He takes another bite… Mmm, Anzac Biscuits!

Sigh. Oh forget it.

These are not Anzac Biscuits, (despite having oats and golden syrup in them) and looking a little (ahem) like them. Ground pecans is the secret ingredient here, combined with wholemeal spelt flour, and giving them a little earthier flavour. Just the thing to throw out to hungry small kids on school holidays, (who also seem to have an ever increasing appetite for…well pretty much everything.)

So if they’re not Anzac Biscuits, what do you call them?

Um…errr, um, (cough cough)… Perfectly Pecan Biscuits?

cityhippyfarmgirl

Perfectly Pecan Biscuits

200g pecans (in processor)

150 whole rolled oats

150g melted butter

100g golden syrup*

1 tsp vanilla

75g wholemeal spelt flour

In a bowl add all the dry ingredients and then also add the combined melted butter and golden syrup. Roll to a ball, and pop onto a tray. Gently flatten biscuits down and bake at 180C for about 20-25 minutes.

* These aren’t overly sweet. If you like your biscuits on the sweeter side add 50-100g of brown sugar.

simple, everyday sourdough

 cityhippyfarmgirl

cityhippyfarmgirl cityhippyfarmgirl

I’m often asked for a basic sourdough recipe and for some reason I have never done a post that is just simply that. A simple, every day sourdough bread recipe.

Bit of an over sight really as so much of this blog is designated to bread. After three years, I still find making sourdough an incredibly enjoyable experience.

I like to make it, I like to eat it and I like seeing other people start on their own sourdough journey. The contagious excitement of when a first bubble appears of a newly made starter. The shared joy of an exceptionally tasty freshly baked loaf. The jump up and down happy feeling of a new mixer arriving. The relief and happiness of hearing that one of your recipes have been used and loved and now in turn as been passed on to someone else.

I tell you, it’s true bread nerd stuff, but I love it, I really do.

For anyone that has vaguely considered making their own bread and they would like to give sourdough a crack, this recipe might be helpful to start off with.

cityhippyfarmgirl

If you don’t have a starter here is post on how to make one.

Or if sourdough seems far too daunting at the moment and you would really just rather try making some regular bread, this post here.

Basic Sourdough Bread

400g starter (100% hydration, refreshed and bubbling)

750g flour

500mls water (approx- depends on your starter and flour)

2 tsp salt (or to taste)

Mix your starter, flour and water together either in a mixer or in a bowl with a spoon. Mixing for about 6 minutes. The dough will be kind of rough and shaggy.

Now leave it. Go find something else to do for about 40 minutes. (Bread magic is beginning…or autolysing but bread magic sounds better. You are developing the gluten here.)

Add your salt and mix again for about another 6 minutes or if by hand until you get a smooth dough.

Put it back in the bowl and leave it for about an hour.

cityhippyfarmgirl

Now you need to do a three way fold. It will take about twenty seconds, (and you are not kneading.) Dough out on to the bench. Flatten a little with your finger tips and fold a third into the middle, then the other third. Swing it round 90 degrees and three way fold the other way.

Back in the bowl for another hour or so, another three way fold, and then back into the bowl again for another hour or so.

cityhippyfarmgirl

Divide your dough up and shape it. Laying it on lined trays, banetton baskets or tins, cover it with a plastic bag and into the fridge for an over night nap (around 12 hours.) Bring it back to room temperature. (Depends on the household temperature 1-4 hours generally.)

Bake at 230C with steam, (I use a cheap spray bottle of water inserted in to a crack of the oven door when first putting the loaves in.)

Bread is baked when tapped and sounds hollow. Allow to cool on a wire rack.

cityhippyfarmgirl

Now there 100 types of different ways to make sourdough and each baker will always have there own little tricks and ways to do things. Sourdough is an amazingly versatile beast, that can work in far more ways than regular commercial yeast made bread. There is never a right way or wrong way in my mind. If the end result is an edible loaf of bread that people are enjoying eating, well your way works. Taste buds and preferences can always be catered for as it’s your bread and you can do what you want. As long as you start off with three keys things- flour, water and salt- combine that with time, a little love and you’re in business…the sourdough world awaits.

Happy baking.

sprouted buckwheat…not really hippy food at all

sprouted and dehydrated buckwheat

DSC_0057 copy

Sprouted buckwheat. It’s my new best friend at the moment, and I’m having a quiet love affair with it in, well pretty much everything.

Since last December I’ve been playing with it in various incarnations and there is yet be a combination that I haven’t liked. I’ve put it in bread, alive granola, a base for tarts, raw energy ball snacks, porridge, pancakes and smoothies. Plus a few experiments with pizza bases, cakes and biscuits. Really, I think the possibilities for these little stars would be endless.

So what’s so good about it and why would you bother sprouting it?

– It’s gluten free.

– It’s super easy to sprout, (given reasonably warm conditions, it can sprout within 24 hours.)

– It’s considered a super food and has a low glycemic index.

– Sprouted it is full of live enzymes and nutrients.

– High in iron and protein, and acts like a grain but isn’t a grain.

– Great for balancing blood sugar levels and has been linked with stabilising cholesterol.

–  It’s also incredibly versatile when it comes to making and baking.

sprouted

How to sprout buckwheat

You’ll need a glass jar, some muslin and a rubber band or alternatively one of these fancy pancy sprouting jars, and raw buckwheat (not roasted).

Rinse your buckwheat.

Leave it to soak in tepid water for about 2 hours, (twice the amount of water to buckwheat.) Buckwheat will swell.

Rinse again, getting rid of any of the slimyness that might have built up (starch). Drain, turning it upside down. Keep rinsing and draining every 6 hours until little tails appear. (In warmer weather this can take as little as 24 hours.) Make sure it’s well drained as you don’t want it to go mouldy. Wait until their tails are the same length as the groat.

essene bread with avocado

And that’s it. Depending on what you are you using it for. You can halt the sprouting process by popping it in to the freezer, or dehydrating if you aren’t quite ready to use it there and then. I don’t have a dehydrater but have used the second shelf of my oven while cooking something at a slow temperature with the same effect (see top picture.)

An incredibly versatile food that is rich in nutrients and other health benefits. Easily accessible, (check in your local health food store) giving a little nutty texture to any food you decide to pop it into. So not hippy food at all, just a simple food item that really, I can’t get enough of at the moment.

Now get sprouting people.

Alive Granola

200g sprouted dehydrated buckwheat

150g dates

100g coconut

100g linseed

100g sunflower seeds

50g sesame seeds

1 tsp vanilla

1 tsp cinnamon

Pulse everything in a mixer and eat instead of a boxed cereal.

lunch time dutch crunch

dutchcrunch2

dutchcrunch

Tuna, asparagus, tomato and cheese toasted sandwich. That was my favourite sandwich of choice when I lived on a tropical island covered in goannas, snakes and partying backpackers. Perhaps an odd choice for that point in my life, but it worked and I was hooked on them for quite a while. I had timed the toasting to just the right crunch, to get the cheese just so, and the taste just right. With a light tropical sweat on my brow, and evening party plans being made, that was my tropical island lunch.

Day old slightly stale cheap bakery bread topped with peanut butter. That was my lunch of choice when I first moved to Sydney. With barely any furniture in my newly leased flat, my fluffy white cat pushing against my feet for attention, my lunch time choice was the cheapest of the cheap. Certainly no crunch in this lunch. I was lucky to get the sandwich actually swallowed without at least two glasses of water.

These days, my lunch of choice is usually an open sandwich on something dark and grainy. Not for the rest of my family though. I made these dutch crunch rolls recently and they were declared a new lunch time favourite.

You can easily make them with any basic bread recipe, (commercial yeast or sourdough) and all you need to do is add a thick paste to the top before baking. Giving your lunch a little extra crunch.

dutchcrunch1

Dutch Crunch or Tiger Bread

Sourdough Bread

400g starter

750g flour (5 cups)

750mls water

2 tsp salt

Commercial Yeast Bread

see this post if you have never made bread before and think you might like to give it a crack. 

600g strong bakers flour

2 tsp dried yeast

400mls tepid water

 3 tbls olive oil

2 tsp salt

The Crunchy Paste

1/2 cup water
1 tablespoons sugar
1 teaspoon sesame seed oil
1/4 tsp salt
3/4 cup rice flour

Mix together to form a thick paste and add to half way though the last prove of your dough.  Bake as you normally do, (I do 230C with steam.)

This post submitted to the inspiring yeastspotting

everyday rolls

rolls

If you are a regular reader of this blog, you might have noticed I bake a little bread… ok, rather a lot of bread.

Bread making doesn’t have to be a chore. Once you get the hang of it, it can just become a part of your weekly routine. I make bread about twice a week these days, the kind of dough always varying depending on my time, tastes and what I might have on hand to chuck into the dough.

These everyday kind of rolls frequently pop up though. They are quick to make, always reliable, and easy to throw into the freezer to be retrieved later for school or work lunches.

Making your own bread keeps costs down and you get to decide what goes into it. No paragraph of “stuff” in my bread please.

For an easy ‘how to’ post, see here (how to make bread for the person who thinks they can’t, but really they can.)

Now this ratio is entirely adaptable. If you don’t want bran in it, simple replace it with flour or something like linseed/ sunflower kernels.

No olive oil? Replace with a little extra water.

If you don’t have a starter, just replace the 150g with another tsp of commercial dried yeast. (If you would like to make your own starter- like the lovely Laura did recently- step by step instructions are here. )

cityhippyfarmgirl

Everyday Bread Rolls

150g starter

1 tsp dried yeast

300mls water

1/2 cup unprocessed bran

2 1/2 cups flour

1 1/2 tsp salt

3 tbls olive oil

Add starter, yeast and water together. Whisk and leave for 10 minutes or so. Mix remaining ingredients together and leave for about 30 minutes. Add the salt and then mix or knead again, (I use my mixer.) The dough needs to be smooth and elastic. Leave to prove for a couple of hours, with a couple of knock backs in between.  Shape into rolls and place on a lined tray, allow to prove for another hour or so.

Cook for about 15-20 minutes at 220C-230C with steam.

chocolate hot cross buns


hot cross buns

Goddess buns. I definitely liked the sounds of that.

I was doing some reading on the history of hot cross buns. Along with the obvious Christian links, the Anglo Saxon goddess Eostre is also connected. (She also seems to be a goddess that not a lot was known about.) A cross being placed on a bun to represent the four phases of the moon. Eaten during the time of the first full moon after the Spring Equinox. Well how about that… fascinating isn’t it this wonderful world we live in.

I also found out that Chocolate Hot Cross Buns seem to be an Australian/ New Zealand thing. It seems we have far more non fruit loving people down under than the rest of the world- which suits Mr Chocolate just fine, as dried fruit and he aren’t firm friends. The nose wrinkles a little and head pulls back in a sharp subtle manner… sultanas?!
.
Chocolate however, no problem what so ever.
.
Would the Saxon’s have approved of these Chocolate Hot Cross Buns in honour of the Goddess Eostre? I like to think so, after all, chocolate is, food of the gods.
.

cityhippyfarmgirl

Chocolate Hot Cross Buns

250g sourdough starter

1 tsp dried yeast

100g sugar

250mls water/milk*

100g softened butter*

600g flour

200g dark chocolate drops**

100mls water

2 tsp cinnamon

1/2 tsp cardamom

1/2 tsp dark malt flour

2 tsp salt

Mix all ingredients together, except for the salt. Autolyse period 20-45 minutes. Add the salt and mix again, then turn out on to a lightly floured bench to knead until you get a lovely smooth ball of dough. Pop the dough back into the bowl, plastic bag over the top and leave to prove.  A couple of proves and folds over the next few hours. Then out onto lightly floured surface again and divide into 16 or so portions. Roll into balls, or simply divide to get a more square shape. Pop them on a lined baking tray, cover and leave for another prove. The dough is ready to be baked, when you press it in and it lightly springs back.

Crosses

1/2 cup flour

1/4 cup sugar

1/2 cup water

Mix together and spoon into a piping bag just before they hit the oven.

Then bake at 210C for approximately 15-25 minutes, (until golden.)

Glaze

1/2 cup sugar

1/2 cup water

Bring to a simmer for a couple of minutes and then brush on to the hot buns with a pastry brush.

Vegan variations

* to make these vegan, omit the butter and milk. Substituting the milk for water.

** use a dark chocolate without any milk solids, and add two tablespoons of great quality cocoa

This post submitted to the always wonderful yeastspotting.