decluttering and a ploughman’s lunch

I’ve been decluttering.

Really decluttering this time.

I am constantly talking of decluttering and even get rid of a small bag or two of ‘stuff’ fairly regularly. However this time around, it’s the big guns. Everything must go. Well not quite, but everything must be re-evaluated and re-assessed to see whether it really is needed or wanted.

Living in a small living space, requires constant reassessing of said ‘stuff’. I try to be very careful of what comes in the door, but still the ‘stuff’ mounts up. And mostly it’s just stored away, under the ‘maybe we will need it one day’ label. With another baby on the way, space is kind of important. Not that babies take up much room, but I know I’m going to enjoy an empty draw or a cleared shelf space a whole lot more once the decluttering as ended.

One thing I have been going through is all my resource folders. I had actually forgotten I had them, as there was a pile of other ‘stuff’ in front of the cupboard door for so long, so much so, that I couldn’t open the door. Front pile gets smaller and shifted. What’s behind there oh…more ‘stuff’. Goody.

Resource folders like,

House ideas- still haven’t bought that house.

Gardening how to’s- I’m still just making do with pot plants, that large secret garden is still a while off.

Massage Therapy notes- too many years ago, am I really going to look at it again?

Old work stuff- come on, it’s been awhile…quite a while.

A years worth of French notes- Parlez vous anglais?

And a whole lot more.

One good thing to come out of all of this, is just moving it somewhere else. Not another folder or another shelf, but online. Having stopped myself from using Pinterest since I heard about it, (as I did not need another digital distraction) I’ve decided that quite frankly it’s a bloody good idea, and now all my scrappy pieces of paper instead of cluttering up my flat, can now clutter up cyberspace. Ahhh, quite liberating really.

So while I don’t need to add any more screen time to my life, I’m loving having a place to store all those ideas that don’t take up my living space and doesn’t gather dust… and I’m quite happy with that trade off.

So what’s all that got to do with a ploughman’s lunch? Not a lot really, but a girls got to eat, and I had had a ploughman’s lunch roll on my mind for quite some time.

Time to get that thought on to my plate.

Ploughmans Lunch Roll

seeded bread roll

lettuce

your favourite strong cheese

apple slices

chutney


Ploughmans Lunch Bread Ingredients
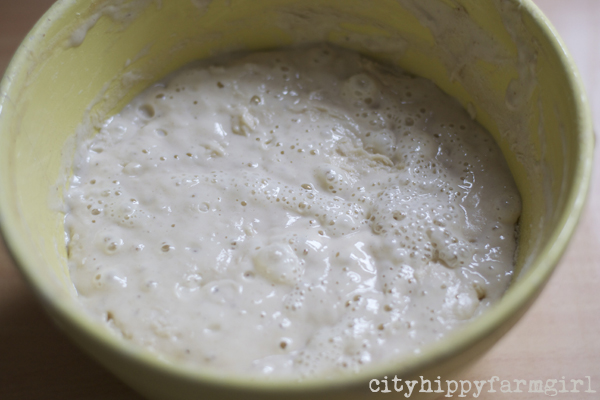
300g starter (100%)

50g (1 cup) unprocessed bran

50g (1/2 cup) linseed meal

3 tbls LSA

2 tbls chia seeds

100g spelt flour

300g strong bakers flour

300mls water

1 1/2 tsp salt

Make it up in your favourite bready fashion.

(I gave an overnight prove, shaped, and proved again. Sprayed rolls with water and then baked at 240C with lots of oven steam.)

******

This post submitted to yeastspotting

Fruit and Nut Rye

There is something about truly wholesome food that feeds the soul. A simple seasonal dish, fruit and vegetables picked at their best. Honest food that nourishes, heals and restores.

It could be something as simple as revitalising an appetite or tantalising those taste buds. Inspiring to cook better. I was watching a cooking programme the other day and got so excited about the simple ingredients the chef was using. The presentation was beautiful, the colours, the textures and also the fact that it took just a few minutes to prepare.

Food is exciting. It can be wonderfully vibrant. It brings people together. The textures, the smells, the colours all mixed together can do so much. As I quite often write, it doesn’t have to be complicated, and it doesn’t have to take half a day to prepare.

Packets don’t have the same effect. Jars are unlikely to as well. Fruit and vegetables with their genetic diversity dumbed down for convenience and then stored for great lengths of time do not have the same qualities and effects of their seasonal local heirloom variety counterparts.

I love sweet things, and don’t have any issue with sweet recipes in moderation. However I do think that in our society sugar is being used as a substitute for taste. Salt is right along side it. A product lacking in flavour, health, anything nourishing what so ever will be added to. What with? Sugar and or salt. It deadens the taste buds, you want more, your satisfaction levels get confused and more gets consumed. Using ingredients that are easily identifiable, and letting their real flavours shine through brings dishes to the table that make a person smile.

Listen closely to a small child with their favourite simple piece of fruit, and more often than not, slow enjoyable eating sounds will be heard. A sun kissed strawberry brings nothing but happy slurps and red stained fingers and mouth. Taste buds heightened and ignited. A lesser strawberry would still be consumed, but leaving no satisfaction, taste buds lying dormant and on finishing it, you’ve already forgotten about it and moved on.

Bread is no different. For this bread I wanted something that nourished every part of me. A couple of slices for breakfast that would leave my taste buds awakened and my body energized.

Fruit and Nut Rye

300g starter

200g strong bakers flour

100g rye flour

50g linseed

100g sultanas

50g chopped pecans

25g unprocessed wheat bran

1 tsp dark malt flour

275mls (approx) water

1 1/2 tsp salt

handful of raw almonds

Mix all ingredients together except the salt. Resting period for about 40 minutes. Add the salt and mix again. Two long proves with a quick knead in between. Shape or pop in an oiled loaf tin, making sure you throw in a handful of whole raw almonds at the bottom of the tin and bake at 240C with plenty of steam. I baked this one for about 40 minutes. Then gently flipped the loaf out of the tin and into the oven again for another 5 or so minutes, bottom side up, to toast the almonds a little more. Cool on a rack, then wrap and leave over night before cutting into.

This post submitted to the wonderful yeastspotting

Purple Carrot Bread

Now if I had a back yard garden I would have rows and rows of heirloom carrots growing. Not because I have an over whelming taste for carrots all the time, (although I do quite like them.) But because there are so many different colours you can grow. Orange, yellow, white, pink and for todays bread, the lovely purple.

I don’t often see them for sale, however my local farmers market has been stocking them the last few weeks so I’ve been stocking up. The Monkeys needed a little convincing they were indeed still carrots. A raised eyebrow and a sceptical look that only a 3 and 5 year old can give on being told, ‘of course they were carrots, taste them’.

So why should you eat an heirloom variety carrot?

* They taste fantastic. If you are comparing it to an insipid supermarket pale old orange carrot- well, there is no comparison.

* Encouraging genetic diversity. 

 * The purple carrots are full of antioxidants, and… they make things a pretty purple colour, (like this bread.)

Purple Carrot Bread

150g sourdough starter

150g purple carrots- steamed/ mashed

25g wheat bran

125mls water + purple carrot water from cooking

225g strong bakers flour

1 tsp salt

I did an over night prove in the fridge for this one. Baked at 240C with steam.

The result is a soft, chewy crumb similar to adding oats in a dough. The purple cooking water from the carrots adds to the intensity of the colour. The next lot of bread I made was just with the carrots, and no cooking water- resulting in a slightly less intense colour.

Next stop, Purple Carrot Cake…

This post submitted to yeastspotting.

Golden light rye rolls

Breakfast has always been my favourite meal of the day.

Travelling overseas, it was always breakfast time that excited me the most. What did the locals eat? How did they start their day?

Germany was always my favourite. A substantial rye bread, cheese, meat and muesli. I read once that the German breakfast was the best way to start the day in terms of low GI and giving lasting energy through out the day. Compared to their neighbouring companions in Italy, who often start the day with a strong coffee and some sweet biscuits to dunk in. Not that I didn’t like that breakfast as well, however I would quite often be hungry two hours later. By lunch time I would be chasing my tail, eyes looking vague and softly muttering oh please feed me.

Malaysia I was also happy with. Eggs and roti (roti telur) being readily available, a little sambal on the side with some tea laced with condensed milk to wash it all down. There’s quite a lot to like of condensed milk early in the morning.

Bagni di Lucca had posted recently on eating breakfast in Finland. While smoked salmon and I are not friends, the picture of the rye bread rolls, remained at the fore front of my brain until I just had to have a go at baking the little fellas.

I enjoyed them so much, there have been at least four batches since. Just the thing to start your day with. It’s not a bowl of cafe au lait, or a straight off the hot plate roti telur. But teamed up with some tarty marmalade and cheese or some avocado/black pepper and tomato and I’m a happy mama. Giving me lots of energy to think about my next meal…


Golden light rye rolls

200g starter (100%)

250g strong bakers flour

100g rye flour

50g golden flaxseed

200mls+ water (approx, may need more.)

1 tsp dark malt flour

1 tsp salt

extra

1 tbls rye flour

80mls boiling water

Mixing ingredients together. Resting period of about 40 minutes before adding the salt, mix again plus a quick fold. Prove. Shape. Now make up the rye water mixture. (I first did this for this 100% rye, and wanted a similar soft top.) Slowly adding your boiling water, while quickly whisking your rye flour. Once mixed together just leave it until the bread is finished the final prove. Just before the bread rolls go in to bake add a good spoonful of the rye mixture to the top, smoothing it over. Squirt with water and pop in the oven at 240 with steam.

This post submitted to yeastspotting.

Time, sourdough and a little Pecan and Prune Bread

Sourdough seems to put a lot of people off by the time factor of it all. Before I started making it last year, I liked the idea of sourdough, but even making the  starter seemed too lengthy, too time consuming, and a whole lot of hassle really. When I finally jumped in and just made the thing, it was a ohh, is that all? So with the starter bubbling away, I jumped in and away I swam with my sourdoughy… err… dough.

So is it time consuming?

Does it take a lot of work?

Does the convenience of sliced shop bread lure me over some times?

Time consuming, I don’t think of it as. (Saying that, I’m not trying to fit in with a paid job that requires my attention away from home for the majority of the day.)

You do have to plan a little. I don’t wake up in the morning and think ohh, today I shall make sourdough and have it on the table by lunch time. It’s usually a 3 day process, but it certainly doesn’t take 3 whole days to make it.

Sourdough is using natural yeast, so it works on its own time. Some times that sourdough is a sprightly young energetic woman with places to go and people to see. Bubbly and so full of spirit.

Some times that dough is a lethargic old man, shuffling along in worn out old slippers and a battered zimmer frame. You get stuck behind him, and you just know you can’t over take, as it would be rude. You just have to slow yourself down some and let the old fella set the pace.

Either way sourdough is boss. You can fiddle and tweak a little by finding a cooler spot to get it to slow down some or finding a sunny warm spot  to fasten things up a little. It all depends on the activity level of the starter, the flour and the room temperature though.

So does it take a lot of work?

No, not really. A starter feed= 1 minute. Wait 8-12 hours, feed again. Wait 8-12 hours, feed again. Wait 8-12 hours, mix up dough with a mixer and dough hooks. A plain dough=5 minutes of getting ingredients together and mixing. Go do something else more exciting for about 40 minutes, then mix again adding the salt. A quick 30 second knead. Leave it on the bench to think about things for a while. Read The Monkeys a story, have a shower, eye off some dark chocolate and then whack it in the fridge over night. In the morning, shape it (5 minutes), pop it on some trays and let it come back to room temperature- 4ish hours, slash. Bake.

1+1+1+5+30 sec+5  

That’s 13 minutes and 30 seconds of hands on time with the dough (a basic, nothing crazy loaf) over several days+ waiting and baking.

Some times I have to wait for the rising dough and sometimes it has to wait for me, we both have to be a bit flexible, which is the wonderful thing about sourdough, it is flexible. You can adapt the whole bread making process to suit you. I’ve mentioned this as one of my methods on making it work, but there are many other ways that other people do it, some that work for me and some that don’t. If it doesn’t fit in with your life style it’s going to become a pain. You don’t want it to become a pain.

So do away with the watch. Judge your bread on how it looks and just fiddle with it until you find out what works for you. Sometimes my loaves aren’t the greatest. Sometimes that extra 3 minutes baking turns into 15 and dark and crusty have a totally new meaning. Sometimes I don’t feel like washing yet another doughy mixing bowl, but… I always enjoy eating it and so do my family.

And that’s the trade off.

So jump in, give it a go, and if it doesn’t work out for you, it might later down the track.

*********

…and does the lure of sliced shop bread ever tempt me?… No chance. 

Pecan and Prune Bread

200g starter

50g oats

8 pitted and chopped large prunes

80mls hot water

large handful of chopped pecans

300g strong bakers flour

200-250mls water

1 tsp salt

Starter at 100% hydration. The 80mls of hot water to soak the oats and prunes beforehand. Mixed together and using a method that suits you.

(Baked at 240C with steam.)

* This post submitted to yeastspotting

word was out, rosetta rolls were in

The word was out. The hunt was on. Rosetta rolls were in.

Rosetta rolls, were the latest thing to plant them selves in my head. An idea that jiggled around like a salsa dancer with funny itch. Ok, maybe not quite like that, but the seed had been planted. I wanted to make rosetta rolls. Those crusty little Italian rolls in the shape of flower, quite often hollow inside, and if my memory served me correctly more than moderately delicious stuffed full with prosciutto and fresh mozzarella. Once an idea implants itself within, it’s pretty hard to shake off that salsa dancer with the funny itch, so I sent out a call for help.

The Bread Goddesses (Celia and Joanna) heeded the call and the hunt began in earnest. Not much longer than 48 hours after the call had gone out and I had a press in my hand. Now that was surprisingly quick for something at the start of my search seemed completely futile, and that clearly I would have to travel to Italy to go and find my own bread stamp. I was certainly willing…sometimes these kind of things just need to be done.

First batch I did a sourdough version and a yeasted version.

Sourdough Rosetta rolls– first batch

200g starter (100% hydration)

450g strong bakers flour

300mls water

1 1/4 tsp salt

(The difference between the colours is top and bottom shelf in the oven.)

(Second batch substituting 100g of the flour with semolina.)

Yeasted Rosetta Rolls- first batch

50g starter

1 tsp dried yeast

125mls warm water

2 tbls flour

whisked together and left for two hours, (this wasn’t a particular method, I just needed to go out.)

Then mixed in

450g flour

250mls water

waited 15 minutes then added

1 1/2 tsp salt

Prove for about an hour, quick knead and then another prove for another hour or so. (It was a cool day)

For shaping both kinds of rolls. I divided the dough into 8. Flatten quickly, then pulled the corners into the middle, with the idea of trapping as much air as possible. Flipped it over and gently tightened it all by using a pushing action going under the roll and spinning it around. On to tray and used the wonderful little stamp dipped in a little vegetable oil.

Baked at 240C with lots of steam.

Second go, and I didn’t bother with the yeasted ones, life is a whole lot nicer with sourdough. The same ingredients and quantities as the first batch but this time substituting 100g of the flour for semolina. This using a little rye flour with the stamp on top to hopefully stop the bread for joining again after using the stamp.

Any difference between the oil and rye with the stamp formation? Not noticeably. Some of the bread rolls had joined a little and some kept the perfect markings. With the addition of the semolina, I’m not sure yet. I think I’ll keep tweaking the semolina and bakers flour ratio though.

second batch with semolina

Anyone else willing to heed the call of the rosetta?…Or simply have a salsa dancer with a funny itch of an idea?

This post submitted to yeastspotting.

Apple and Oat Bread

I quite like the process of trying to work out what to put in a new bread every few weeks.

There are the regulars of course, like a well worn pair of slippers that I know how to just slip on. Making it is straight forward, I can easily do it with out that much thought behind it, and I know for the most part how it’s going to taste (sourdough does like to keep me on my toes a little though.) When I’m fiddling with different flavours though, I like the balancing act, the unknown factor…

It’s a bit like ordering from a menu in a foreign language. You think you get the idea of what it will taste like, and what it is that you might be ordering but there is always that element of surprise just waiting to be brought to the table.

Now in the past, I had played with using fresh apples a few times. I had cooked them beforehand, thinly sliced them, made them into chunks, grated them, but I think I’ve decided I like finely diced the most. You still get the apple-y taste, without it getting soggy and overly all apple. Grating the apple, while I like the moistness it gives to the loaf, I do find by doing this it loses the flavour a bit. So diced it was for this one, add some soaked oats, a little spice and we are away…

 Apple and Oat Bread

200g starter

100g finely diced apple

425g bakers flour

100g whole oats

50mls hot water

200mls water

1 tsp cinnamon

1/2 tsp coriander

1 tsp salt

Soak oats in the hot water until they plump up. Add all ingredients except salt. Mix well, let if it rest for about 40 minutes, add the salt mix again.

Proof for awhile, quick knead, proof, shape, proof. Bake at 240C with steam.

This post submitted to yeastspotting.

It’s all feeling a little Nordic

Something had been reignited again. It started with a holiday and then snowballed from there.

I’ve been reading.

Congratulations, I hear you mutter. But really it is a big thing. Books were getting piled up in ambitious piles and not moving. The newspaper was taunting me.

Then it all changed. Three books in three weeks and the ball was rolling, really quite fast. They were fat books too. The most I had been reading before that, was the back of the peanut butter jar… Even that was skim reading.

So what got me going again?

Stieg Larsson. The Millenium triology.

Goodbye Monkeys, goodbye Mr Chocolate, goodbye tv, *ahem* goodbye cityhippyfarmgirl blog… hello Sweden and your criminal mysteries.

Thoroughly enjoyed the books, all three of them.

Now with that being said, I have been immersed in all things Scandinavian and my taste buds are calling for food that would be fitting. Rye bread was obviously a must, along with anything else I could make happen.

I had also kept in the back of my mind this beautiful lady’s crisp bread recipe from the beginning of the year. It was time to give that one a go, and I’m so glad I did. They make the perfect base for an open sandwich, and I think they will definitely become a staple around here.


Knekkebrod

200g spelt flour

200g whole oats

100g pepita

100g sunflower seeds

100g LSA (linseed, sunflower and almond meal)

25g sesame

350mls water

These are the ingredients I used as it was what I had on hand. I can see how they would be incredibly versatile though, and using any ingredients that you really like. I loved them, and am definitely going to make them regularly now. See here for Turid’s original recipe though.

The Split Pea Soup I suspect is not just restricted to Swedish eating, however Jamie Oliver has a recipe for it in his Swedish section in this great book, and while I adapted it to what I had on hand and my taste buds, the one thing that I think is genius was to put mustard on top. Now, I love my mustard but I would never have thought to add it to a Split Pea Soup, so thanks Jamie.

Split Pea Soup

adapted from Jamie Oliver’s “Jamie does…”

A good couple of slurps of olive oil

add a couple of diced sticks of celery, and an onion

cook it down a little

add 500g of washed split peas

and about 1.5 litres of stock (I use vegetable stock)

1 tsp oregano

and simmer it for about 45 minutes or until soft.

Serve with a dollop of mustard and knekkebrod.

slowing it down to eat some rye bread


Sourdough is not a quick process. It’s slow, likes to amble. Take its time. Focus it’s energy on the job on hand and then gradually release all of that sourdoughy goodness. Especially slow in winter. I don’t mind though. I’m in no hurry. The bread and I have no place special to be, and if I did…well the bread can wait. Sourdough is like that. Occasionally moody and a little flighty, but regularly reliable, and keen to just make peace with what ever is happening. I like that.

I had started with a 100% rye from Dan Lepard’s The Handmade Loaf. I took my time, didn’t hurry it along. It turned out ok, but I wasn’t thrilled. Mr Chocolate had mistakenly washed up my 2 tablespoons of crucial gelatinized mix to go on top of the loaf, and it all looked a little too floury. I had been nervous about putting the sticky mass dough in my banetton, so had floured a teatowel to line it instead. The loaf just came out looking like a floured teatowel though. Never mind. I’ll try a again.

Trial one

Second time around and I thought I would tweak the flavours a little. I wanted a more in-depth flavour, and also banished Mr Chocolate from my gelatinized mix at the crucial time. Flavour was better, and I didn’t bother with a banetton, just freeformed a rough round shape and pegged the sides of the baking paper to cradle and support it a little. It did rise, the top looked a little glossy, and several cracks developed while rising…. but it wasn’t quite there yet. What was missing?

Trial Two

Third time around, and the weather was cold. It certainly was going to take longer than the 5 hours recommended to let it rise. Once baked, I left it for 48 hours wrapped in baking paper before I cut into it. This really did seem to help in the development of the flavour, but….

Trial three- it’s getting there. The flavour was certainly there, but not quite there yet…

Fourth go. It tastes good.

I’m done.

Trialing and tweaking I’ve enjoyed doing, but I still find it a bit of a pain to make on account of it being so sticky. The taste is there though. It was really cold the day I made this one and it certainly didn’t double in size. It was a loooong cool prove, probably 12 hours on the bench all up plus 12 hours in the fridge. I’m still sticking with the hand shaping and laying on bakers paper rather than a banetton, I didn’t bother checking the temperature of the boiling water asper Dan Lepard’s instructions, (things aren’t that slow round here.) Just whisked when it’s boiled. I also think wrapping it afterwards is very crucial. The taste is a light sour, really tight crumb and I think the linseed and dark malt flour I added give a bit more depth, to which I like.

It’s filling, it’s good for you, The Monkeys won’t have a bar of it, and that suits me just fine. I can eat my way through it… slowly.


My changed ingredient list is as follows, for the method and some other invaluable notes on Dan Lepard’s more original recipe- jump over to Zeb Bakes. The lovely Joanna made this a little while back and it was really interesting to see what she thought of the same recipe.

100% Sour Rye

adapted from The Handmade Loaf
300g rye starter
75mls cold water
450g gelatinized rye mix
400g rye flour
1 1/2 tsp salt
1 tsp cardamom
1 tsp dark malt flour
50g (1/2 cup) linseed meal, or LSA
gelatinized rye mix- 90g rye flour and 360 mls water
**********
The night before make up the gelatinized rye mix, using just boiled water and whisking flour in immediately. Leave two tablespoons aside for the top of the loaf. Whisk cold water into thr rye starter and then also whisk in the gelatinized mix. Then add remaining ingredients.
On to an oiled surface, try and squish it into the shape you want. Smoothing it round and leave it for 5 (ambitious for me)- 12 hours on a baking paper cradle or banetton. Until it’s risen a bit anyway.
Spread the remaining gelatinized mix on, spray with water and pop in the oven at 210C for about 50 minutes.
******
This post submitted to yeastspotting.

Chia Quinoa Bread

Hippy bread. That’s what my mum would probably say if I told her what the loaf of bread sitting beside me was called.

Maybe it should be called superfood bread? Both chia and quinoa seem to be happily sitting under the superfood umbrella at the moment. Basking their superfood bodies in the healthy food spotlight. Rightly so, as this loaf certainly feels good and healthy on eating. I’d picked up some locally grown quinoa in Tasmania and already had some chia lounging in the back of the fridge. I was ready to jump back into the sourdough making after being away and these two super heroes had their names written down for my upcoming loaf.

After we had got back from Tasmania, checking the sourdough starter in the fridge was one of the first things I did. Actually I checked both of them, as I had put two in different bowls in different positions to try to make sure something was still happy when we got back.

Why so pedantic?

It all started a few weeks back.  There I was on an everyday Monday, with a head full of things that left very little room for much else. I needed to make bread and while in my whole heartedly distracted state, I used all my starter. Yes. Allll my starter. My starter that I had been gently nurturing for over a year, providing my family with abundance of loaves of bread, and I had just used it all.

A sharp intake of breath, a slight sweating of the brow, and a quickened heart beat. Oh, oh, oh….

It’s ok! I’ve got a frozen bit for back up. I had recently used another frozen portion to see how the whole bringing it back process actually worked. I’d also written a draft post on it. It was going to be fine. It was going to be fine…

But it wasn’t. It wasn’t fine. I gave that little frozen starter so much love it clearly didn’t know what to do with itself. An encouraging one teeny tiny bubble a day kept my hope alive. Come on little thing, you can do it, I softly whispered.

It turned grey. I changed bowls. I added more water. I added more flour. I added honey. I added rye… It smelt funny.

I suspected death was around the corner and in a last attempt before quietly putting her in the bin, I turned it to three different bowls with three different ways of encouraging the starter to grow to her old bubbly self. One bowl died immediately, and two decided to give themselves one more go. Two bubbles…three bubbles, four bubbles. Frog spawn! Oh the joy! Thank you, thank you, thank you.

Yes, I could have got some starter back from friends who have now embraced the sourdough pilgrimage. I could have made another, and I could have just let it rest awhile and played with commercial yeasted bread. I could have, but I didn’t want to. I wasn’t the only one who had despaired at the thought of no sourdough. Mr Chocolate had looked on with horror when I had explained what had happened on that first distracted day. Horror again at the thought of his lunch going to have to come from shop bread…

So that’s what happened. But now, the old girls back. She was clearly itching to get cracking with some loaves of bread this time around, as it didn’t take long for those reassuring bubbles to come back at all, (thank goodness.)

Chia Quinoa Bread

2 tbls chia

150g quinoa

300mls water

—————

300g starter

450g strong bakers flour

375mls water

300g cooked quinoa and chia (I had a bit left over)

1 1/2 tsp salt

In a pot add the quinoa, chia and water. Cook for about 10 minutes or so. When the water is all absorbed and grains have softened, cool a little. Add starter, flour and water. Mix together and then I left it for about half an hour. Add the cooled quinoa and chia, mix well (I used a dough hook) then add the salt. A 30 second knead/fold on lightly floured surface and back in the bowl for an hour or so. Another 30 second knead/fold and then back in bowl, covered and into the fridge for a cold sleep for about 12-ish hours. Back out, getting a tight knead together, than into the banetton for about 4 hours.

Out on to tray, slash, steam, and bake at 240 for about 40 minutes.

*This post submitted to the lovely yeastspotting

how to make a sourdough starter

I made a sourdough starter a year ago and have been happily dibble dabbling in sourdough ever since. I love it and my family loves it. It’s easily become a regular part of our life. When I initially started it, I had no idea what I was doing, had confused myself, and so just played around until I got into a rhythm that I liked. The whole process is still very much evolving and I am by no means an expert though. How I do things, constantly gets tweaked and changed and I’m fine with that. There is a LOT to understand with sourdough and bread making in general and I still feel I only have a tiny grasp of it all.

I’m fine with this though. I’m happy to keep fiddling, tweaking and learning. I’ve had a few questions lately of how I started my starter. I partially documented it here, but was never really sure whether it would work properly. It did work though and a year down the track the starter is strong, happy to get reduced to nothing, frozen, bulked up, popped in the fridge, loved on the bench. It’s very much still there.

So could I do it again? Could I make another? Was it a fluke the first time? Were the planets aligned and the sourdough fairies happily hovering when it all happened the first time? Let’s find out. Let me see if I can make another, and this time show a bit more of the process, (as long as it didn’t turn grey, smell like vomit, smell like acetone, grow purple mould, or simply just die.)

You’ll need a ceramic bowl, an old plastic shopping bag, rye and bakers flour, tap water. Try to feed your starter at approximately the same time each day.

 Day one- Added 50g rye flour and 50mls water together. Weighs 100g.

 Smells like- rye flour and water

Looks like- rye flour and water

 Day two– First feed. Adding 50g rye flour and 50mls water to flour and water mixture. Now weighs 200g.

Smells like- rye flour and water.

Looks like- rye flour and water.

Day Three– Second feed. Adding 100g white flour and 100mls water to the mixture. Now weighs 400g.

Smells like- Fruity and floury, things are starting… Go on, take another smell to make sure.

Looks like- It’s puffed up a little, it looks a little stringy when you stir through the feed. That tiny black speck in the middle is a bubble.

Day Four– Third feed. Adding 200g of white flour and 200mls water. Now weighs 800g.

Smells like- a bit fruity, a bit yeasty, a bit…?

Looks like- more bubbles, with a few white streaks with the change of the flour.

Day Five– Fourth feed. First I need to divide the starter, (otherwise it will be too big- this just goes in the compost). Take it back down to 100g of starter and add- 50g white flour and 50mls water. Now weighs 200g. (This is repeating Day Two)

Smells like- A bit fruity, a bit yeasty, nothing unpleasant at all.

Looks like- Bubbles. Lots of action going on now.

Day Six– Fifth feed. Repeating Day Three. 100g of flour and 100mls water, now weighs 400g.

Smells like- fruity/yeasty kind of action.

Looks like- bubbles, a whole lot of them.

day seven copy

Day Seven–  Changes. The smell of the starter becomes slightly more acidic smelling. As long as there are plenty of bubbles happening, you can decide whether you want to keep feeding it and bake with the discarded amount of starter or store it in the fridge, (this is now your mother.) At this stage your starter is a little vulnerable as it’s still new, but the older and more feeds it has, the stronger it will be.

By storing the mother in the fridge you slow down the fermentation process. (I store mine in the fridge, feeding and baking with it twice a week.)

Before you want to make up a dough, you will need to refresh your starter at least 3 times within 36 hours, (eg. 7am, 7pm, 7am.) Longer, if you have left it for any length of period.

*****

Now as this was just an experiment and I didn’t really need another starter (or to be using up any more flour). I decided to mix up a dough. The bubbles were good and big, and ready to rock.

Into the mixer, with 200g of starter, 375g flour, 250mls water. Quick mix with the dough hook, then forgot about it for 2 hours, (I usually leave it for 40 minutes.) Added 1 tsp salt, mixed again with the dough hooks and then by this stage it’s late and I couldn’t be bothered thinking about anything bread, so whacked a plastic bag over the top of the mixing bowl and popped it in the fridge.

Day Eight– 7am out on to a lightly floured bench, for a quick stretchy, three way fold. Then back into the mixing bowl with bag over the top, and placed in the warmest spot in the flat. Couple of hours later and it’s doubled in size. Back to the lightly floured surface. A stretchy, three way fold again, a little shaping and then on to a paper lined tray with a bag over the top again. Chase the sun once more and forgot about it for half the afternoon. Doubled in size (ish).

Pre-heated oven, then

slashed and into the oven at 240C with steam.

So did it work? Yes, I think it just might have.

*****

EDIT- Simple, Everyday Sourdough Recipe here.

If you are interested in getting into sourdough, there is some more information on other methods, troubleshooting, and maintaining the starter below. (There is a LOT of information to take in, but it’s a versatile beast that works in many mysterious ways for a lot of different people.) These people who have shared their vast sourdough knowledge on these sites have been doing it far longer than I have, so please have a read, and happy playing with your new pet.

sourdough baker

sourdough.com

wild yeast

bread cetera

the fresh loaf

Books

Bourke Street Bakery

The Handmade Loaf

The Real Food Companion

calzone…or little parcels of goodness

First time I ever had one of these doughy little parcels of goodness, I was sixteen. I was walking on a crowded street with school friends on a Saturday night in southern Italy. It was cold, the middle of winter kind of cold. Cold enough for the wind to whistle up my slightly too short jeans, and leave a chilled to the bone feeling.

My jeans in those days were frequently too short, as I was quite tall. So in winter time, the wind would whistle around my ankles, attaching its cold breathy fingers to me.

Biting into a calzone was the perfect antidote. Two bites in and you would reach the molten lava that is the tomatoey mixture inside. Hot enough for you to start gasping, waving a useless hand in front of your gaping mouth. Hoping to god, that the mouthful of food would cool in your mouth before you had to spit it out and look like an idiot. In those days I would choose burning the roof top of your mouth until all that remained was a flapping bloody mess of skin, over looking like an idiot any day.

These days, the jeans length has dropped. My ankles stay warm, I don’t tend to keep molten hot food in my mouth and the happy taste memory of calzone are still with me.

Calzone to make are dead easy. It’s basically a folded pizza. What ever you like on your pizza, can go in these. I used this olive oil bread dough, (I like making up extra bread dough and keeping some in the freezer for a quick weekend lunch.) Rolled out a rough circle, shoved some cooked tomatoes, salami, mozzarella in and then folded it over. Pinch the sides and place on an oiled or lined tray. Into the oven at 240C, cook until golden and sounds hollow.

Eat…when slightly cooler.

Submitted to the lovely yeast spotting.