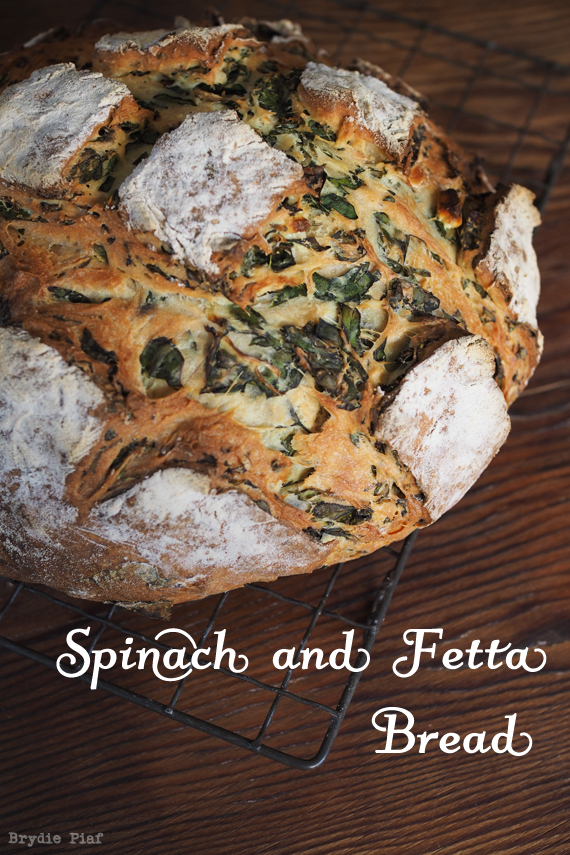
While two of my children gagged their way through dinner, the other one couldn’t get the second, third, fourth slice in fast enough. The problem and in equal measures, the highlight of the bread, was the spinach.
Spinach is one of those vegetables that seem to be hated by many and adored by all others. I think spinach is delicious and and will happily eat it in any form given to me. In a bread, you’ve got the benefit of a vegetable hidden (or not so much) in a high carbohydrate baked good, where you can’t go wrong really.
(Although two round here would contest that.)
So while I showered my spinach eating child in heart eyes, deep seated love and adoration, I loaded up his plate with slice after slice of green infused bread goodness.
I ignored my other two who continued to gag their way through the meal, feigning food poisoning, swallowing inability and general parental wickedness at even placing such a thing on our family table.
I instead focussed on the crusty sided outside of the loaf. The soft inner crumb, the subtle taste of the spinach and fetta infused throughout and the slappings of cultured butter to bring it all together.
As sunk my teeth in, I mumbled that I might make another one tomorrow.
Predictably this was met with a one sided cheer and two tragic noisy wails worthy of oscar nominations…luckily for me I’m well practised at ignoring misguided spinach wails.
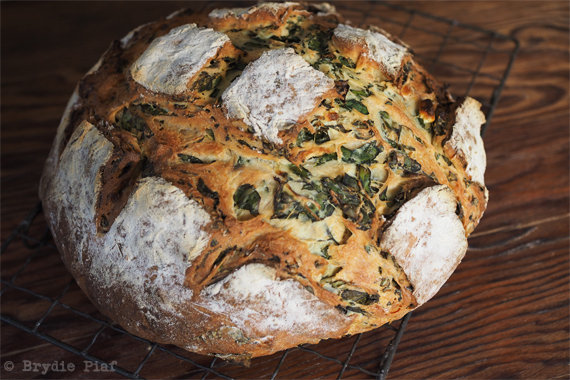

Spinach and Fetta Bread
2 tsp dried yeast
5 cups (750g) strong bread flour
600mls tepid water
2 tsp salt
200g fetta
1 bunch of finely chopped spinach or rainbow chard
In a large bowl mix through your yeast, flour and water, with a spoon then cover bowl and leave for 20 minutes. Then add salt, spinach and fetta, turn dough out on to bench and knead dough until it comes together. It’s a bit of a messy one with the spinach and fetta, but the dough will start to feel smooth and more elastic.
Pop the dough back in to the mixing bowl and cover for about an hour or until roughly doubled in size.
Fold the dough over once, and then proof again.
Dough out on to the bench and gently shape into a round, laying it on a baking tray. Rub a little extra flour on the top and leave to proof again until roughly doubly in size.
Score the dough just before it goes in the oven and bake with steam at 230C.