This is, (I hope) a really basic way to start making your own bread. It’s an adapted version of the Bourke Street Bakery cookbook olive oil dough. I’ve used it a whole bunch of times, and it’s always reliably delicious.
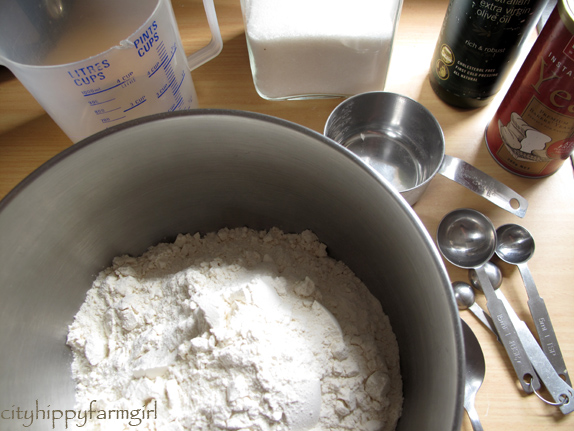
You will need.
600g flour (4 cups- I use strong bakers flour)
2 tsp dried yeast
400mls tepid water
3 tbls olive oil
2 tsp salt
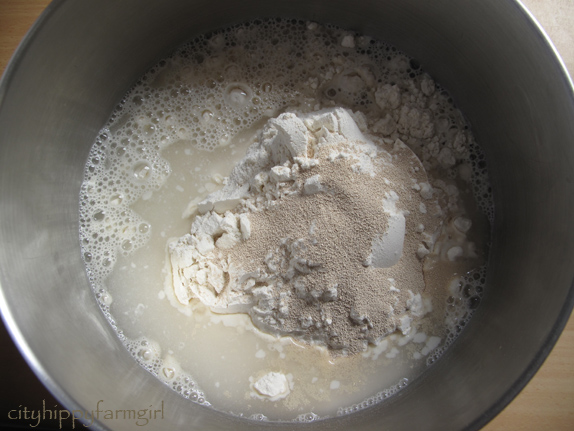
In a large mixing bowl add the, 600g flour, 2 tsp yeast and 400mls water. (The slight warmth of the water will kick start things, don’t use hot; you’ll kill the yeast.)
mix with a spoon until it all comes together. It will look a little dry and unlikely.
Now leave it for 10 minutes.
The dough looks and feels a little different. It’s been doing its thing for the past 10 minutes.
It will feel softer and more workable.
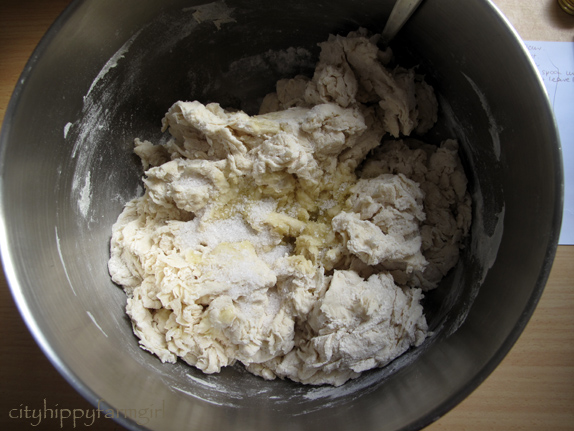
Now add 3 tbls olive oil, and 2 tsp salt
Mix it through with the spoon initially, for about a minute and then by hand. You will be able to feel it coming together. Now tip it out on to a bench and knead. (I don’t find with this recipe I need a floured surfaced area, but it may depend on the type of flour you are using. If it’s sticking, lightly flour the surface and your hands.
Work the dough until it comes together as a smooth, stretching mass (or use a mixer with dough hook). You want it to feel elastic.
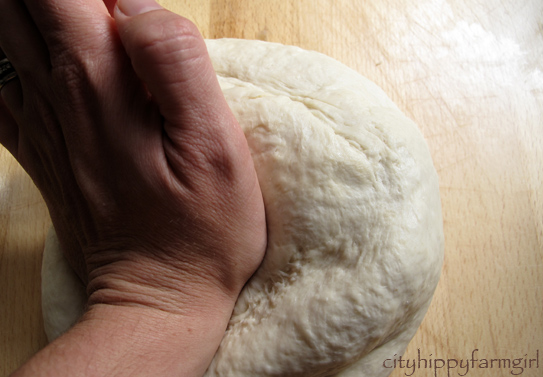
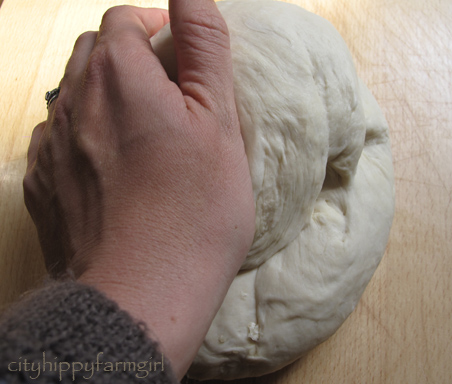
Use the heel of both of your hands for kneading. Finger tips flick the dough up, and heel of hands push down.
When the dough is soft and smooth, it’s a happy dough. The kneading will probably take about 10 minutes.
Then pop it back into the mixing bowl, (or a lightly oiled clean one, I just whack it back in the grubby one though) with some plastic wrap (or a shopping bag/wet tea towel) over the top. This stops it from drying out. Let it prove for 30+ minutes.
If the dough is in a warm spot (about 26C) it will just need the 30 minutes, if cooler, it may take longer. If it’s soft, and springs back when you poke it, it’s ready to be folded.
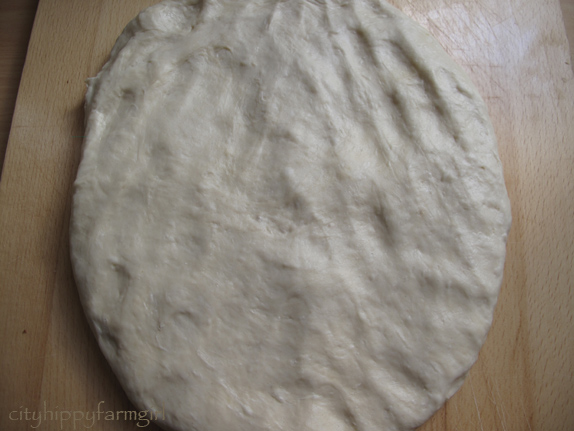
Pop it out on to your work surface and roughly flatten it. Using your finger tips.
Fold one third over
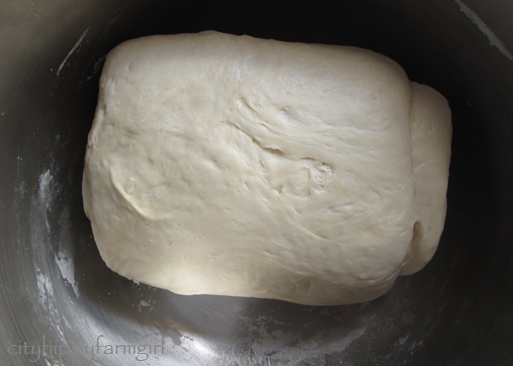
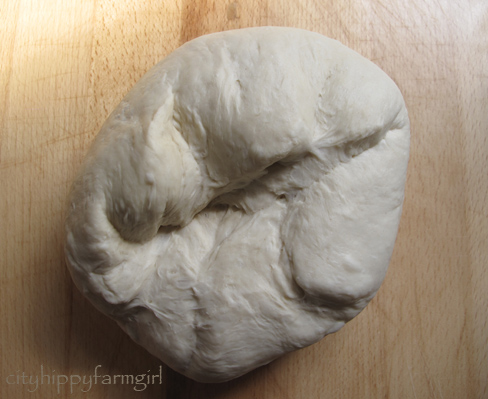
Then the other third over. Turn it 90 degrees, and fold it to thirds again. Pop it back in the bowl.
looking kind of square
Another prove for about 30 minutes, (longer if it’s colder). Then get it out and press the dough down on the working surface area and shape. Or…
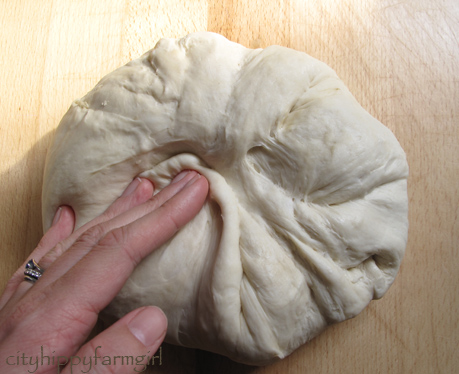
Take the ball of dough out of the bowl and place on the bench. Pulling a side of the circle, and dragging it into the middle and press down. Keep going until you have gone all the way around. Then using one hand to do the same process with the heel of your hand, (side to the middle) and your other hand turning the disc. This process can be used instead of the folding after the initial prove or it can be a way to do a final shape.
In to the middle.
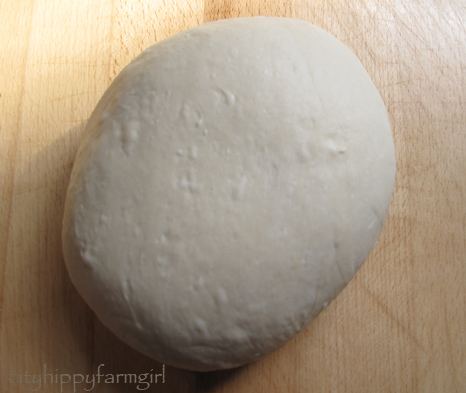
Looks like that
and then flick it over. Should be smooth and round. Once you’ve got the shape you want, pop it on an oiled tray (or a tray lined with baking paper) cover it with a plastic shopping bag and leave it to prove again in a warm spot. Should have risen by about 2/3 and feel/look soft and pillowy. This can take 30+ minutes.
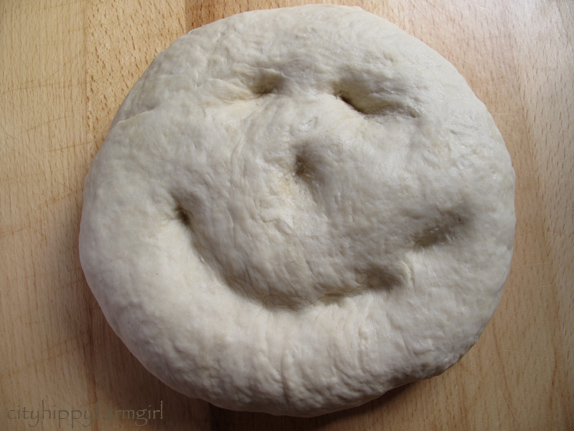
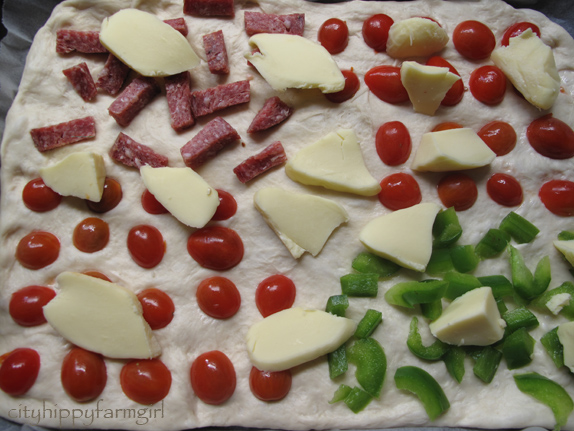
This dough can be shaped into just about anything. I used it as a foccacia base here, but have used it as a fish, mermaid, sunflower, grissini and bread rolls.
Bake in a pre-heated oven at 240C with steam. I use a water squirter bottle for the steam. 20 squirts in the crack of the door once you’ve popped the bread in or you can use a little dish of water at the bottom of the oven when you turn it on. Baking time depends on the shape you have made. Bread is cooked when dark golden in colour and sounds hollow if tapped.
*****
The trick with bread is, you just have to practise. Make it, and if there are any problems, write down what they are so you remember for next time and can change it accordingly. I watched my mum make bread my whole childhood so absorbed how to knead it just by watching. If you have never played with dough before though, it might seem a little daunting.
Play with it.
At worst, they will be stone hard burnt unsalted bricks, (and I’ve certainly made my share of them before). Most likely though, they’ll be delicious, and you’ll never want to buy shop bread again.
Books to make you want to play further
Online






Brilliant post. I’m fairly new to making bread and have chosen to go for the very pragmatic option, no-knead bread (from the Artisan Bread in 5 Mins a Day book). It’s really good for what it is, but I think it’s such a shame to forgo the kneading! I was given the Bourke St book last year though, so once I have the headspace I’ll mix it up a bit!
Ps tell me, do you actually make all your bread?do you ever just buy a sanwhich loaf? Spill it, Brydie!
LikeLike
My bready secrets eh? Ok… do I buy loaf bread? No. But I do buy a deli Greek style pitta bread that The Monkeys like as a change, also the odd Fijian roti wrap which is from the deli as well. Otherwise it’s usually just the sourdough, with the odd yeasted bread I make here and there. I tend to bake big lots and just freeze them, so it lasts most of the week. Sandwich loaves don’t fill up! 🙂
LikeLike
Lovely clear step by step. I don’t knead the way you do but use Dan Lepard’s method and the bread comes out OK usually. I think lots of people get pleasure from kneading and it certainly does no harm, but long kneads just aren’t necessary from my experience. Why am I saying this? Because. unlike you, having to knead dough was the one thing that put me off doing it. I have weak wrists, getting weaker as I age, and I couldn’t face all that kneading, so I was very relieved to find the short light knead method, three short kneads over 30 minutes, followed by stretch and folds, worked so very well. x Joanna
LikeLike
Actually I don’t really knead the sourdough (which is the usual bread) that much either Joanna 🙂 I did this yeasted tutorial for someone that had wanted to know how to make bread but hadn’t really played before. I use the mixer with a dough hook and a whole lot of leaving it alone to do it’s thing. The second knead with the stretch and pull, and then spun into the middle shown here is what I do usually after the mixer has done its thing and I’m loving that it takes 30 seconds! I think the longest I spend with the dough is when I shape it.
I would never make it so much if it was so time consuming.
LikeLike
I love the kneading process. Maybe I just have a lot of stress to work out! 🙂 I Love making Italian bread so that I can punch it down as well, mid process. Maybe I am too aggressive in the kitchen?
LikeLike
You are the Bread Goddess!
LikeLike
Thanks Dixiebelle 🙂
LikeLike
Wonderful. You make it seem so easy.
Matthew 🙂
LikeLike
It is Matthew! 🙂
LikeLike
I do it the lazy way and put it in a food processor with a dough hook – too easy – and it is always delicious.
LikeLike
the dough hook was a marvellous invention wasn’t it.
LikeLike
Thanks so much for posting this (with pictures and all!). I really appreciate you sharing your expertise. I feel I have everything now to give it a go… will let you know how it turns out (give me a week!). xx
LikeLike
No hurry MM. You’ve got it now for when ever you feel inspired. It really is easy after making it a few times. Just fiddle and tweak it to suit you. You don’t want bread making to be a pain in the chops, otherwise it takes all the fun out.
Good luck Mama!
LikeLike
What a great step-by-step guide – thank you. My bread making skills are virtually non-existent, but the few times I have tried it I’ve been pleasantly surprised by the process being much easier than I expected. This may just motivate me to do more 🙂
LikeLike
A lot of bread recipes, my eyes just start glazing over after the first paragraph. I’m definitely a visual person. Pictures make it seem more achievable.
LikeLike
What a wonderful tutorial!
🙂 Mandy
LikeLike
Thanks Mandy. I hope it makes sense to people who haven’t played with bread before.
LikeLike
love the step by step photos – though I had hoped to see a photo of the baked bread.
I can add my own two cents to your advice – I grew up with a mum who baked bread and learnt a lot from her. one thing I do remember is when she was starting out that her bread was hard rocks but now her bread is superb and so I know that it takes time to learn to make bread
LikeLike
Baked at dinner time, bad light, hungry Monkeys, no…ravenous Monkeys. No chance of a photo that time. All photos of the end results of the fish, mermaid, grissini etc are all there though.
It does take time to get to know when a dough is ready, baked properly etc. I guess with anything, practise makes things a lot easier.
LikeLike
Great instructions. I have to remember to do the happy face next time!
LikeLike
Happy dough, happy face Rufus 🙂
LikeLike
Lovely step by step guide! I started making pretty much all my bread a couple of years ago now and like Joanna, tend to favour short kneads (but not due to weak wrists – I’m just lazy!!!) and agree so much about practice making better bread. Some of my first ones weren’t nearly as good as what I make now (and I’ve got a way to go for perfection!) but it’s so worth persevering! I love the adaptability of this dough, a perfect blank canvass.
LikeLike
A really blank canvas. I find this dough super easy to make up quickly and seems to hold its shape to what ever I put it in.
…and I’m lazy too! Short is good.
LikeLike
You’ve really got me in the mood for white bread now. Love the smily face. Really good clear instructions. I was interested to see the folding as I’ve heard a lot about it but not quite understood how it was done. Of course my rye sourdough is too wet to even knead so can’t fold that, but one day will try making some plain white bread and use your method,
LikeLike
I’ve got my very first 100% rye sourdough proving at the moment. I’m excited!…but I really hope it works.
LikeLike
I have only attempted making bread with my machine so far but I am interested in giving it a go by hand now that my family and I have fallen in love with the taste and beauty of not being dependant on having to go to the supermarket to buy bread. Thanks for the links, love the look of the books!
LikeLike
It’s incredibly freeing not relying on super market bread isn’t it!
LikeLike
Fantastic photo’s, Brydie. I love that book, although I suspect my waist expands just looking at it!
LikeLike
sigh… Amanda so does mine.
LikeLike
I’ve seen so many bread posts lately thunk it’s timeto face my fears and just do it! Ive never made ‘real’ bread (where you have to price it and punch it!) only cakey bread. Yours always so look so amazing!
LikeLike
Face those fears Mrs Bok, jump in! 🙂
LikeLike
Great tute, Brydie! 🙂
LikeLike
Thanks Celia. Hopefully it makes sense!
LikeLike
It’s been a while since I made bread with dry yeast, and even longer since I made all-white bread. But I read this post this morning and it reminded me that I hadn’t started any bread to go with the soup I’d be making for dinner tonight. So I made rolls with this recipe, and I must say they’re the lightest, softest bread I’ve ever made! Oh my goodness. Perfect for dinner. Thanks!
LikeLike
How wonderful are you! Thank you. I forget that this a white bread recipe sometimes, all the olive oil in it some how turns it healthier in my mind. Thank you for making it Betsy 🙂
LikeLike
Pingback: Sunday Link Round Up Move To Portugal | Move to Portugal
Great post Brydie and super easy…compared with my sourdough quest. Love the idea of studding it all with an assortment of tomatoes, cured meats and cheese. These days I’m also a big dough hook fan – my wrists aren’t quite cut out for lots of kneading (they’re good for picking up fistfuls of food and chucking it into my mouth though, no problems there!).
LikeLike
Oh, how cute is your little bread guy up there..So happy! Is there nothing worse than forgetting to salt the dough? Very frustrating!! Wonderful post, Brydie 🙂
LikeLike
Pingback: Good habits, good things (including apple crumble) | Bookworm's Lair
ok, you have convinced me to give it a try. I will leave it till the hols when things are quieter. Will let you know how I get on.
LikeLike
I love you for this, I have been umming and aahing but you have made these seem really straight forward! Thanks Bridie 🙂
LikeLike
You posted this for me right Brydie? Yep., you did I know it. I so gotta get my bread bake on….. I gotta, I gotta, I gotta 🙂
LikeLike
mmmm bread, my favourite! I learned to make it when I was in Newfoundland. But it was a much longer, and larger (10 loaves) recipe. And I since was gifted a bread maker, which makes it less time consuming for me. I might have to give this one a try though, it looks so simple. Thanks!
LikeLike
Pingback: how to make a sourdough starter « Cityhippyfarmgirl
Just popping in to say how much I love this bread – always is golden brown and gorgeous – it is my new go to simple bread recipe – have posted about it on my blog
LikeLike
Pingback: fiesta bread cones « Cityhippyfarmgirl
Pingback: Sesame Chia Bread @ Not Quite Nigella
Lubbly jubbly 🙂
LikeLike
Pingback: Schiacciata con l’uva…can you remember it? | Cityhippyfarmgirl
Pingback: simple, everyday sourdough | Cityhippyfarmgirl
Pingback: the bread that I had to try | cityhippyfarmgirl
Pingback: How to make fancy pants Flower Bread | cityhippyfarmgirl